Street Source is shutting down April 30th, 2026. Read the announcement
W
new project, trial bumper *pics* more to come
NR
night rider
+1y
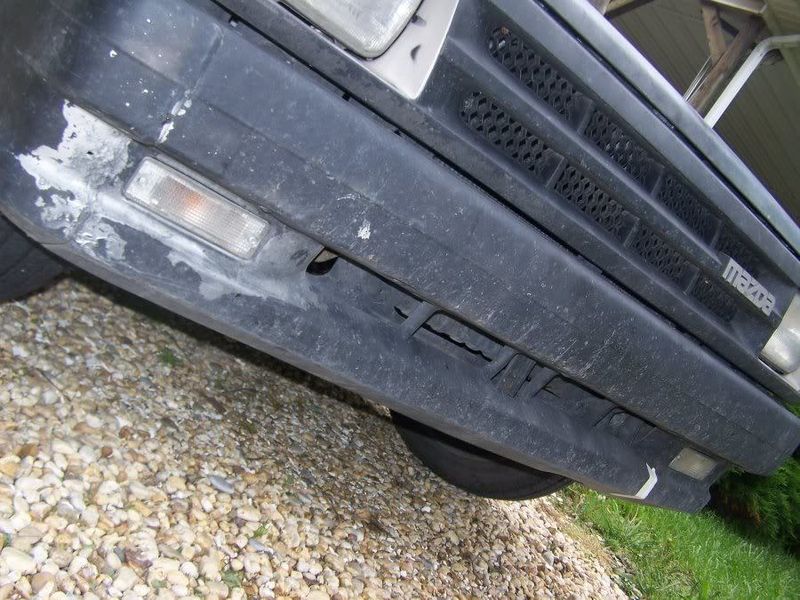
i have been wanting to get a new bumper for the truck. i dont have $400 to get one from grant and i want something different from everyone else, how else to do that? make it. so thats what i am doin, at least attempting. for now.
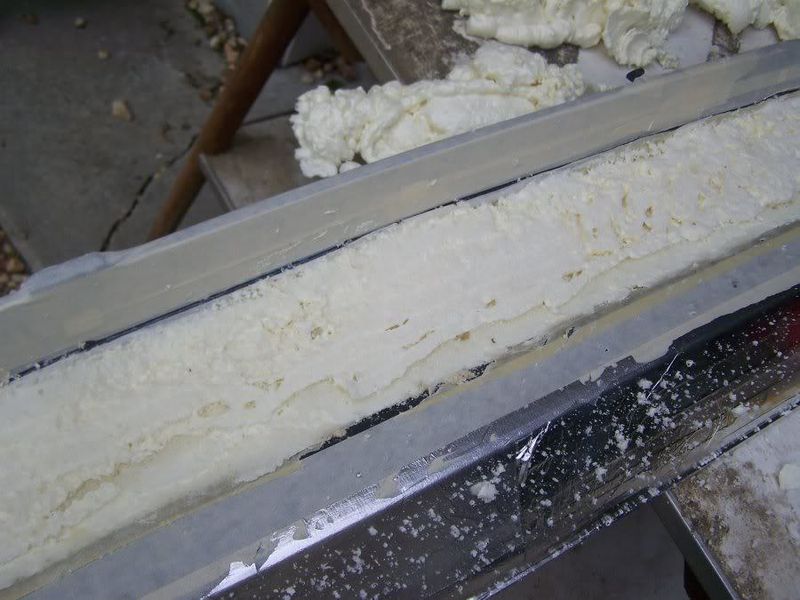
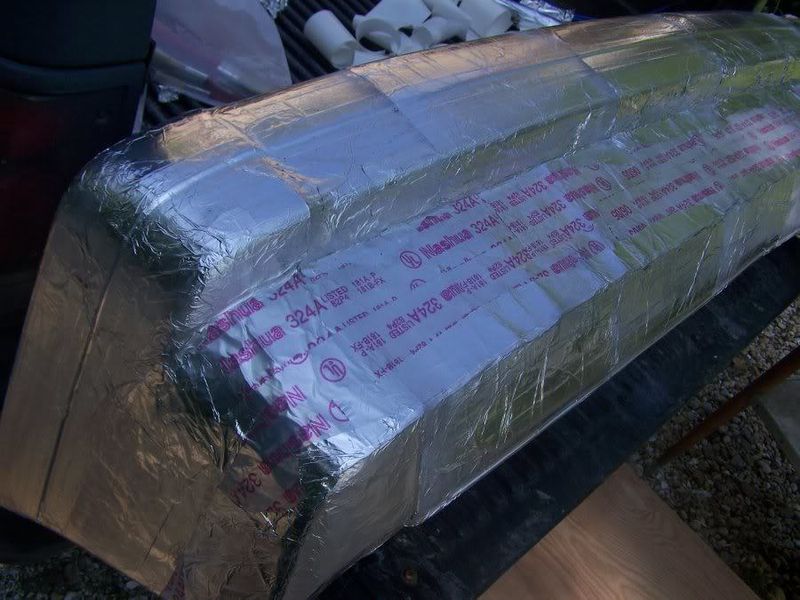
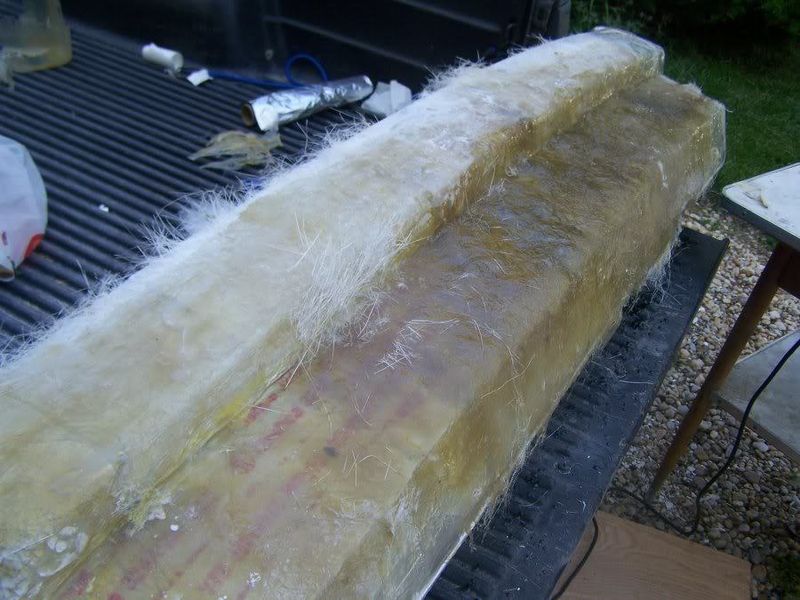
i started out by taking the stock bumper, lower valance and end caps off. and fastening them together. then i used a mess of masking tape to tape the entire piece off. then i used some great stuff spray foam to fill the areas i wanted filled. after it hardened i used a drywall saw to cut off the excess foam to give a semi smooth face. then i started using body filler to make it a solid smooth surface but it took to much and body filler cost to much to use. so i used small layers of drywall mud and gave it a few smooth layers. after they hardened i sanded it down to the desired texture. after that i used a air hose to blow all the dust off. then more masking tape and masked off the entire bumper again. then used some spray on adhesive and laid 2 layers of aluminum foil (so when the fiberglass hardens i can pull it easily off the mold. then next day i went to my buddies to get my fiberglass resin and a mess of chopmat. earlier this morning i started laying the fiberglass. so far i have put about 4 layers of fiberglass on and chopmat.
my plan is to make the mold of the bumper as 1 piece, about 1/4 to 3/8 of an inch thick. after it hardens i plan to pry the mold off. after that i want to lay a few more layers of glass to the inside to firm it up. then i will use the stock supports to hold it up. i may have to weld up some more for support. the stock supports will be fiberglassed it. i will drill a mess of holes then lay them on wet fiberglass then laying a few coats of fiberglass over the holes thus locking it in. the metal bumper will be used under the fiberglass with a layer or 2 of a foam type gasket then riveted in (many many rivets with big washers)... the rivets and washers will be countersunk into the glass and covered over with a few more layers of glass.
after i get the bumper sanded down and formed the way i want i then plan to cut out the lights and add some features to the glass.
ill try to post more pics up as i go.
PICS PICS PICS COMING SOON! i got a few of the early stages just need to upload to photobucket
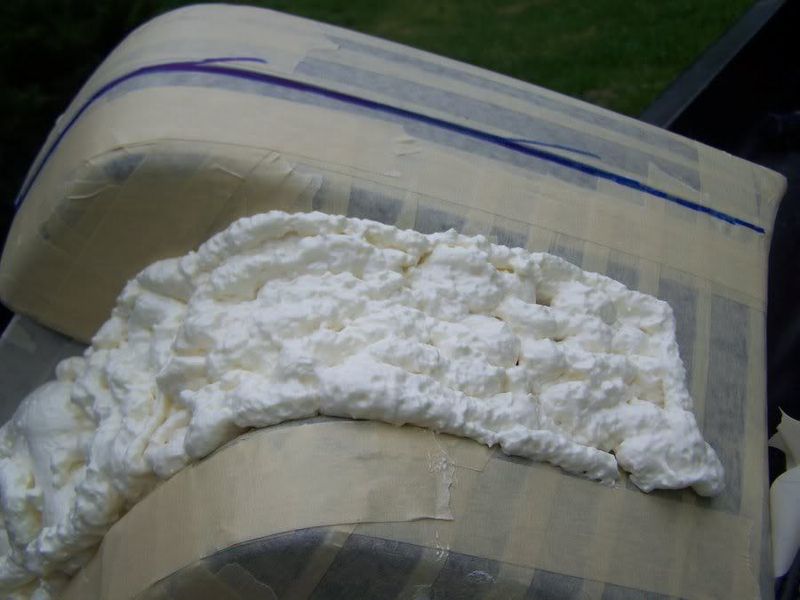
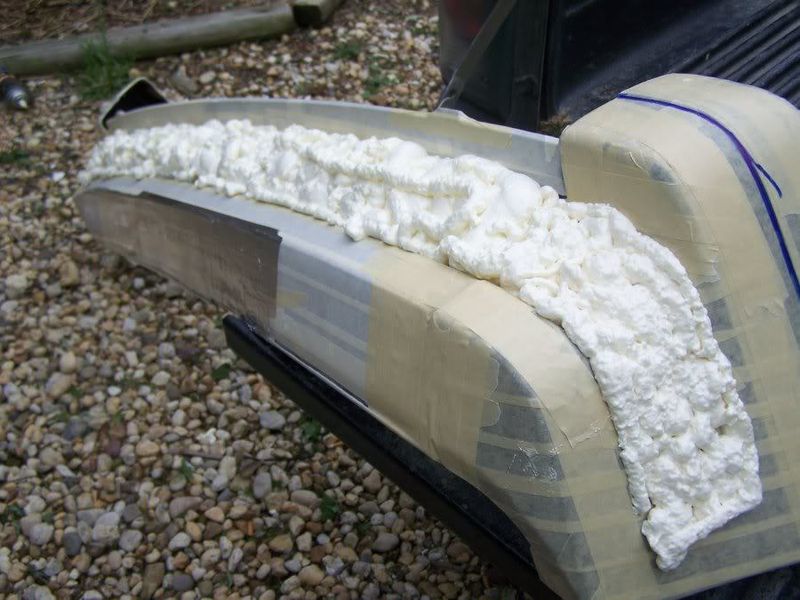
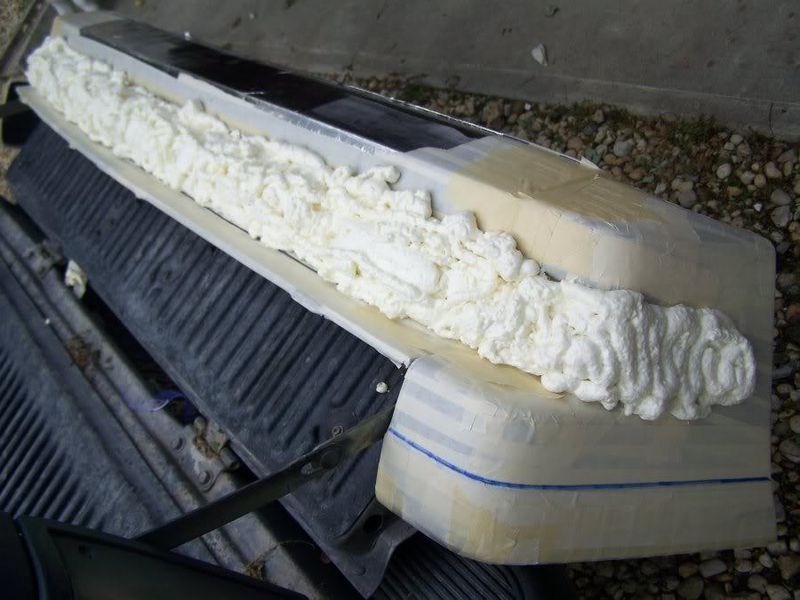

sstone
+1y
Looks like it's gonna be an interesting project. Coming along good though. I love smoothed bumpers.

pimpeasyelil
+1y
seems like a lot of work but it might look really cool. keep it up with the pics.
NR
night rider
+1y
alot of work yes, luckily i had most of the materials. i have to get new pads for my sander.
pimpeasyelil
+1y
cant wait to see how it turns out.
E
E

layedoutb2k (chase)
+1y
should look real cool when you are done. im gettin tired of seein mis-aligned yota bumpers on so many mazdas, itll be cool to see somethin different.
H
harris1
+1y
keep us posted for sure! this looks like its gunna be a good one,
F
frocashmoney24
+1y
sweet project bumper bro! cant wait to see more progress
M
macdave06
+1y
That's just spray foam right?
NR
night rider
+1y
here are 2 i found on my camera i forgot to upload to photobucket. as soon as i can get new disc ill start sanding down a little then get better pics. i still have alot of glass/chop mat to lay
Related Discussions in Mazda Projects
Thread
Posts
Last Post
852

last post by
skrapinsask +1y
150

last post by
cherokeed +1y