watts link setup?

jdauer02
+1y
Edited: 5/12/2009 8:45:20 PM by jdauer02
Edited: 5/12/2009 2:41:31 PM by jdauer02
Edited: 5/12/2009 2:41:31 PM by jdauer02

B
bagdb2200
+1y
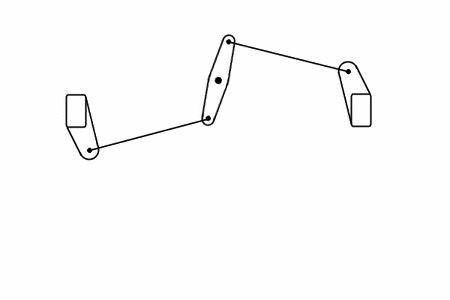
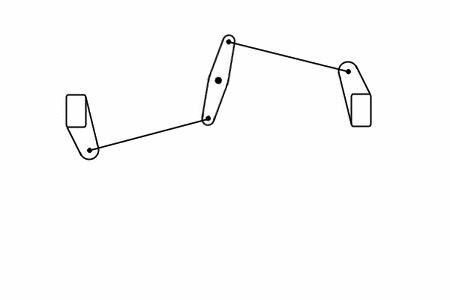
Max,Thanks for the info. As for the pics, when you're making a post, in the header above the text field, click the little icon that has a mountain on it, 4th from the right on top row of icons, then paste the url for the pic in there. Or at the bottom of the text field box there's the Normal, HTML, and Preview. You can select HTML and post pics like you used to on the old SSM forums. Which I had to do it the latter way to get the .gif to show up.


Johnny O
+1y
I was wondering what that graphic was gonna be used for...

trucks&stuff
+1y
sweet that actually helps me out alot! now i know which direction to go to get it set up. thanks
B
BigDumbOx
+1y
there's a really good animation of a watt's linkage at this web addy: http://www.brockeng.com/mechanism/Watt.htm it shows the relationship of all the pivot points to the center line, and you can click on it and stop it at any point in it's travel. not that Max's .gif isn't good, this one's just a little more detailed. Ox

90yota
+1y
that' pretty cool ^^^

thenephilm
+1y
whats the best way to determine the length of the bell crank and bars? Say you have 40" inside to inside of your frame with a bag over axle setup. Travel is going to be limited to about 8 to 10", what would be the best way of measuring everything.

BioMax
+1y
The way that I would do it would be to build something out of cardboard and cycle it to see how your chosen dimensions work. The length of the center bell-crank not need to be that long fo only 10" of travel assuming it was set up right. The connecting bars should be longer than half of the inner frame width so that the bell-crank angles were right. But other than playing with it, I'm not sure what to tell you.
Related Discussions in Ask A Pro
Thread
Posts
Last Post
0
T
last post by
twistedmetal2188 +1y
4
H
last post by
himynameischance +1y


