Street Source is shutting down April 30th, 2026. Read the announcement
6
69 Chevy Build

DeepSouthS10
+1y
---------------------------------------------Originally posted by twisteddraggerI am not sure if stitch weld is the correct term, but it is a method I have kind of come up with over the last ten or so years. It is done with the amperage around 140, and a careful feathering of the trigger to create a nice tig like look. The amperage has to be high enough that you can see definate penetration on each burst. Then you have to learn to control the bursts of wire so an even pattern can be made. I do it for looks more than anything.---------------------------------------------well it looks pretty damn cool! i just got a 69 c10 so i am lookin forward to watchion this build.
9
92zuzuman
+1y
stitch welds are beads a few inches long at spaced intervals rather than welding the entire length of the joint. The truck looks good man. I was thinking about doing an idler eye for the steering like that on my buddys C10. Hows it spin inside that heim?
T
twisteddragger
+1y
The intermediate shaft is exactly 3/4 of an inch on the wide sides. It fits perfectly in the 3/4" heim. The inner piece of the heim turns with the shaft. It works really nicely sitting on stands, I havent driven it yet. I am also gonna replace the upper u-joint with one to match the lower one, since the stock one squirts out grease at the angle it is at now. I got he U-joint at speedway motors, or something like that.
X
xgolferdude
+1y
very clean work!
T
twisteddragger
+1y
Thanks. So, I didn't get it on the ground. I ran out of gas and it was in the 20's here yesterday. Hopefully I will get a few more free hours this week and make some more progress.
T
twisteddragger
+1y
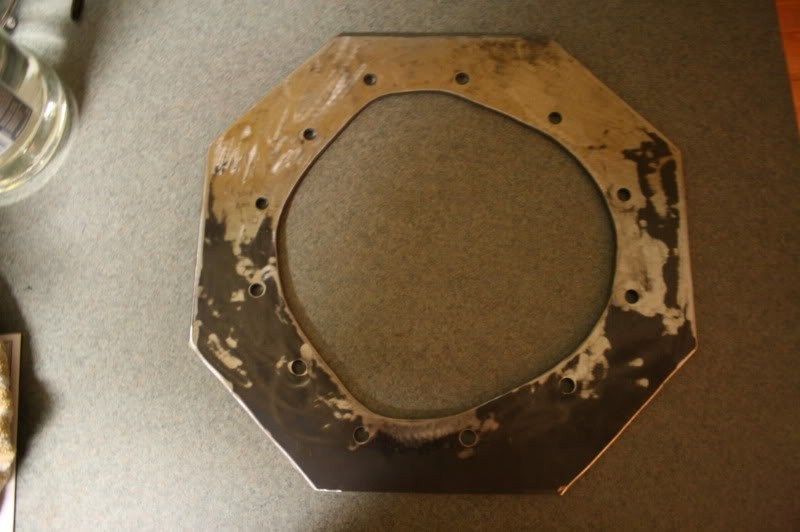
Been really busy at work, so progress has been slow again. This is my latest update. Cutting this thing out sucked, I should have just spent the cash for laser cutting. This will eventually be the bracket for the wishbone to mount to the diff.


pmiller
+1y
Edited: 2/3/2010 7:02:07 PM by pmiller
---------------------------------------------Originally posted by twisteddraggerThanks, I will try to take more pictures as I make more progress. I can't decide if it will be worth it to make the backhalf into an airtank. It will look clean but I don't know what to do about draining out condensation. Any one ever have good luck with doing this?---------------------------------------------
You should only need to drill and tap for a drain cock. You may need to weld bungs for them, depending on how thick your rails are. I'd probably do the bungs. I'd do it on the lowest point. Since there is probably two lowest points, one on each side near the cab where it meets your other rails. Some 18 wheelers have drain cocks that have pull cords attatched to them. Those would probably work the best for the location of where they'd be.
T
twisteddragger
+1y
Yeah, I thought about that, but finally decided to modify the stock gas tank so I will have plenty of room for air tanks. I will not be using the frame as an air tank since the lowest point will be on the ground. Thanks for the advice though.
T
twisteddragger
+1y
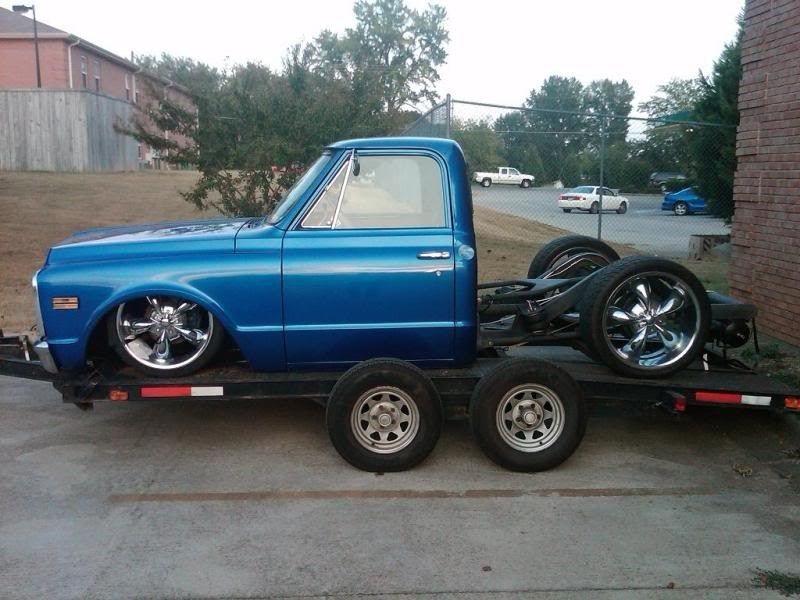
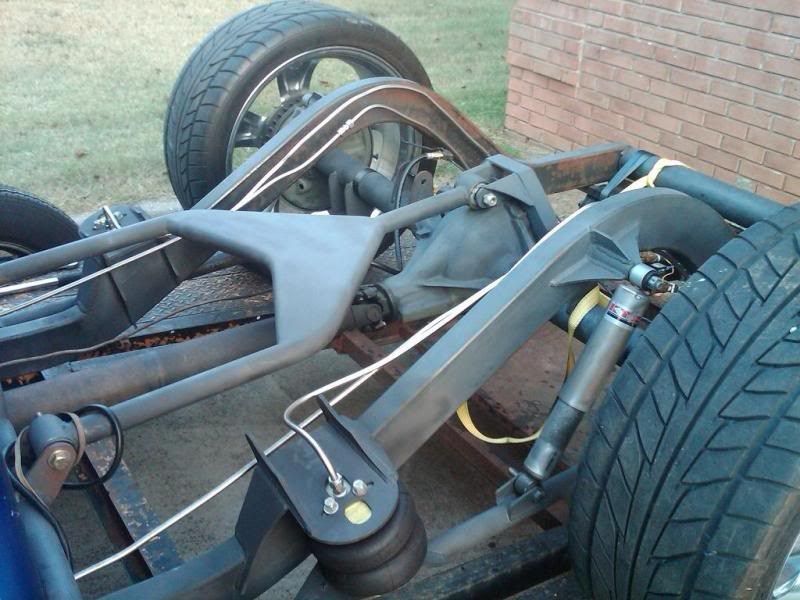
So I am finally out of the military and found a job in another state. I had to get really motivated on this thing to get it moved out with me. A few days of hard work and it is a lot closer to being done. It took forever but is coming out nice, so it has been well worth the wait. Let me know what you all think!!


T
twisteddragger
+1y
And no the stainless lines are not permanent, I reused the old ones bent for the old backhalf and manhandled them into shape for the move. The airtank is temp too.
Related Discussions in Build-Ups
Thread
Posts
Last Post
32

last post by
baha 4 mo
0
V
last post by
Vic 9 mo
168

last post by
truck action +1y
