
My 1989 Red Regular Cab Truck

axel breaker earl
+1y
Thanks Guys!
I'm glad you enjoy the threads, I enjoy sharing my experiences when working on these motors & trucks.
Heading out to the garage for more fun right now!
Got it all disassembled and ready for it's required 200,000 mile Super Bath!!
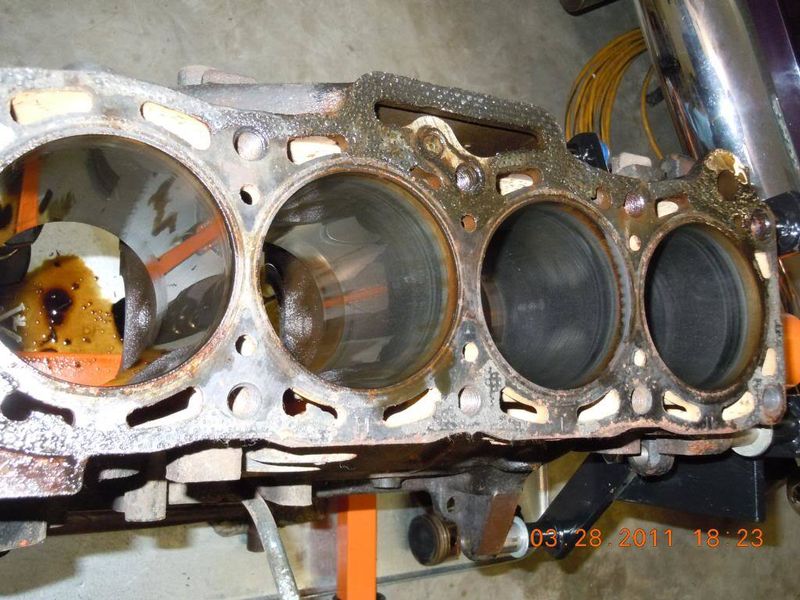
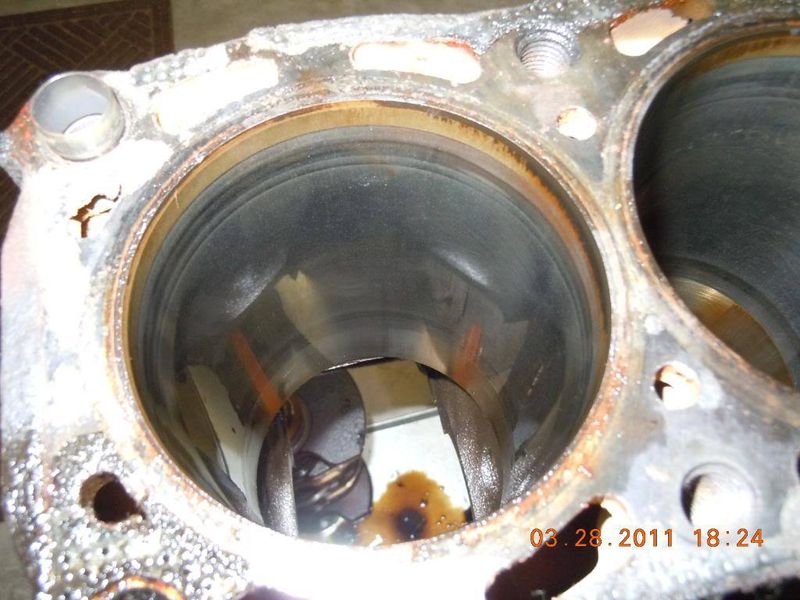
So far, so good! I have measured the #1 cylinder, piston, and big end of the rod.
It is a standard bore motor and hasn't been bored or decked.....and the piston to bore clearance is .003" (piston is 3.383" and bore is 3.386" at the middle & top).
The #1 rod journal on the crank is 2.006" and the big end of the rod is 2.009" so it also has a .003" oil clearance as measured.
Not bad at all......this motor is definitely tighter than the last motor I did a "Quickie Rebuild" on back in 2007 and it is still going strong and burning NO oil!!
I know this because I sold it to a very good friend, and he would let me know for sure!:mecker:
Here's a few more pics.....
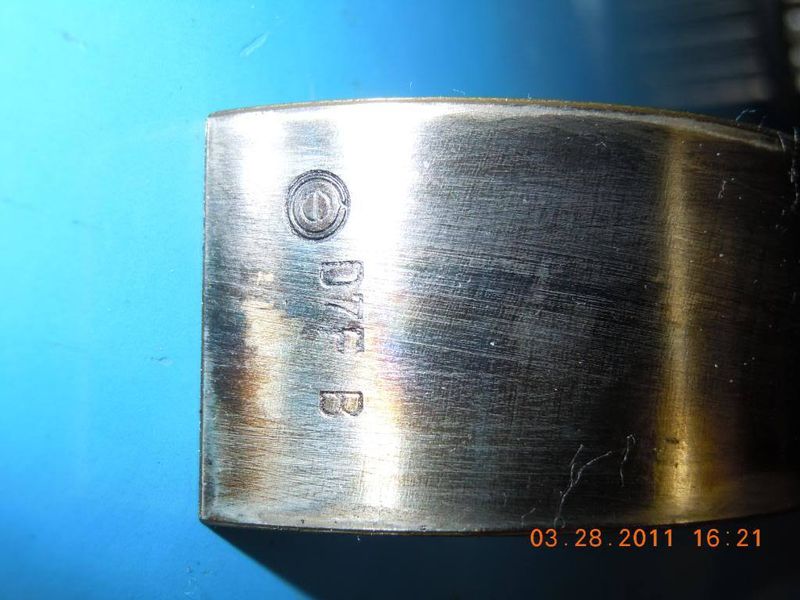
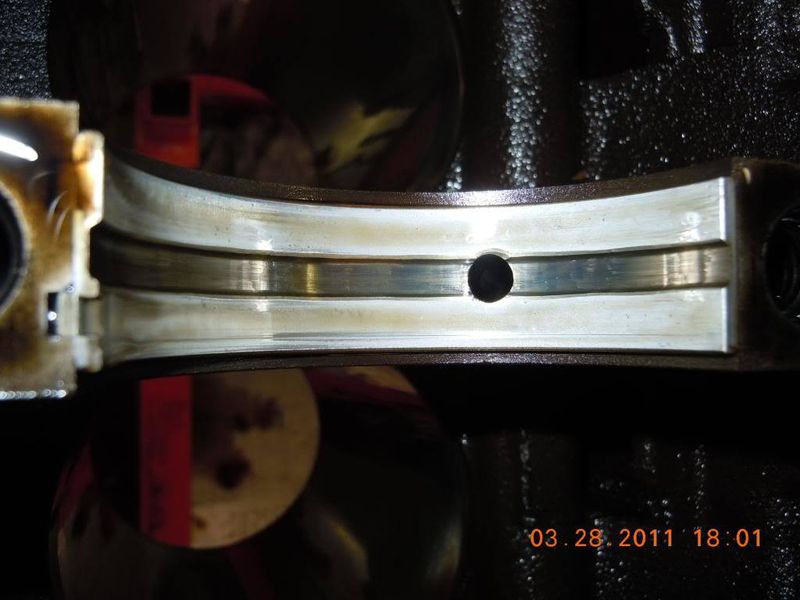
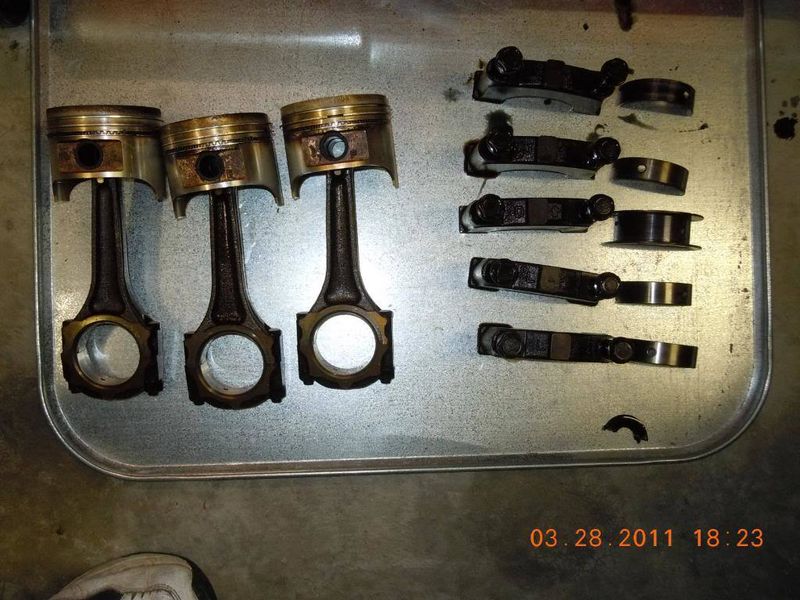
The stamp on the back of the rod bearings.
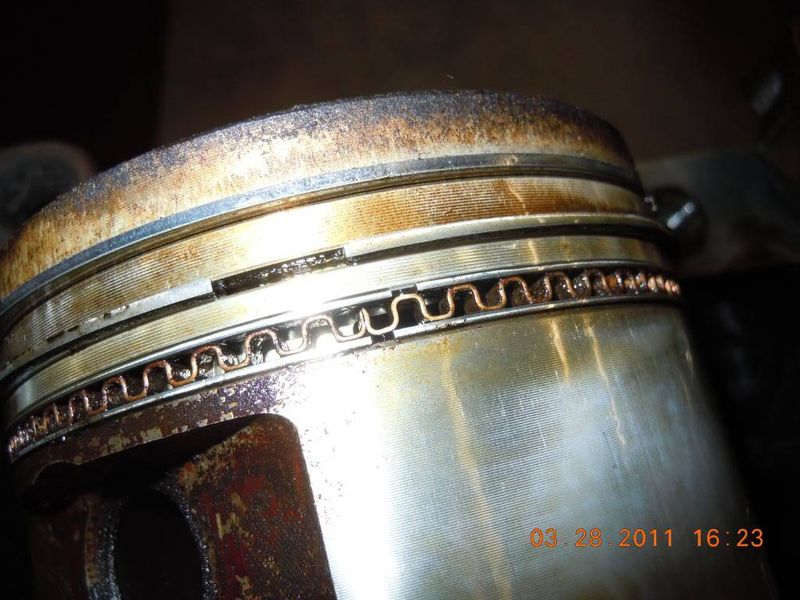
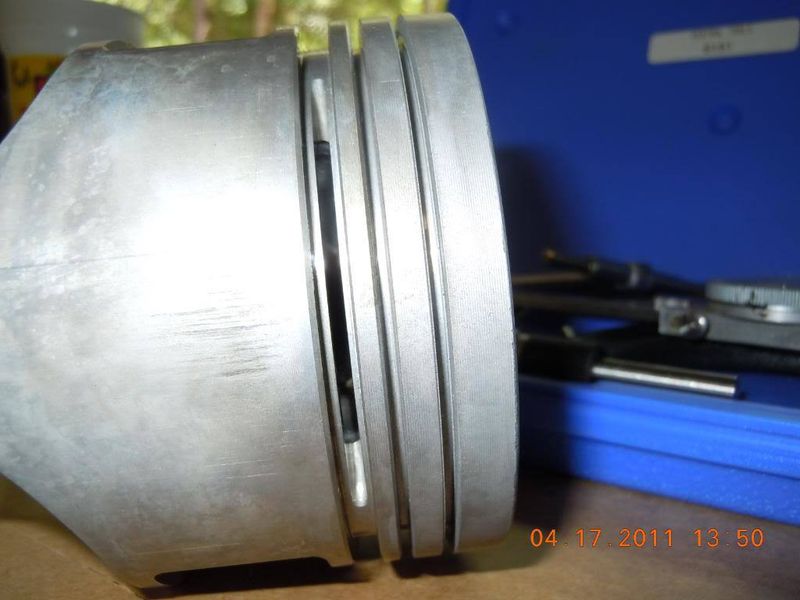
Check out the #2 piston's upper & lower oil ring rails......the end gaps are above each other and not staggered as they should be. I guess after all the hot/cold cycles and the 200,000 + miles they will move a bit!
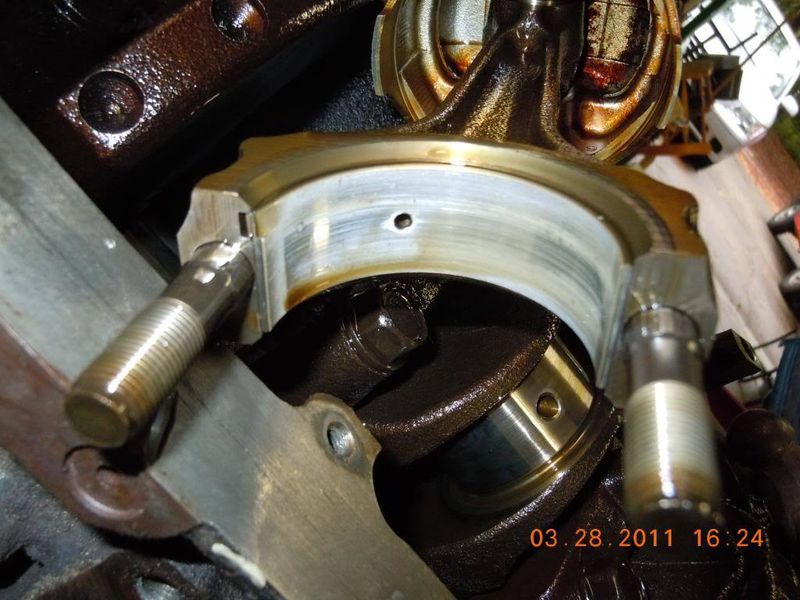
Bearings look decent.
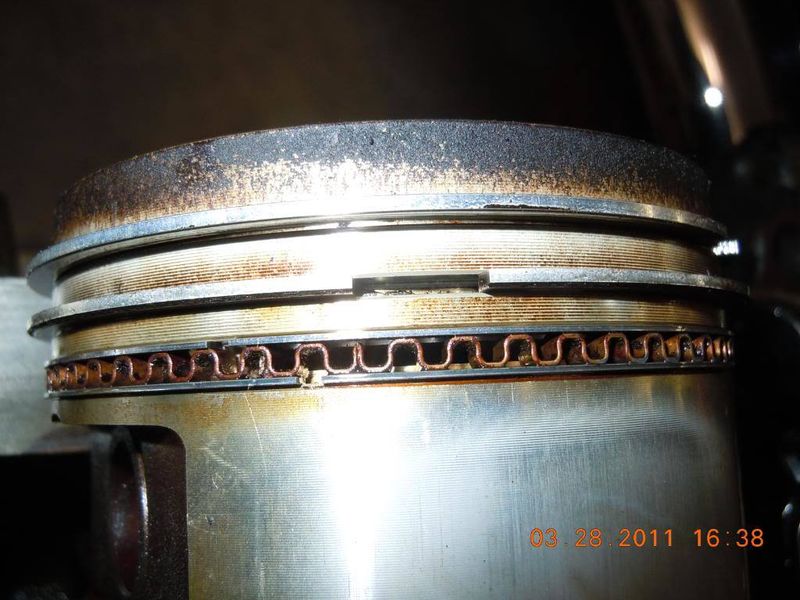
#3 piston was the same way on the oil ring rails.......this could be the reason it smoked a tad when revving the engine. Also, the complete oil ring assembly was hard to move/rotate probably because of the crud building in the expander portion of it. The oil ring rails were not protruding past the exterior surface of the piston either, therefore I wouldn't think they were doing a very good job of controlling the oil past them. New rings will do a better job as well as a good groove cleansing.
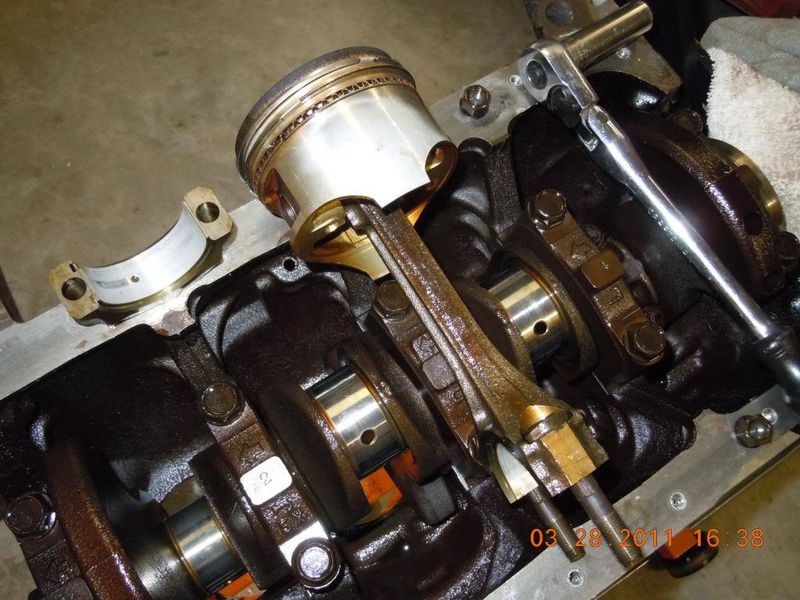
#4 piston.
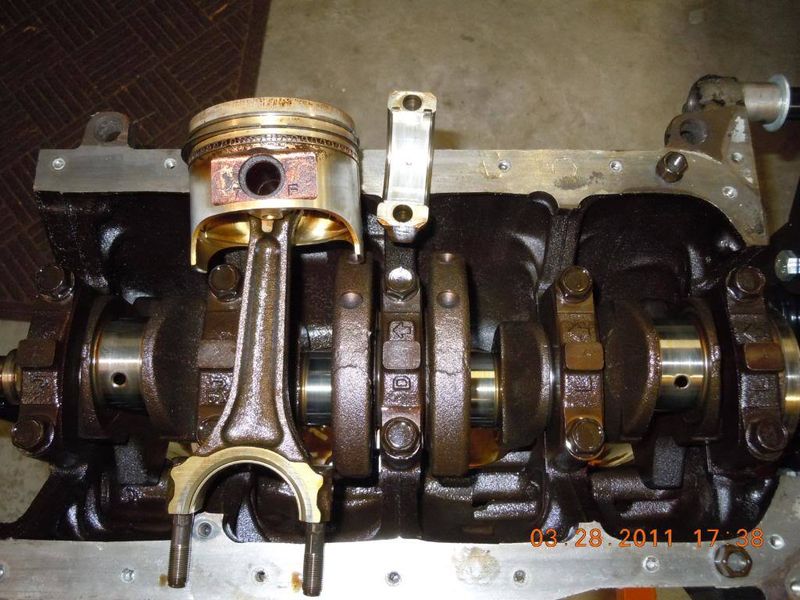
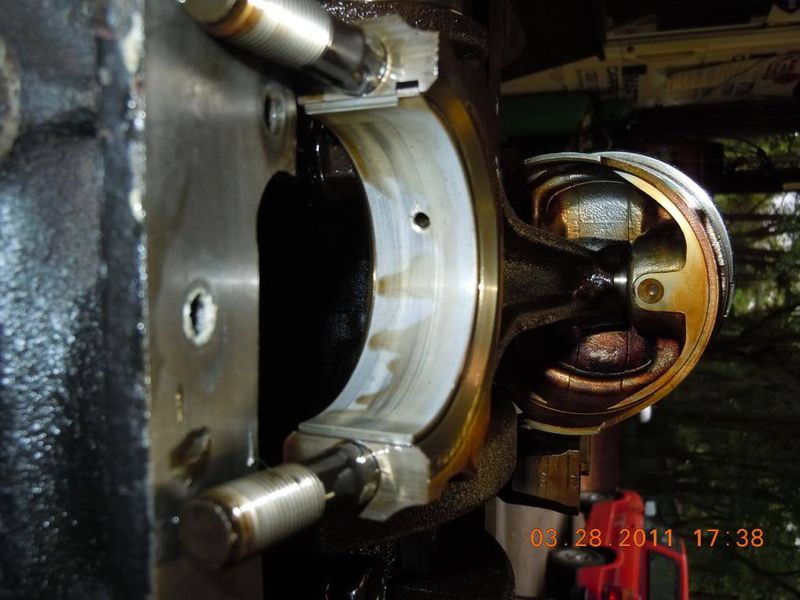
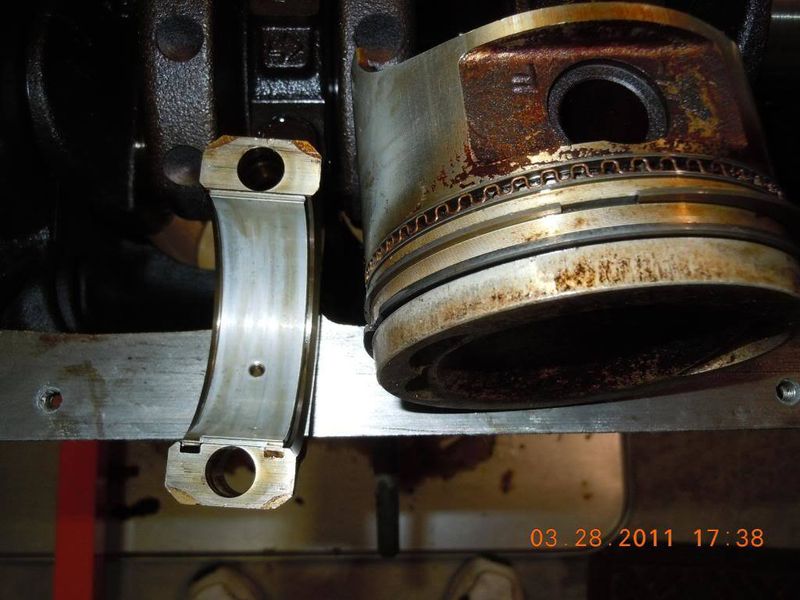
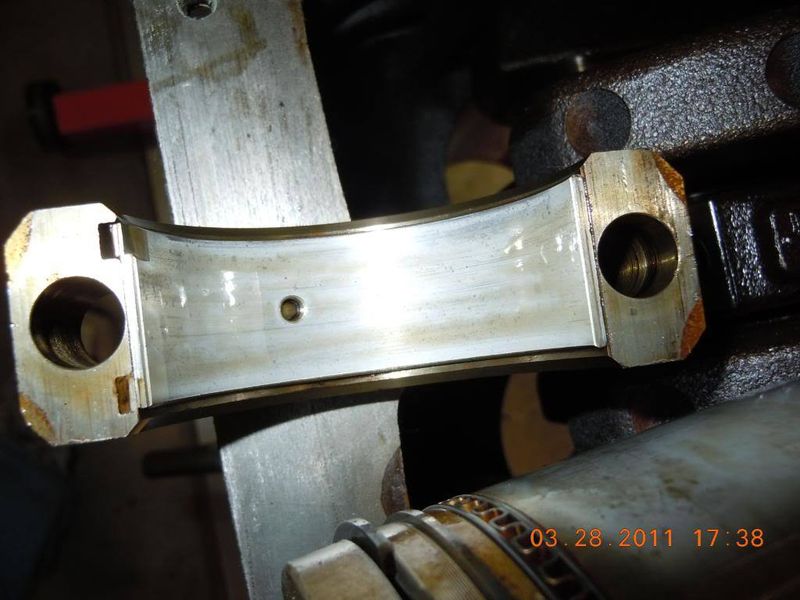
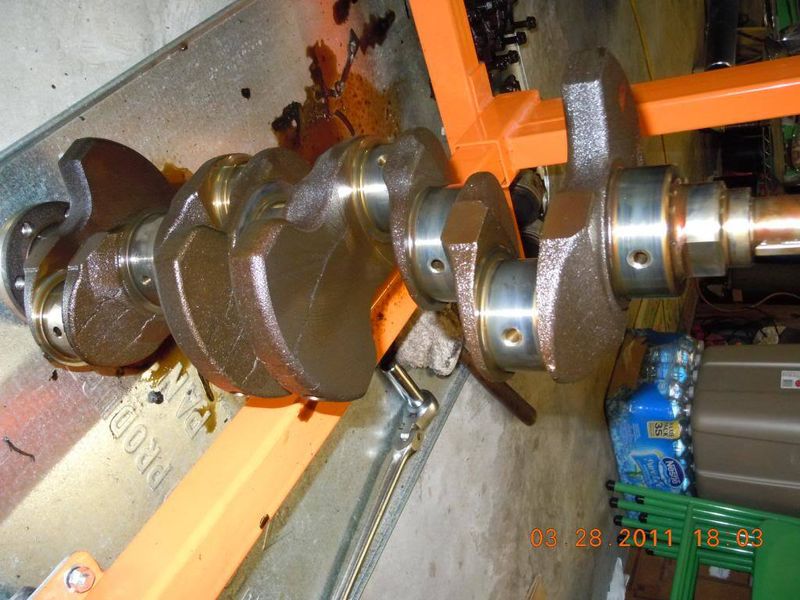
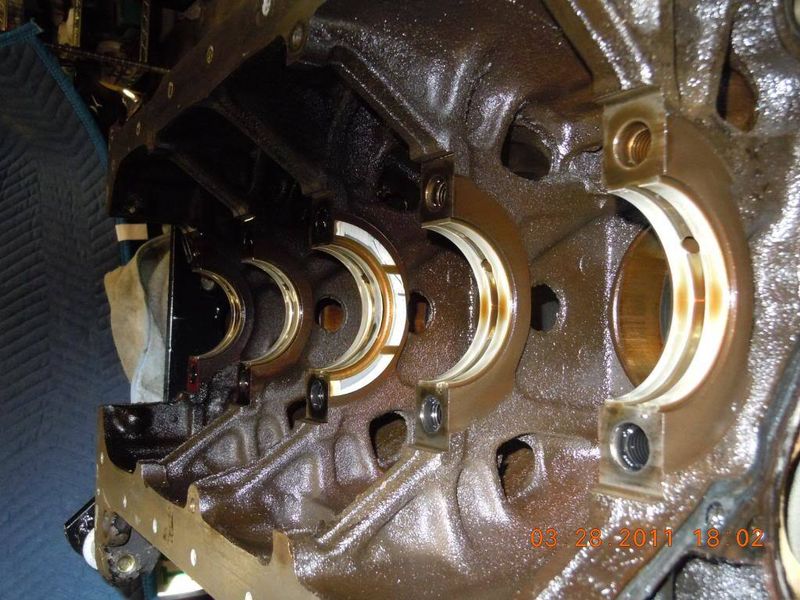
Main journals are looking great as well......I need to measure the other 3 pistons and the crank & mains tomorrow.
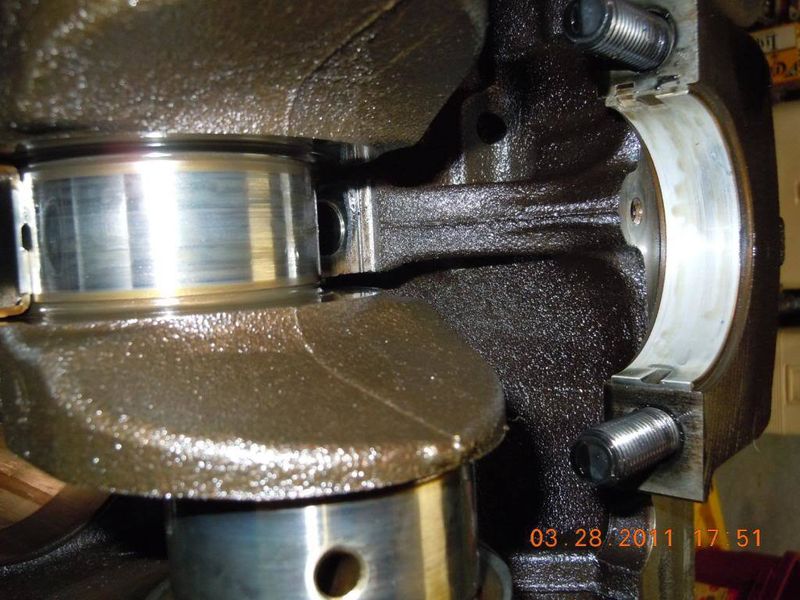
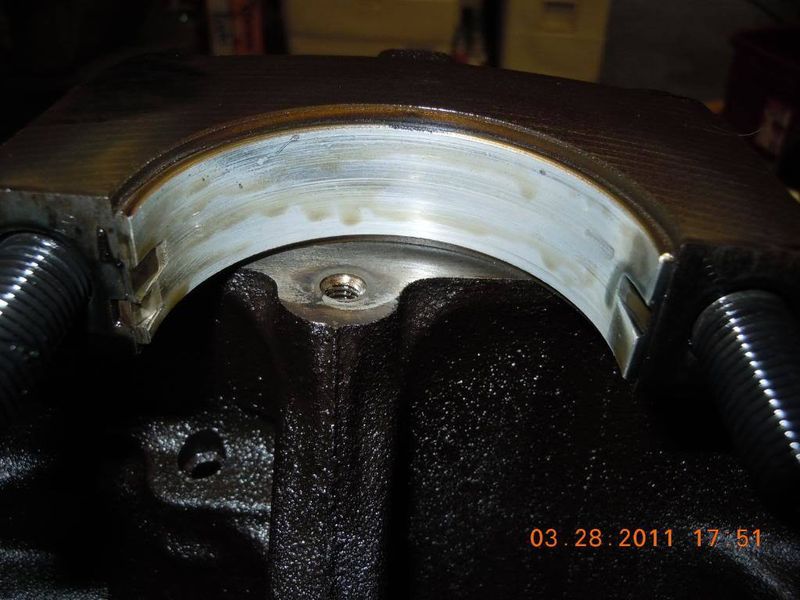
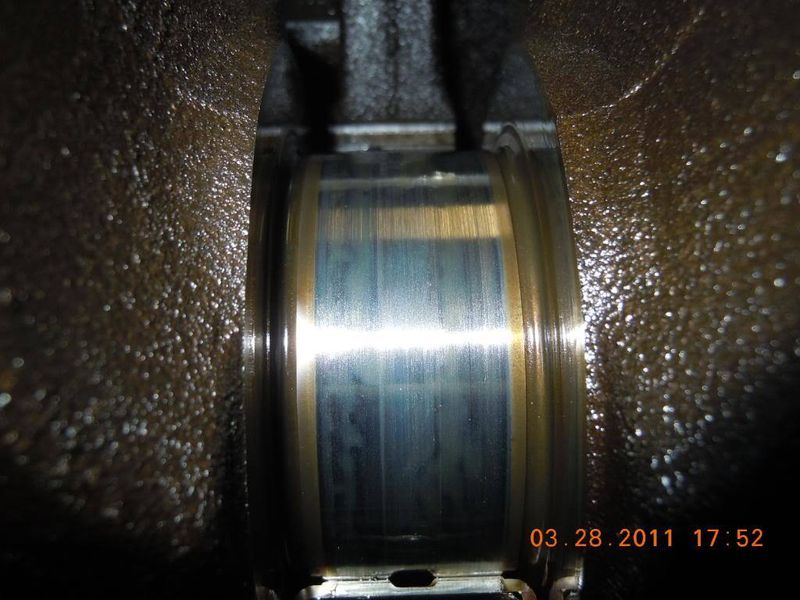
Crank OUT!
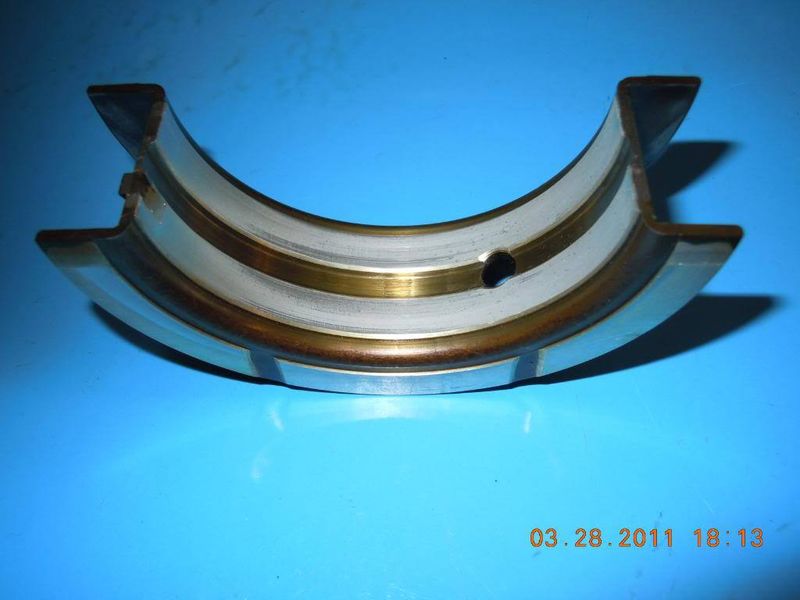
Thrust bearing.
Misc. pics.
I'm glad you enjoy the threads, I enjoy sharing my experiences when working on these motors & trucks.
Heading out to the garage for more fun right now!
Got it all disassembled and ready for it's required 200,000 mile Super Bath!!
So far, so good! I have measured the #1 cylinder, piston, and big end of the rod.
It is a standard bore motor and hasn't been bored or decked.....and the piston to bore clearance is .003" (piston is 3.383" and bore is 3.386" at the middle & top).
The #1 rod journal on the crank is 2.006" and the big end of the rod is 2.009" so it also has a .003" oil clearance as measured.
Not bad at all......this motor is definitely tighter than the last motor I did a "Quickie Rebuild" on back in 2007 and it is still going strong and burning NO oil!!
I know this because I sold it to a very good friend, and he would let me know for sure!:mecker:
Here's a few more pics.....
The stamp on the back of the rod bearings.

Check out the #2 piston's upper & lower oil ring rails......the end gaps are above each other and not staggered as they should be. I guess after all the hot/cold cycles and the 200,000 + miles they will move a bit!

Bearings look decent.

#3 piston was the same way on the oil ring rails.......this could be the reason it smoked a tad when revving the engine. Also, the complete oil ring assembly was hard to move/rotate probably because of the crud building in the expander portion of it. The oil ring rails were not protruding past the exterior surface of the piston either, therefore I wouldn't think they were doing a very good job of controlling the oil past them. New rings will do a better job as well as a good groove cleansing.


#4 piston.


Main journals are looking great as well......I need to measure the other 3 pistons and the crank & mains tomorrow.


Crank OUT!


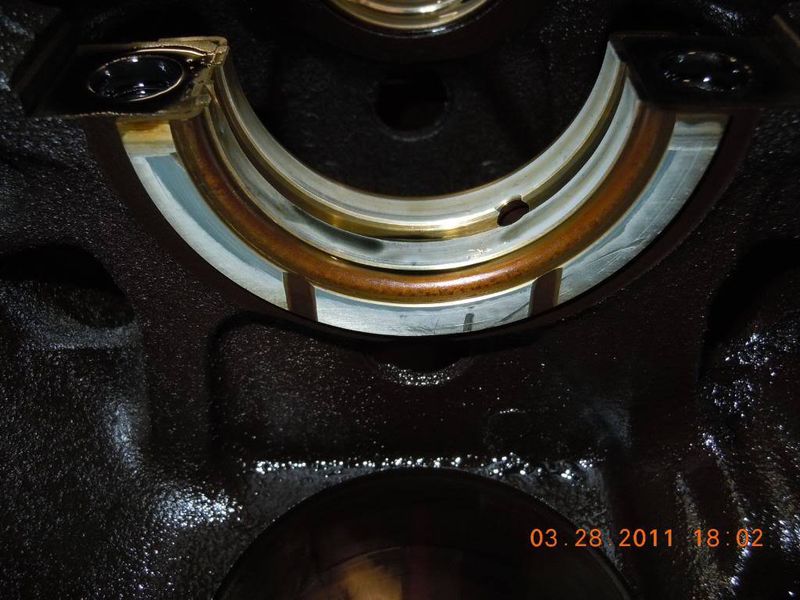
Thrust bearing.


Misc. pics.


axel breaker earl
+1y
Well, I have a blue motor now!
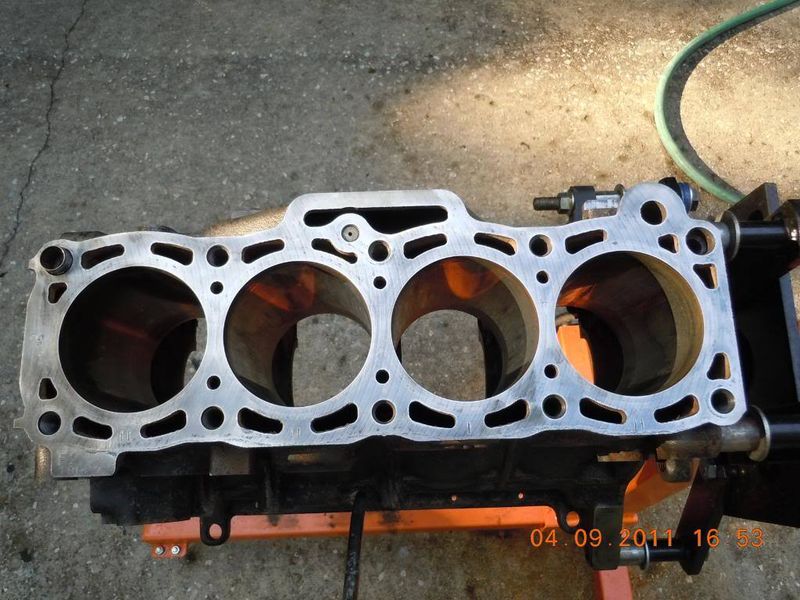
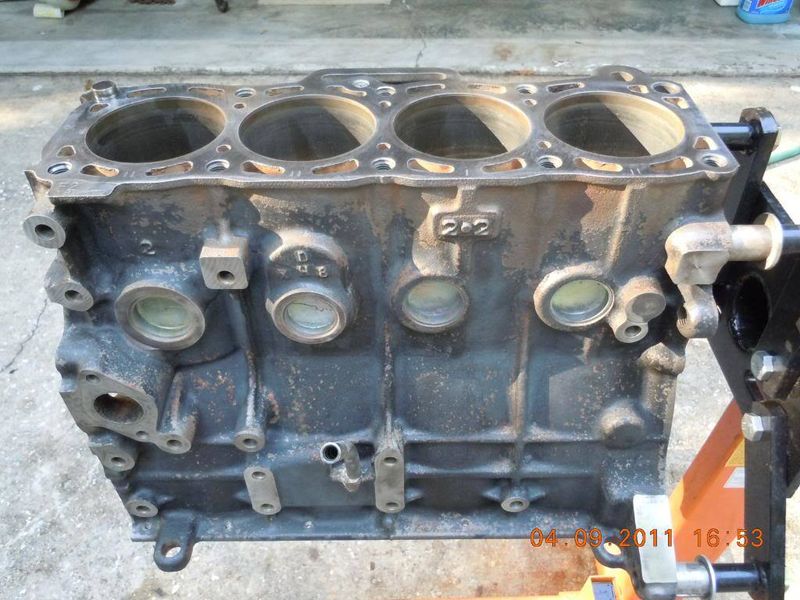
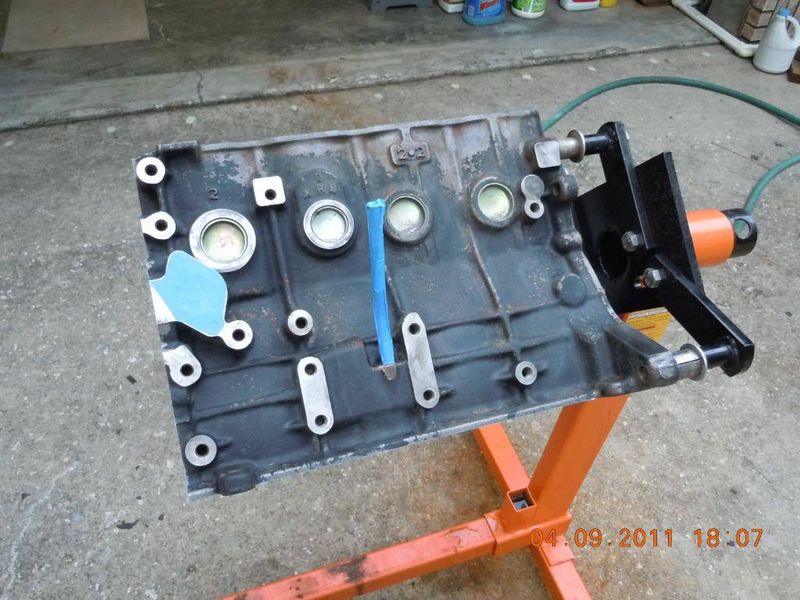
I got outside this morning and washed down the block inside & out with mineral spirits, rodding out all the oil passages I could get to while flushing them with mineral spirits as well. Then I washed it all down, then cleaned it again with Simple Green, rodding out the passages with brass and then nylon brushes that I would install into my 18v DeWalt drill.....did all the bolt holes like this as well.
An all day affair, but it's squeaky clean now. I didn't remove any freeze plugs, they all looked good.....I did remove the one screw-in oil galley plug on the side of the block and used a pipe cleaner to get into that oil galley the best I could.
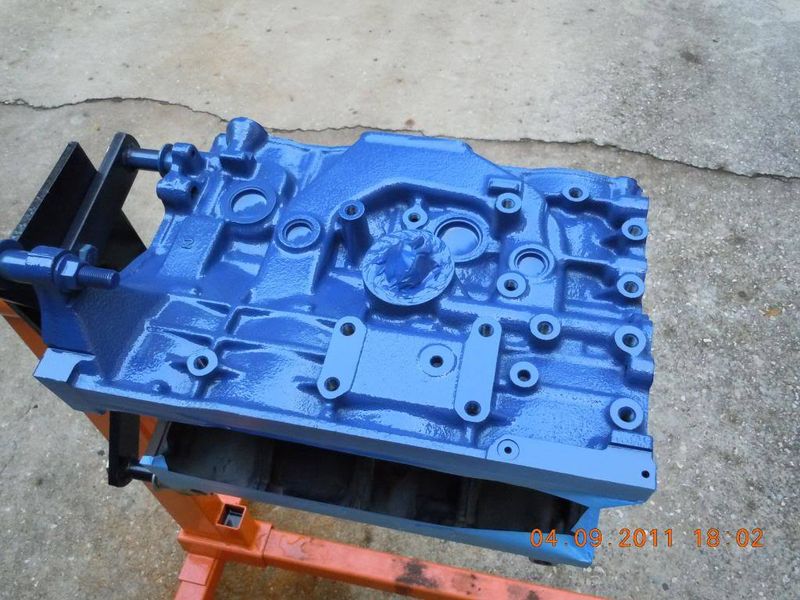
The engine really wasn't too dirty at all, but now it's really clean. Then I painted her with the left over Blue paint from R90's motor a couple of months ago! :rollinglaugh: I promise not to duplicate the red that he used on several of the accessories and the oil pan. I'm going to leave all the aluminum a natural color so it will look Blue & Silver.
Here's a few pics of it.
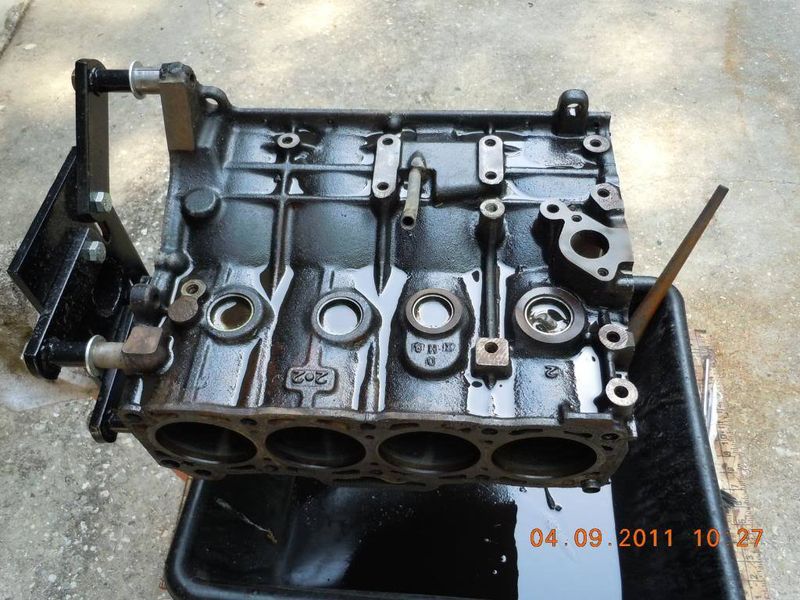
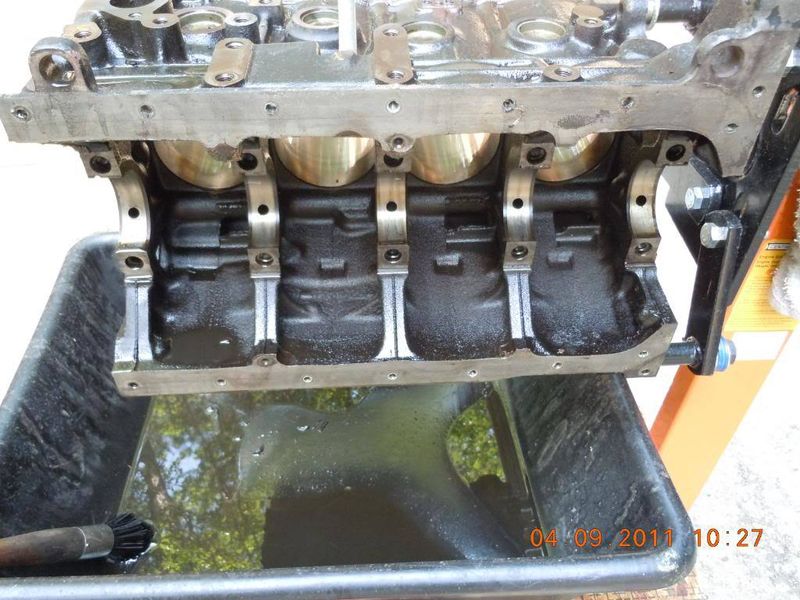
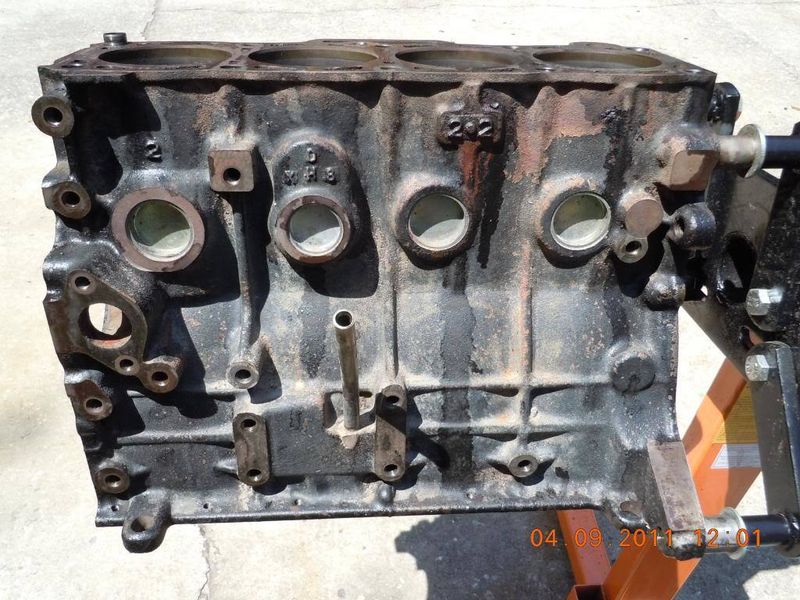
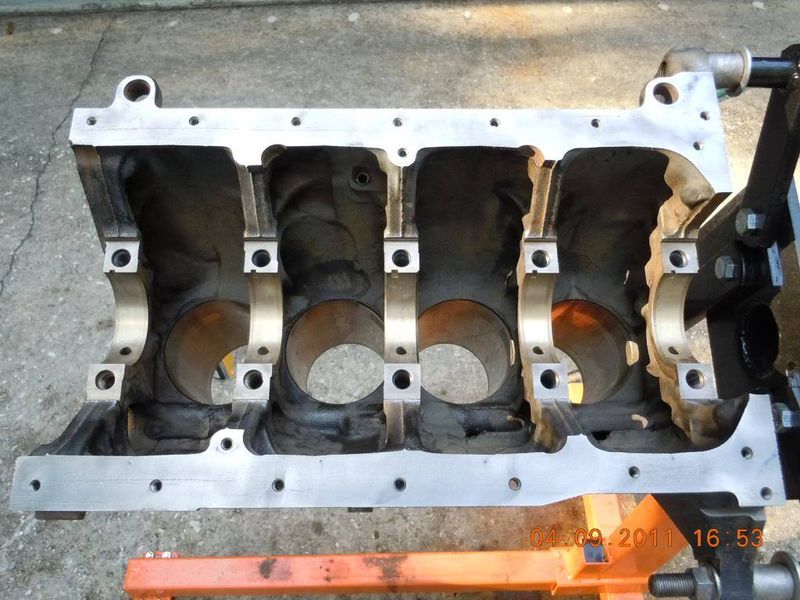
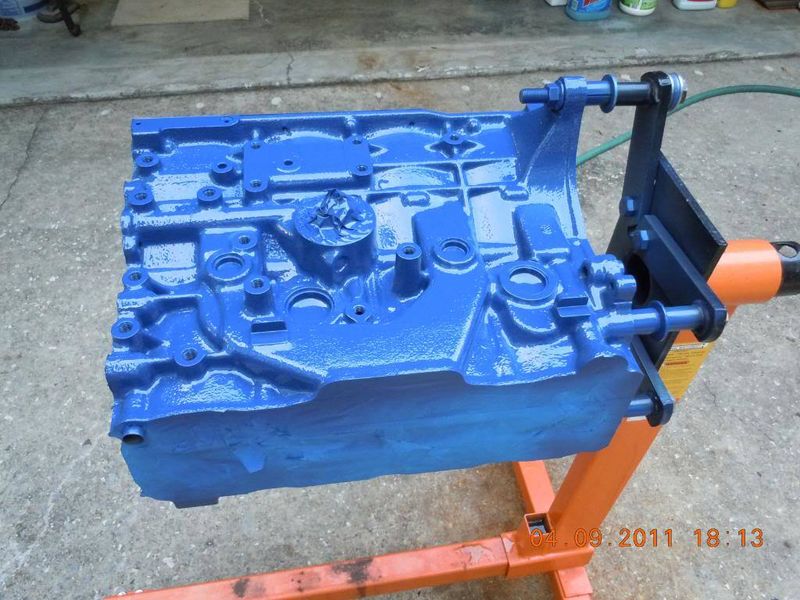
In the garage for the night.
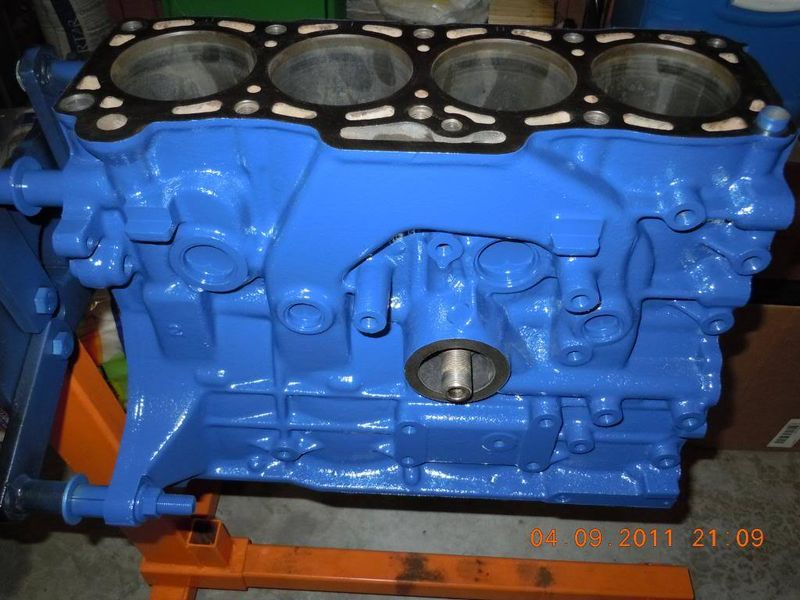
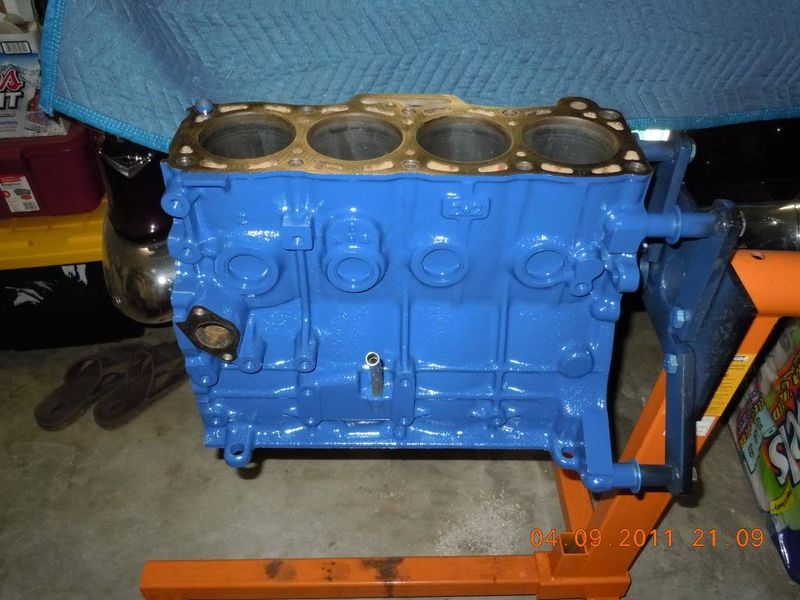
I'll clean the crank in the morning, and get it installed tomorrow, then start cleaning the pistons.
I have bearings, rings, oil pump, gaskets, and a reman. head so far.....gonna get a new water pump and timing belt also, and of course all the new tune up parts. Also going to put a Weber & header on her as well.
It's coming along!
I got outside this morning and washed down the block inside & out with mineral spirits, rodding out all the oil passages I could get to while flushing them with mineral spirits as well. Then I washed it all down, then cleaned it again with Simple Green, rodding out the passages with brass and then nylon brushes that I would install into my 18v DeWalt drill.....did all the bolt holes like this as well.
An all day affair, but it's squeaky clean now. I didn't remove any freeze plugs, they all looked good.....I did remove the one screw-in oil galley plug on the side of the block and used a pipe cleaner to get into that oil galley the best I could.
The engine really wasn't too dirty at all, but now it's really clean. Then I painted her with the left over Blue paint from R90's motor a couple of months ago! :rollinglaugh: I promise not to duplicate the red that he used on several of the accessories and the oil pan. I'm going to leave all the aluminum a natural color so it will look Blue & Silver.
Here's a few pics of it.


In the garage for the night.


I'll clean the crank in the morning, and get it installed tomorrow, then start cleaning the pistons.
I have bearings, rings, oil pump, gaskets, and a reman. head so far.....gonna get a new water pump and timing belt also, and of course all the new tune up parts. Also going to put a Weber & header on her as well.
It's coming along!

axel breaker earl
+1y
On these Mazda motors I just paint them if they still have the original paint on them. It usually wears off in certain areas but it seems like the engine paint is a lot better than it used to be back in the eighties or so. I know my 2.2 I painted back in 2007 still looks great.....I just used Black on it though. I usually keep the engine cleaned off pretty good......I want to know where any oil leaks are coming from so it's easier & quicker to spot if they are clean.
Thanks!
Thanks!

axel breaker earl
+1y
Thanks everyone!
I didn't get too far today...: had to be a responsible business owner and get my books in order for doing the taxes this coming week......:fork:
I was able to get 3 of the 5 main caps and bolts all cleaned up and that's it.
Sorry indeed.....I also had to do the grilling this evening......I thought the wife was gonna do it! I told her "If I have to grill then you have to finish cleaning the main caps on the engine for the little red truck!" Somehow I lost that battle........wait until she wants to ride in it! I'll show her!
I haven't even cleaned the crank yet.
I did decide to lightly hone the cylinders also, so I will need to do that before the crank install this week.....I only have one pic I think today! :no:
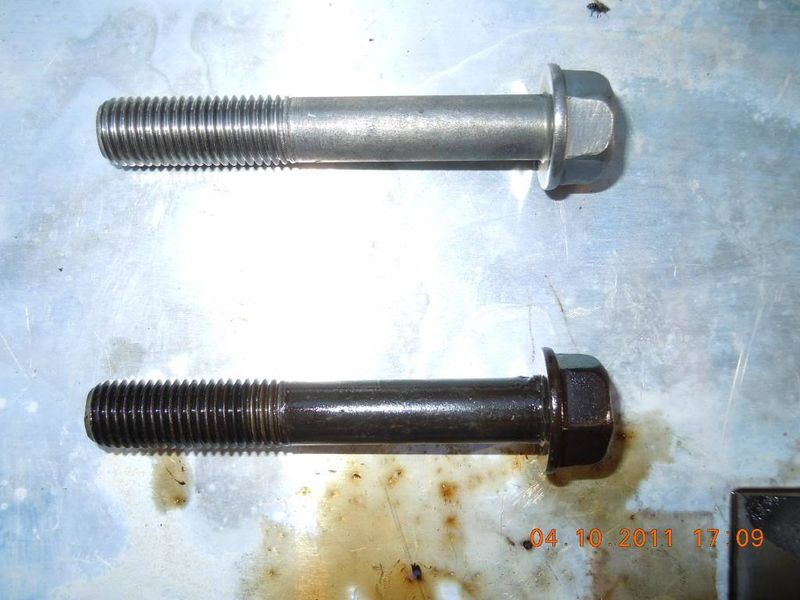
You think I'm getting the main cap bolts clean enough?
I'm washing everything with mineral spirits first, rinsing with water, then cleaning it with Simple Green, rinsing again, then blowing dry with compressed air. During the cleaning process I'm using a brass bristle brush, and then a nylon tooth brush......works good, just takes a lot of time, but I have fun doing this I guess.


axel breaker earl
+1y
I finally got the last couple of main caps and bolts cleaned a ready for dropping in the crank.......I still gotta clean the crank though. I've been having to do too many other things here lately.....darn it!

axel breaker earl
+1y
I got the crank in today......here's the photo's.
First I lightly honed the cylinders with a 220 grit cylinder hone.
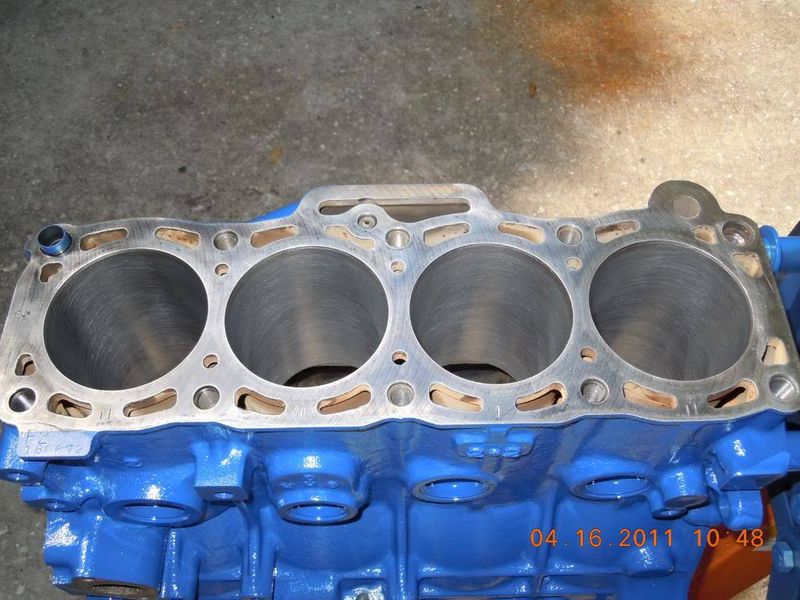
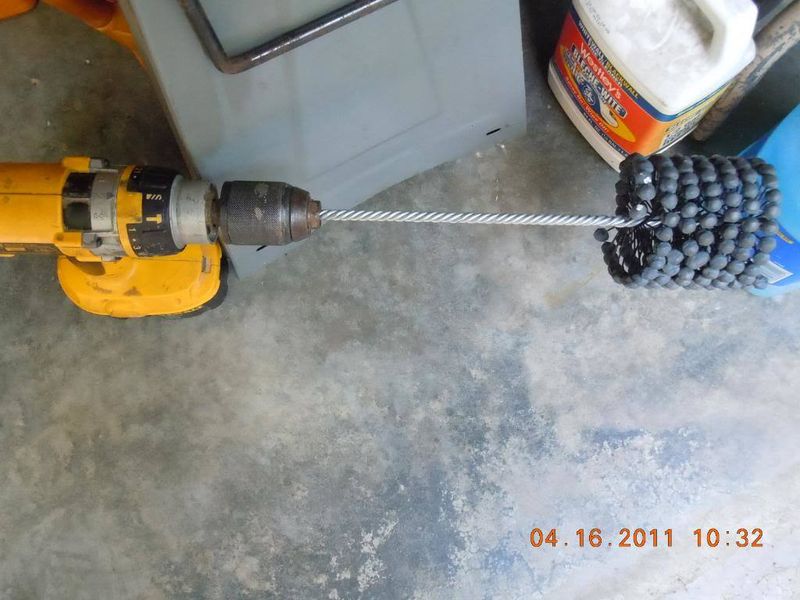
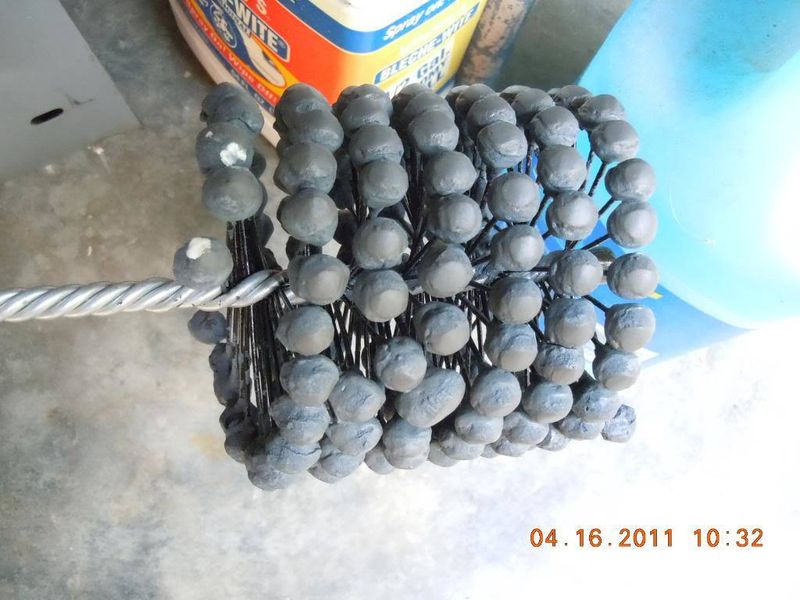
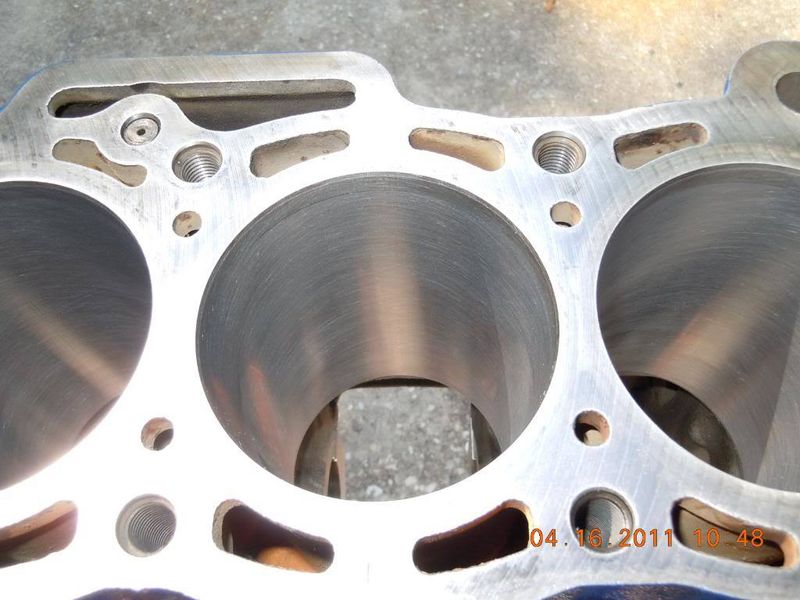
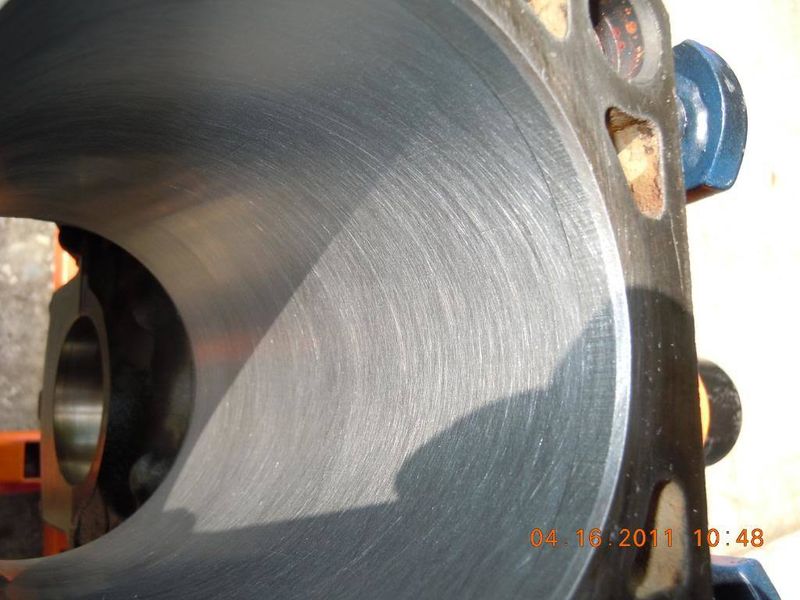
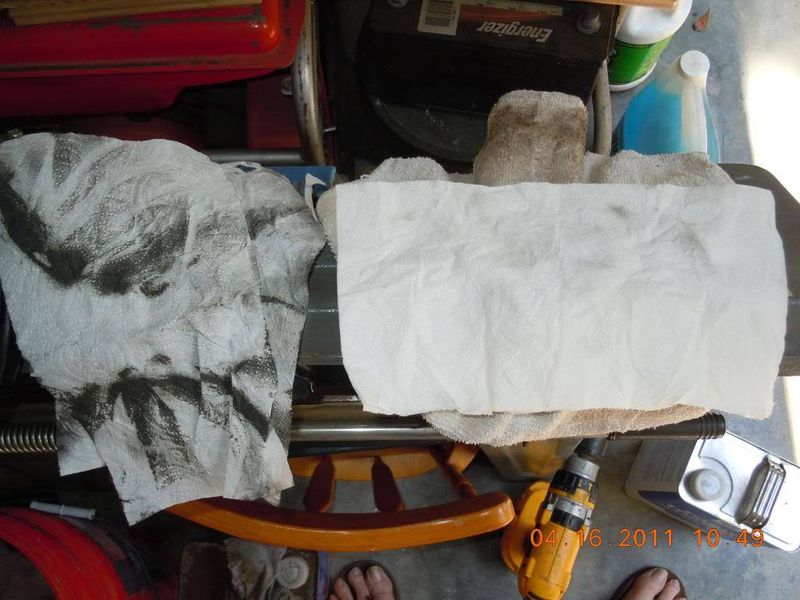
You can see what is left in the cylinders after honing them.....the paper towel on the left is one of the first towels and the one on the right is after I swabbed the cylinders down with a mineral spirits soaked paper towel and dried them. I use the paper towels because you have to wipe the cylinders down a lot and keep using a clean towel to do it so you can tell when your not getting any more filings/hone material. You'd waste a lot of cloth towels doing this!
Putting all the main bearings and caps in and then torqued to spec. so I could measure the diameter of the journal "hole".
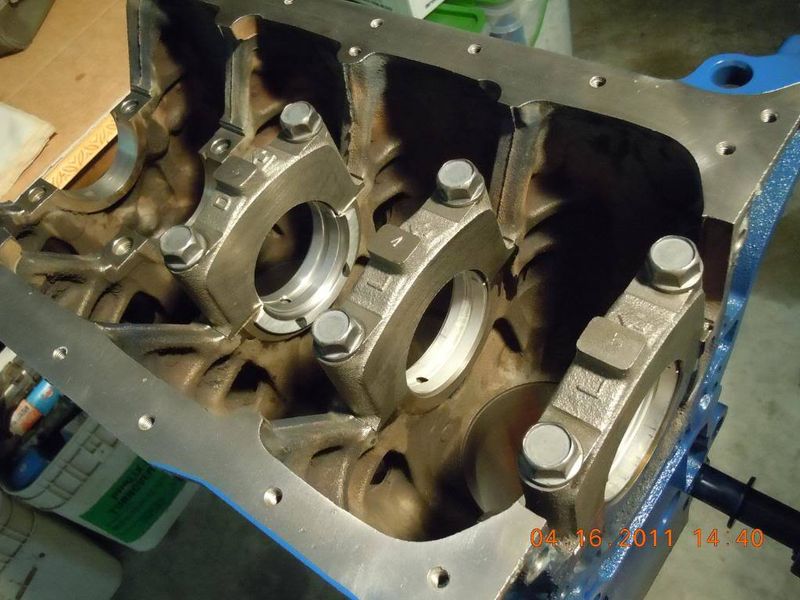
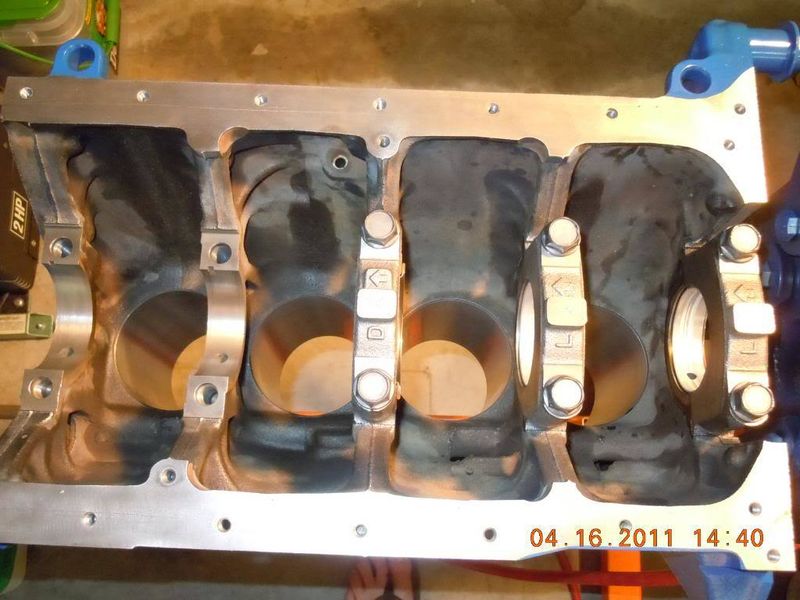
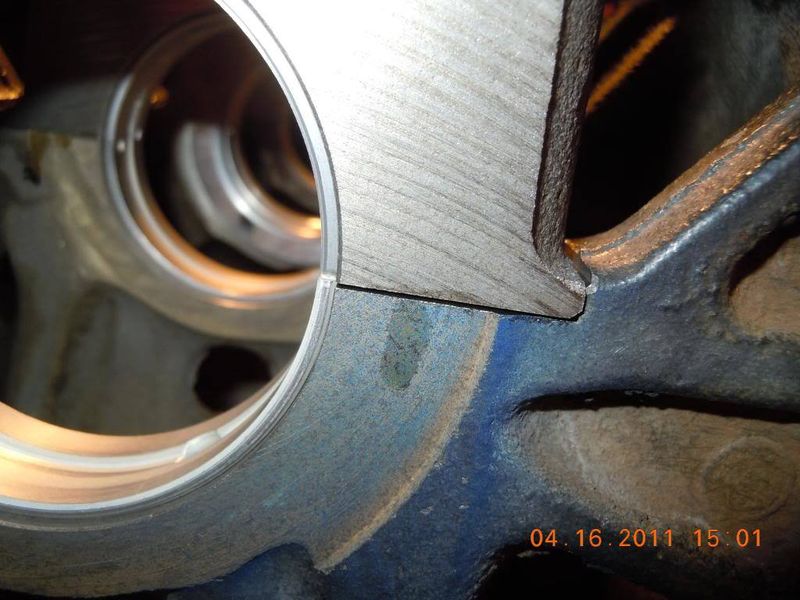
Here you can tell there is a "crush" tolerance to the bearings as you tighten the cap bolts down.
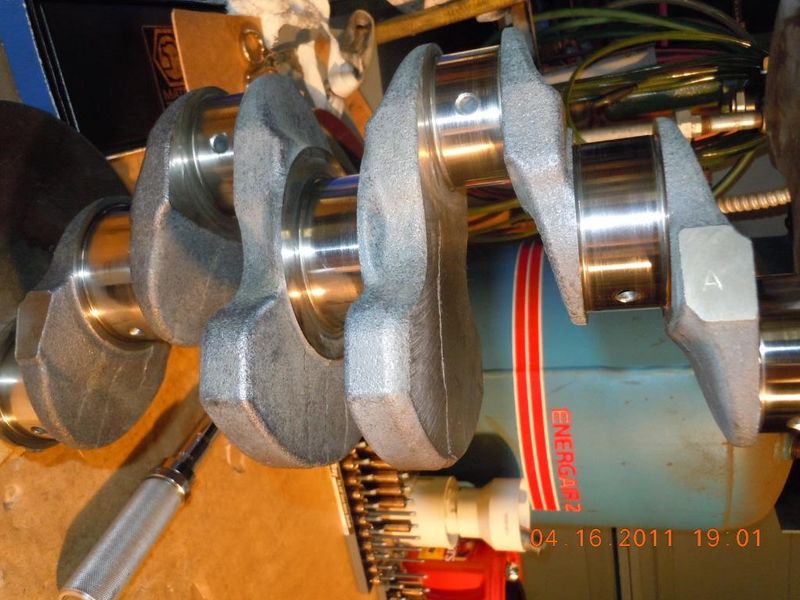
It took a while to get the crank spotless.
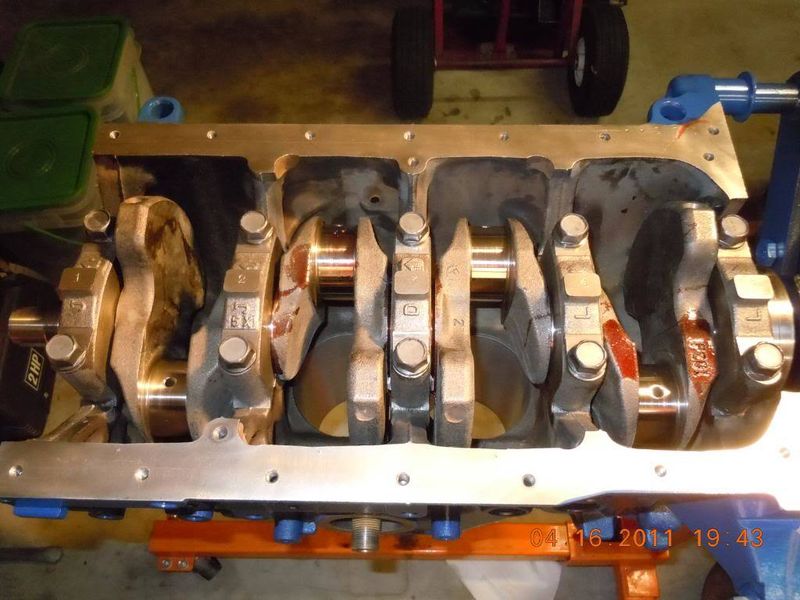
Installing it was the easy part!!
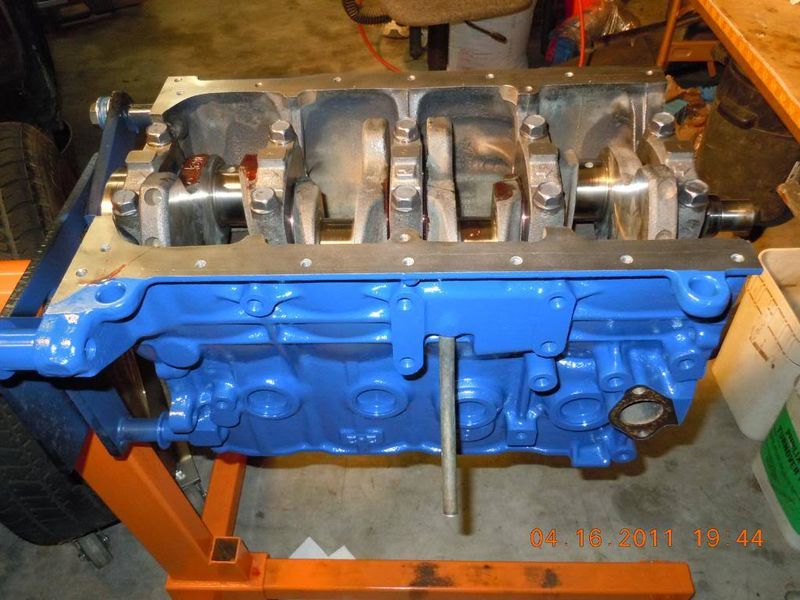
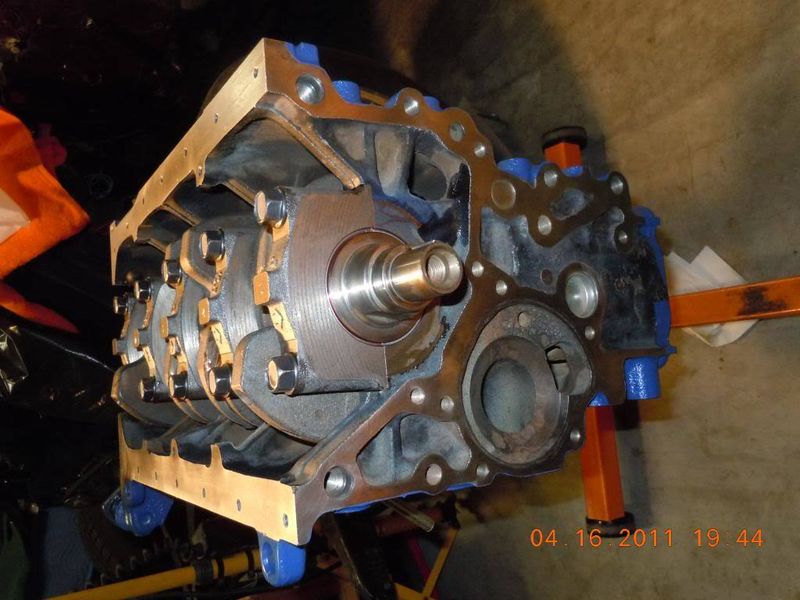
Gotta clean up the pistons tomorrow.
First I lightly honed the cylinders with a 220 grit cylinder hone.


You can see what is left in the cylinders after honing them.....the paper towel on the left is one of the first towels and the one on the right is after I swabbed the cylinders down with a mineral spirits soaked paper towel and dried them. I use the paper towels because you have to wipe the cylinders down a lot and keep using a clean towel to do it so you can tell when your not getting any more filings/hone material. You'd waste a lot of cloth towels doing this!

Putting all the main bearings and caps in and then torqued to spec. so I could measure the diameter of the journal "hole".


Here you can tell there is a "crush" tolerance to the bearings as you tighten the cap bolts down.

It took a while to get the crank spotless.

Installing it was the easy part!!


Gotta clean up the pistons tomorrow.

lowlyfe
+1y
Great thread. I have yet to dig inside of a motor and do a full rebuild like this so it's nice to be able to watch and follow along.

axel breaker earl
+1y
Thanks Lowlyfe!
I forgot about this thread transfer! So i am going to try and get it all done in the near future.......starting now!
Well, I got three of them cleaned today....I'll clean the last one tomorrow.
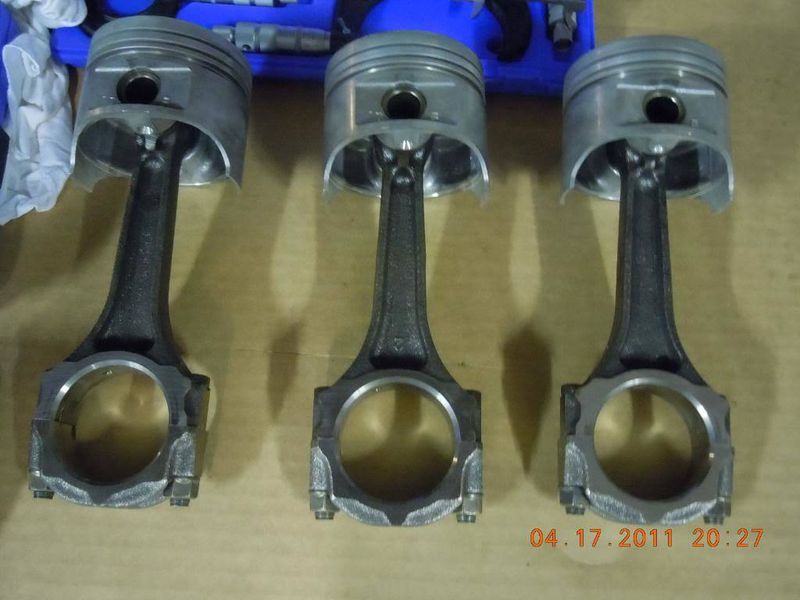
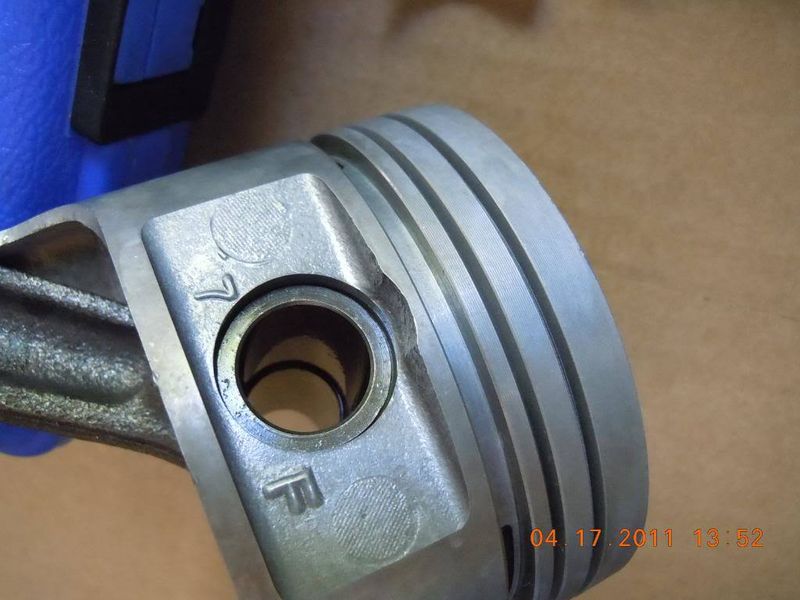
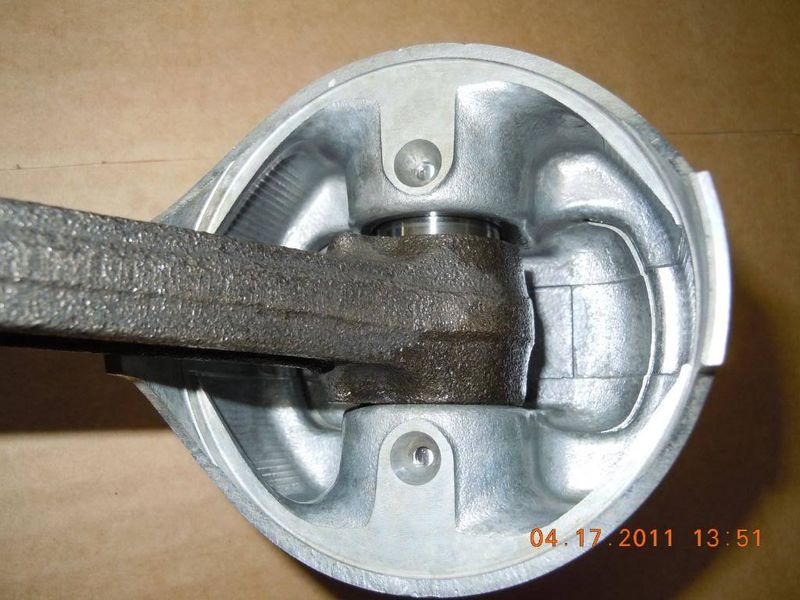
I forgot about this thread transfer! So i am going to try and get it all done in the near future.......starting now!
Well, I got three of them cleaned today....I'll clean the last one tomorrow.


axel breaker earl
+1y
I got the last piston cleaned up this evening......the wife had some sales girl over that was doing in home demos on kitchen cutlery.......I got the he77 out of the house!! She looked good though!
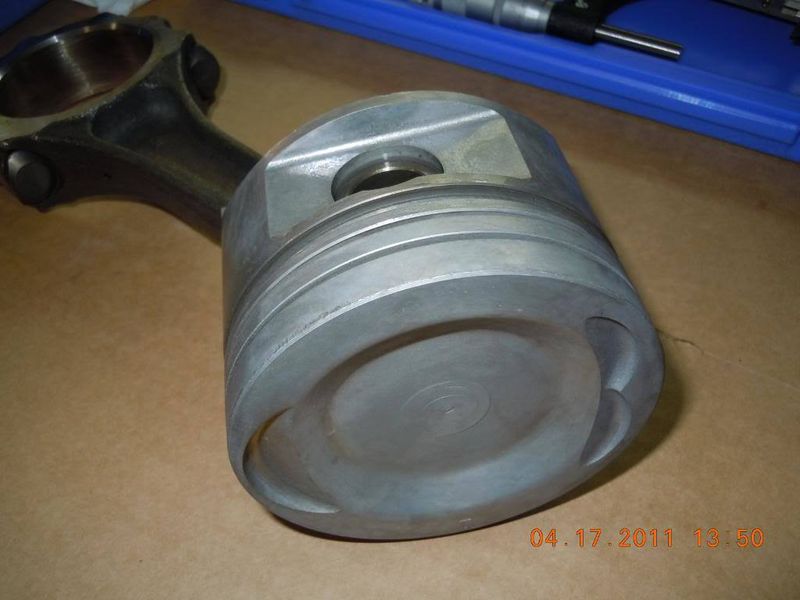
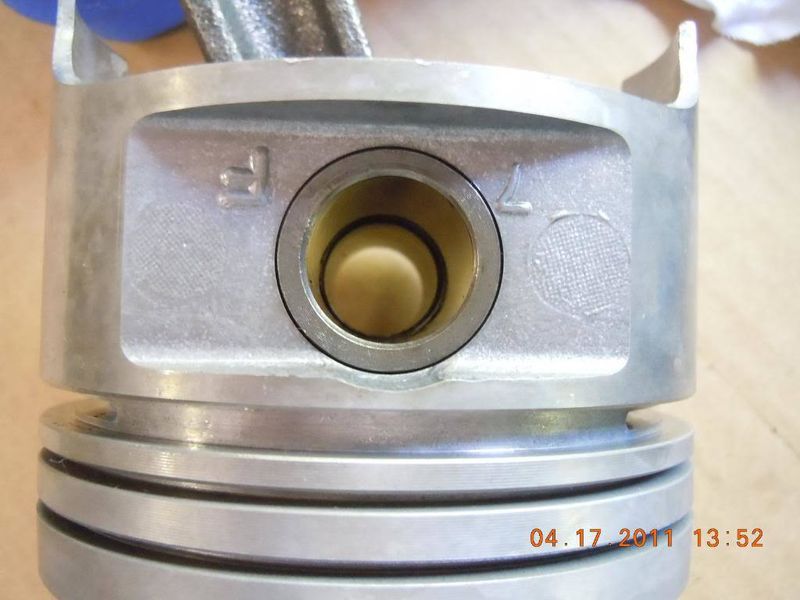
One thing I forgot to mention when cleaning the heck out of the pistons while the rod is attached.......when you get done, re-lube the piston pin afterward.....if you don't, the piston pin will start to rust (if you used Greased Lightning and rinsed with water real good like I did) and it will start to get "bound up" in the piston pin bore. Not good. I like to use WD40 after I've dried the piston as much as I could with compressed air because if there is any moisture left in the bore the WD40 will displace it and keep the rust at bay. This is particularly true if you live in FL like I do.....bare metal loves to grow rust around here when you remove all the oils off of it. Before installing the pistons in the block I will lube the pin with regular oil and "work it in" to the bore real good though!
Gonna check the clearances on the rings after work tomorrow and hopefully get them on the pistons so they'll be ready to install the following evening. I'm hoping to have the motor closed up by the end of this next weekend!

axel breaker earl
+1y
I was asked how I clean these things......
I just use an assortment of brushes and mineral spirits to begin with then I rinse it good and wash it down with full strength Simple Green then rinse again with water.....I do have a hot water hose bib right next to the driveway as well and I usually use that to spray it down, the warm/hot water will evaporate much quicker than the regular cold water will so you don't have to work so hard getting it dry after washing it. Bare metal like the cylinder walls and such will start to rust right away, so you have to dry it asap. I have a 80 gallon compressor in the garage that puts out 175 psi max and I use a blow gun with the air pressure dialed down to 90-100 psi.
I also use Greased Lightning & Purple Power a lot.....I used it on the pistons and it removes most of the brown tarnish that is on them from the oil & combustion process. I keep all of my old tooth brushes when I get a new one (every 6 months the dentist gives us new ones after our scheduled cleanings) and I use those a lot! They work real good on the pistons because you can't use a wire brush, it will scratch the aluminum.
It takes a while to get these things cleaned.....not my favorite job, but if you want it clean, it requires some work and patience.
Related Discussions in Mazda Projects
Thread
Posts
Last Post
852

last post by
skrapinsask +1y
150

last post by
cherokeed +1y