Well WTF, do I post my 3500HD project here or not
29732 views
210 replies
25 following

Well WTF, do I post my 3500HD project here or not
H
huskerdually
+1y
What's he using for compound? I haven't been to happy with the stuff I've gotten lately.

someotherguy
+1y
He's using the Meguiar's Professional Line stuff, there's like 3 different bottles of it over here so I couldn't tell you which one he's using for what. A lot of it came down to the wet sanding too - 800, 1000, 1500 grit. Dually502 is the guy shining it up so you might shoot him a PM.
Richard
Richard

someotherguy
+1y
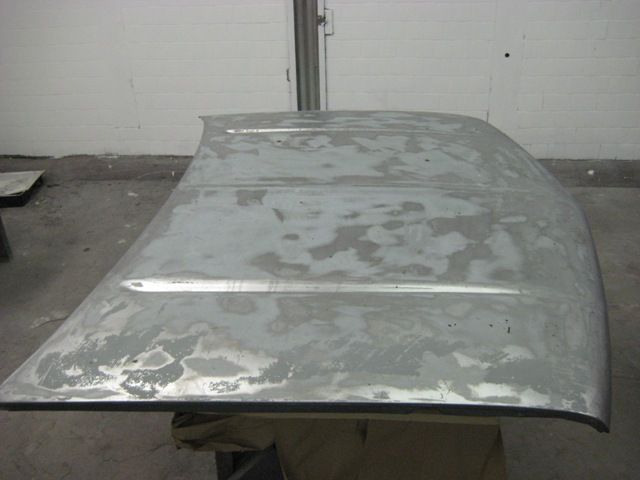
The more Tim worked on the hood, the more it was obvious the paint was really thin, so it was time to re-do it. Taking the paint down showed so much filler and damage we decided to junk the hood and picked another. Here's the "new" hood, taken down to bare metal with chemical stripper, after I degreased the underside with about $7 at the car wash. There was ZERO filler on this hood and just a few small dings. A little primer left to sand off with the DA.
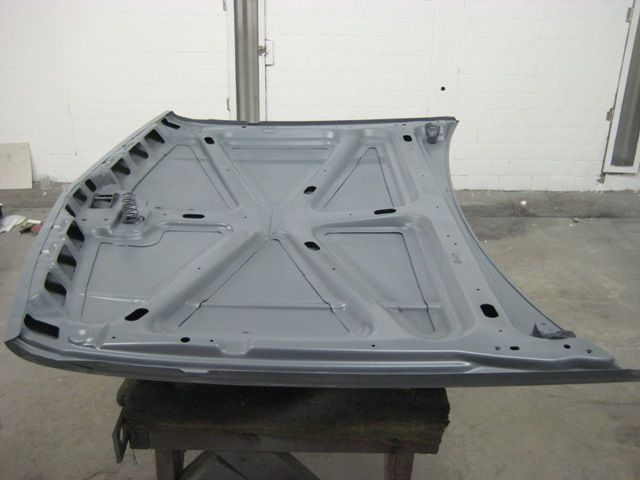
Underside now primed, sealed, and painted black (black not pictured.)
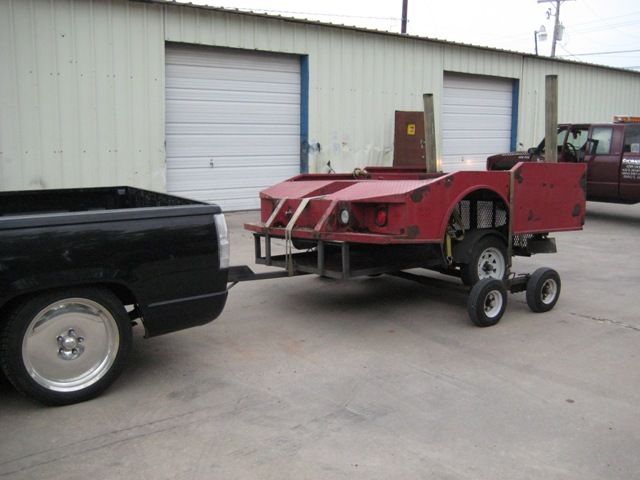
Picked up a well-used Western Hauler style bed, going to need a LOT of work to bring it around but it was cheap.
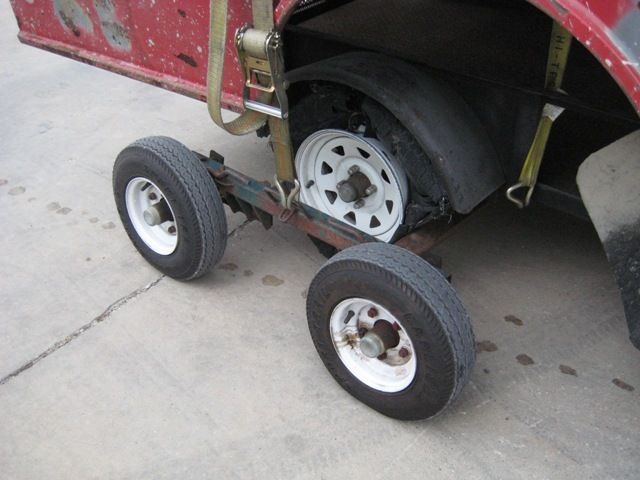
Had a blowout on the trailer on the way back, my buddy Polo brought his tow dollies out so I could get the trailer back to the shop (where my 2 spare trailer tires were waiting, of course.)
Now that the flares are repainted, I've got them back on the fenders, and fenders back on the truck.
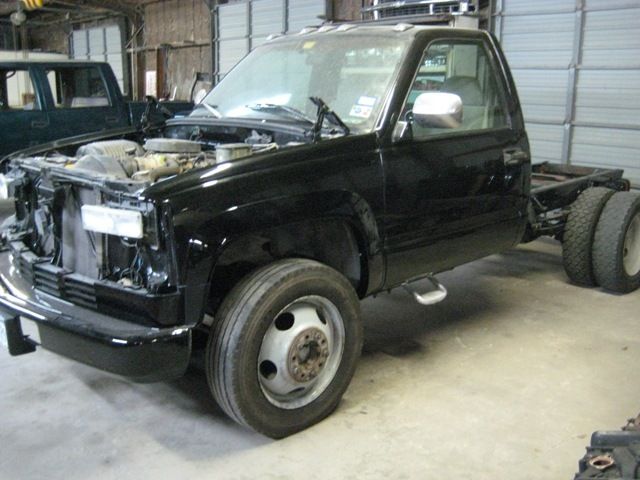
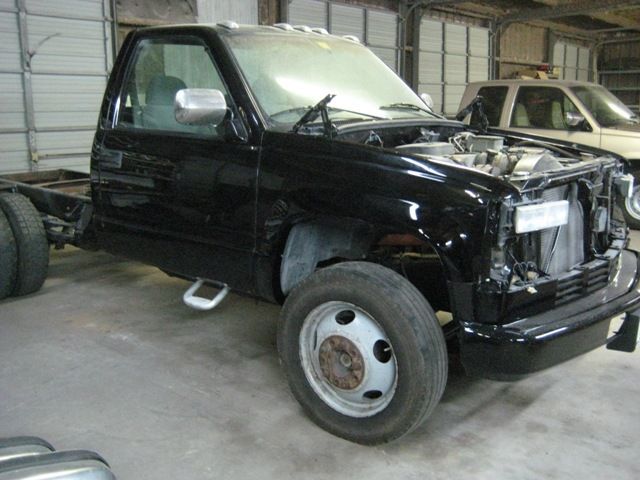
I would have re-installed the grille but I forgot to pick up o-rings for installing the condenser.
The topside of the hood is actually sitting in the paint booth and has a coat of black but it needs wetsanding and maybe another coat. Having problems with the gun and really should just buy a new one but I've been bleeding money lately for stuff like water traps, air plumbing, regulator, DA sander, paint materials, misc. air tools, and parts for the gold '93 ext cab project - so I'm trying to cut back a LITTLE!
Richard

Underside now primed, sealed, and painted black (black not pictured.)

Picked up a well-used Western Hauler style bed, going to need a LOT of work to bring it around but it was cheap.

Had a blowout on the trailer on the way back, my buddy Polo brought his tow dollies out so I could get the trailer back to the shop (where my 2 spare trailer tires were waiting, of course.)

Now that the flares are repainted, I've got them back on the fenders, and fenders back on the truck.


I would have re-installed the grille but I forgot to pick up o-rings for installing the condenser.
The topside of the hood is actually sitting in the paint booth and has a coat of black but it needs wetsanding and maybe another coat. Having problems with the gun and really should just buy a new one but I've been bleeding money lately for stuff like water traps, air plumbing, regulator, DA sander, paint materials, misc. air tools, and parts for the gold '93 ext cab project - so I'm trying to cut back a LITTLE!
Richard
Post was last edited on Dec 27, 2011 01:34. Edited 1
time.
L
low95xlt
+1y
lookin good man

jcampbell1180
+1y
Looks good, Dude. I dig the bed.

someotherguy
+1y
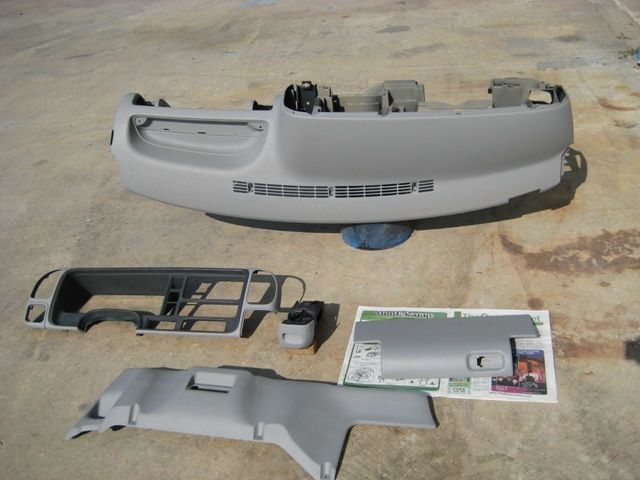
Time to work on the interior. I had a pretty decent dash other than being cracked across the defrost vents, and the wrong color (tan)...did some repairs using Devcon Plastic Weld, a little plumber's strap, and mechanic's wire. No idea if it's really going to hold but I had to try. There's no surface area to speak of at the breaks so just simply trying to glue it back together would have been a waste of time; it needed some kind of reinforcement.
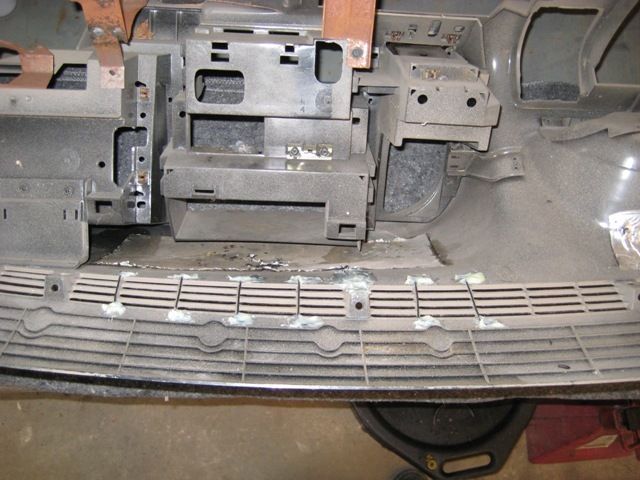
I was lucky enough to have most of the other dash pieces in gray except for the trim bezel, which was maroon. Scrubbed all the pieces to be painted with TSP substitute and a gray scotchbrite pad.
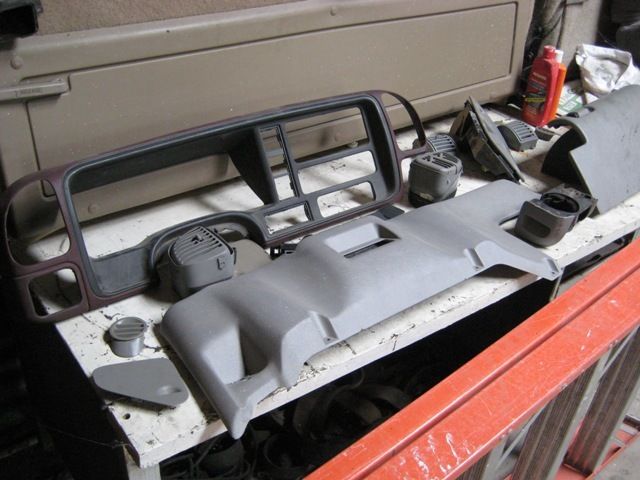
Two coats of SEM adhesion promoter and then two coats of 17173 medium gray later, everything is looking pretty good. Masking the bezel was a real PITA since the color breaks roughly in the middle of a thin flat area right past an edge, and has a lot of curves in it. It came out pretty good but not great. The cupholder is all gashed up and I didn't see any sense in trying to use filler on it, then have to try to simulate the grain, either way it would obviously be damaged. I'm trying to stick to using parts that others would pass over because of minor damage. Again, this is "just" a work truck.
Richard

I was lucky enough to have most of the other dash pieces in gray except for the trim bezel, which was maroon. Scrubbed all the pieces to be painted with TSP substitute and a gray scotchbrite pad.

Two coats of SEM adhesion promoter and then two coats of 17173 medium gray later, everything is looking pretty good. Masking the bezel was a real PITA since the color breaks roughly in the middle of a thin flat area right past an edge, and has a lot of curves in it. It came out pretty good but not great. The cupholder is all gashed up and I didn't see any sense in trying to use filler on it, then have to try to simulate the grain, either way it would obviously be damaged. I'm trying to stick to using parts that others would pass over because of minor damage. Again, this is "just" a work truck.

Richard
Post was last edited on Dec 27, 2011 01:34. Edited 2
times.

someotherguy
+1y
Installed the freshly painted dash. This is always a bigger job on the 95-up interior than you'd think. I also had to mark and drill/slot holes in either side of the kick panel area for the short trim strips on either side of the dash; 88-94 does not use these, they're incorporated into the A-pillar trim. These short strips MUST be installed before the dash is in or it's a major PITA afterwards. I still need to make the holes for the hood release handle. Driver's side defrost vent had a broken tab so I need to dig up another.
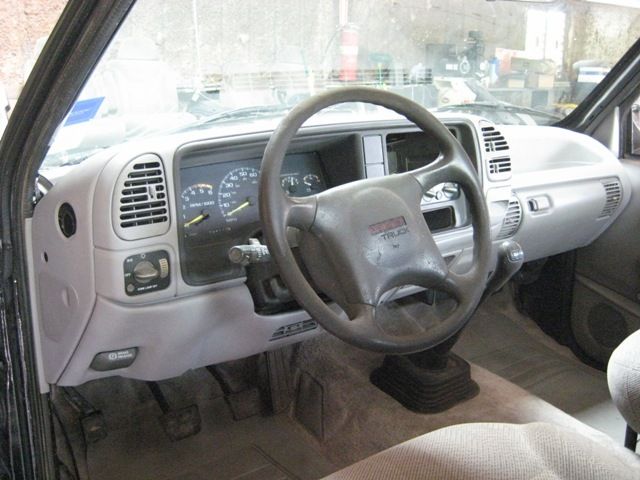
The color difference between the SEM medium gray is apparent vs. a molded part like the fuse cover, but is less obvious compared to the molded color of the dash vents for some reason. As I've said before there's a lot of variance even in the factory colors.
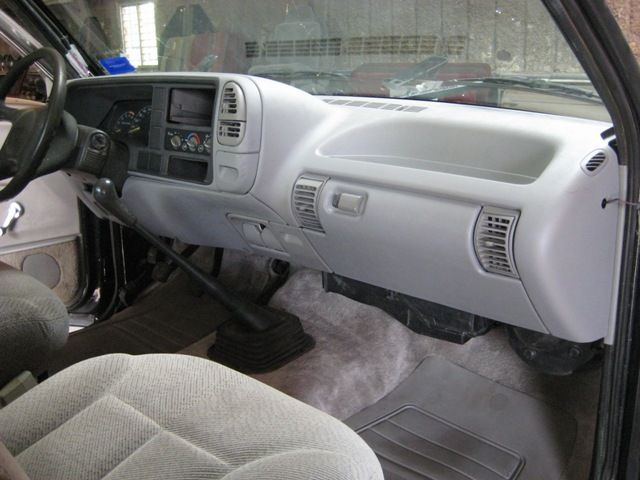
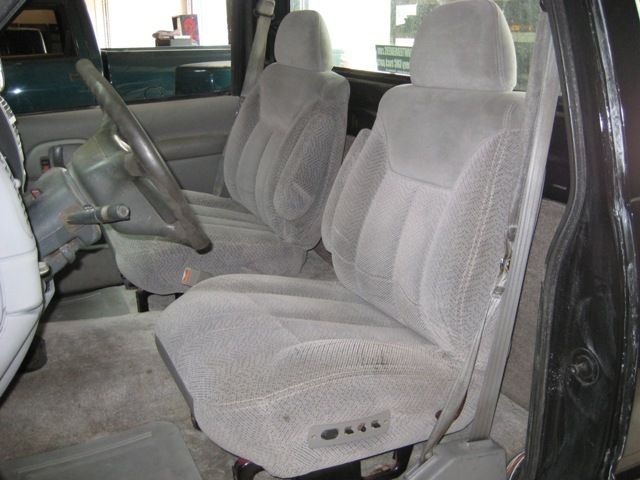
Since I had the driver's seat out to drop the column for dash install, I put a better one back in (unbroken inner seat frame) and swapped in its matching passenger side, too. Also installed rear cab wall carpet. "All that's left" for the interior is headliner, visors, kick panels, sill plates, A and B pillars, upper and lower rear window trim and misc. stuff like the courtesy light switches and dome light fixture (it's wired but not working yet.)
Richard

The color difference between the SEM medium gray is apparent vs. a molded part like the fuse cover, but is less obvious compared to the molded color of the dash vents for some reason. As I've said before there's a lot of variance even in the factory colors.

Since I had the driver's seat out to drop the column for dash install, I put a better one back in (unbroken inner seat frame) and swapped in its matching passenger side, too. Also installed rear cab wall carpet. "All that's left" for the interior is headliner, visors, kick panels, sill plates, A and B pillars, upper and lower rear window trim and misc. stuff like the courtesy light switches and dome light fixture (it's wired but not working yet.)

Richard
Post was last edited on Dec 27, 2011 01:33. Edited 1
time.

skeletoncrew
+1y
Looks good! Your project is coming together nicely!

someotherguy
+1y
Pulled the dash back down to fix a plastic wire channel routing problem. Installed courtesy light pin switches, fixed two breaks in the dome light harness. Installed kick panels and sill plates. Used the stainless torx screws for the sill plates because they look cool and won't rust. Notched and drilled the cab kickpanel area to mount the hood release lever.
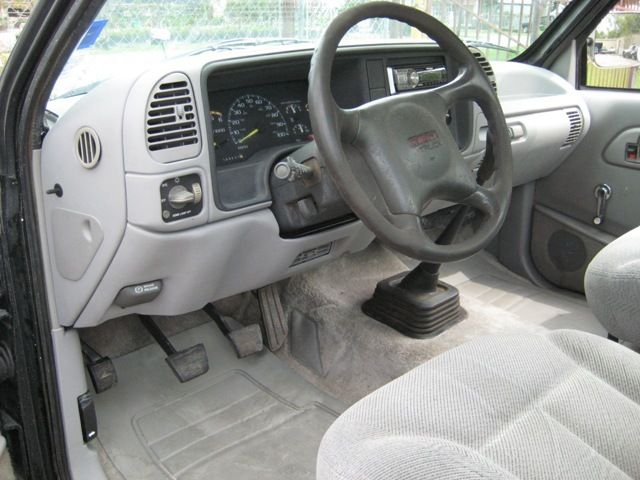
Threw together a stereo from used parts sitting around - Pioneer DEH-P5800MP, Audiobahn 6.5, and Fosgate 4x6. Factory cubby hole installed under A/C controls.
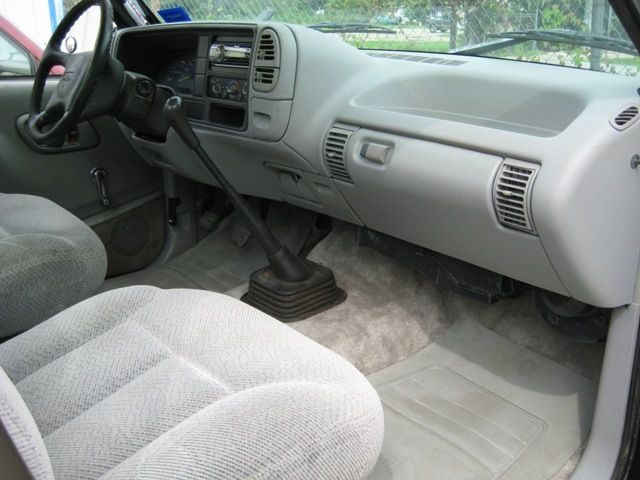
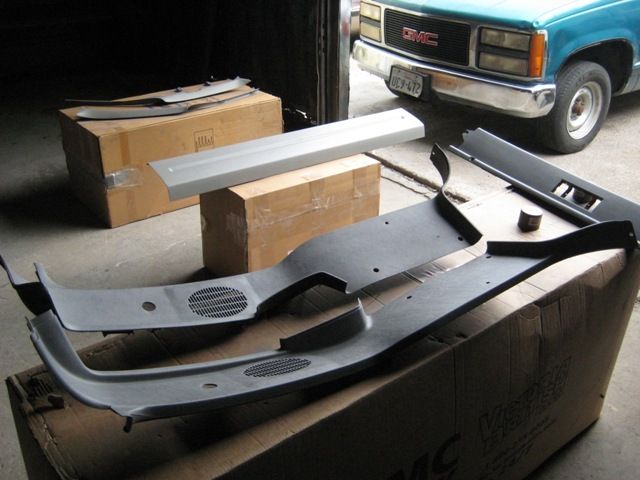
Next I painted the remaining interior plastics. B pillars and upper rear window trim were maroon; A pillars and lower rear window trim were already gray but aged. Pic was taken after the first coat. They're done now and curing.
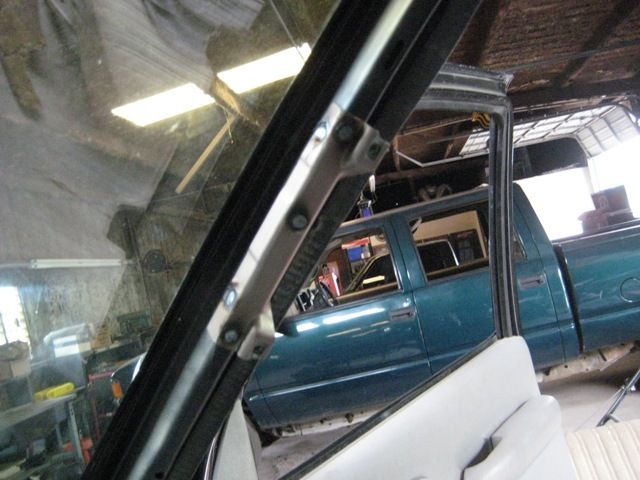
I kept looking at the grab handle holes in the passenger A pillar trim and decided to go ahead and install the bracket for the grab handle. Used the sawzall to chop the pillar out of a scrap cab so I could drill the 5 plug welds out of the bracket (2 of them are too close to the windshield to get to even with a right angle drill) - then hustled over to my bud Antonio who welded it up better than factory. After the pic I shot a little satin black on it to keep it from rusting.
Richard

Threw together a stereo from used parts sitting around - Pioneer DEH-P5800MP, Audiobahn 6.5, and Fosgate 4x6. Factory cubby hole installed under A/C controls.

Next I painted the remaining interior plastics. B pillars and upper rear window trim were maroon; A pillars and lower rear window trim were already gray but aged. Pic was taken after the first coat. They're done now and curing.

I kept looking at the grab handle holes in the passenger A pillar trim and decided to go ahead and install the bracket for the grab handle. Used the sawzall to chop the pillar out of a scrap cab so I could drill the 5 plug welds out of the bracket (2 of them are too close to the windshield to get to even with a right angle drill) - then hustled over to my bud Antonio who welded it up better than factory. After the pic I shot a little satin black on it to keep it from rusting.

Richard
Post was last edited on Dec 27, 2011 01:32. Edited 1
time.
H
huskerdually
+1y
Gonna be a nice work truck.
Related Discussions in Dually Projects
Thread
Posts
Last Post
546
A
last post by
Airnewb91 +1y
193

last post by
Airnewb91 +1y