K
SFBD square with a Cummins and custom chassis

83baggedduallylee
+1y
Do u still need the 8" pipe

jcampbell1180
+1y
Those backhoe attachments are ass. I hate 'em.
...and that 2,200lb rating is breakout force, not lifting capacity. Two entirely different things. They each place completely different loads on the machine (but you found that out first hand). Typically, your lifting capacity is roughly 45% of the max breakout, which in your case would be somewhere in the neighborhood of 990lbs...and not at full reach, either. Hell, that 873 only has a 2,300lb working capacity with a 5,000lb tipping weight.
I'll just go ahead and Monday Morning Quarterback the situation and say you should have shit-canned the attachment and just used the lift arms and a chain.
But...glad it all worked out for ya!
Post was last edited on Aug 12, 2012 05:54. Edited 1
time.
6
656mx
+1y
Looks like it belongs there. Ill be follow ing closely. Mine will be getting a cummins one day.

comegetsome
+1y
looks like you have a pretty good bit of hood clearance compared to mine...how low below the xmember is that pan hanging down?
BD
bagged dually
+1y
The oil pan is only hanging down about 2" right now which of course I'll have to section to get it up a little higher but that kind of surprised me. I've only got about 3/8" till I hit my crossmember. Im still not think I'm gunna be able to run a stock hood. I won't really know until I get the mounts done though. I just can't go any lower with the engine and I think it'll still hit at the front of the hood. I guess this is just a really tall engine to be trying to fit under stock parts with a body drop.
I got my firewall all trimmed out today so the engine can go back about another 2". So hopefully it'll be as low and far back as possible. I'm having an issue with the trans tunnel right around the gas pedal hitting the starter nose cone. So I had to cut quite a bit of that material out. My gas pedal should still be good but I may just move itto the left a little. Not sure if I want to use the stock cummins engine mounts yet. Their really big and bulky. Thinking about using a couple of 3" end links for a 4 link. Not sure if that rubber in there is gunna hold up the cummins weight and the harsh vibrations combined with the heat of the engine compartment.
I got my firewall all trimmed out today so the engine can go back about another 2". So hopefully it'll be as low and far back as possible. I'm having an issue with the trans tunnel right around the gas pedal hitting the starter nose cone. So I had to cut quite a bit of that material out. My gas pedal should still be good but I may just move itto the left a little. Not sure if I want to use the stock cummins engine mounts yet. Their really big and bulky. Thinking about using a couple of 3" end links for a 4 link. Not sure if that rubber in there is gunna hold up the cummins weight and the harsh vibrations combined with the heat of the engine compartment.
W
watahyahknow
+1y
whell there hoods available with a raised centersection , it should be eazy to finangle it under there , or go old style and cut some holes in the hood to have the engine stick out of it
BD
bagged dually
+1y
I'm hoping I can get away with just trimming the bracing under the hood. I had thought about cutting a hole in the hood also. That'll most likely be the way I'll have to run it for a while. Eventually I'll get some kind of steel cowl hood if I have to. Since I don't have a garage right now having a hole in the hood for a long period of time probably wouldn't be good letting a lot of rain water and melting snow constantly soaking the engine. I've still got to figure out a way to get my grid heaters put on a momentary switch. That way when it gets cold out I can just hold the button for 15-20 seconds and start it up without a bunch of uneeded timers and sensors. I'm think some kind of starter solenoid can be made to switch them on and off. There are 2 on the engine and I've heard they can each draw 100 amps.
BD
bagged dually
+1y
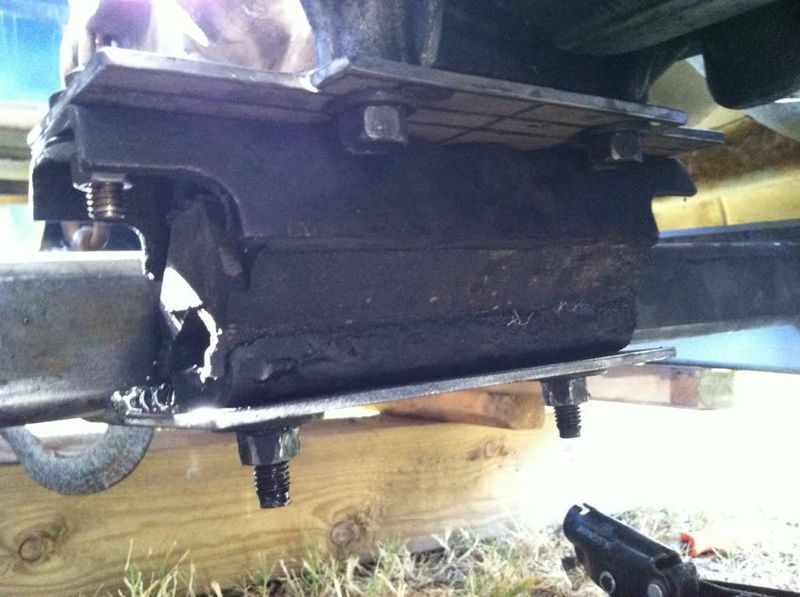
I got my trans all mounted up this evening and got the cross member built. I used the same 1/4" walled 2x2 tubing that I used on my 4 link and made the cross member. From there I used some 3/16" plate and made a bracket to bolt up the trans. I welded a 3/16" plate off of the cross member and put the stock rubber mount in between. At some point when I year the cab back off for final paint and finish welding I'll make it to where the middle 1' is bolt on so I can remove it if I ever need to drop the trans an front to pull the engine.
I got started on the engine mounts and hopefully will have them done tomorrow. I'll post some pix when their done.
With everything set in place with the engine as far back as I can get it without cutting out my entire firewall it looks like I'm going to have to not h right above the back valve cover. It should be to big of a deal since all of what I'll have to botch is just in the cowl area. The starter nose cone is quite a bit farther into the gas pedal area than I would have liked but I can use an after market pedal assembly if I have to. This type of stuff is just to be expected I guess when you do these swaps. The next order of business after the engine mounts is going to be try to get all of the hydro boost hooked back up and getting a little notch cut out of the firewall for the trans dip stick and modifying the dipstick itself. Crazy how much this little stuff can hold you up.
My phone is just about dead but as soon as I get some juice back in it I'll post a few pix. The trans mount picture isn't to great. I'll get a better one later on if anyone wants see it.
BD
bagged dually
+1y
I got the turbo all mounted back up to see what kind of space I had. The waste gate on the stock 12cm housing is going to get smashed off by the upper control arm when I let the air out. The 12cm housing is to small for the the fuel and boost this thing has been making and has been getting my EGT pretty warm. So a member over at 4btswaps graciously gave me a 16cm non waste gated housing. So that'll take care of both problems. Thanks for the housing Drifter!!
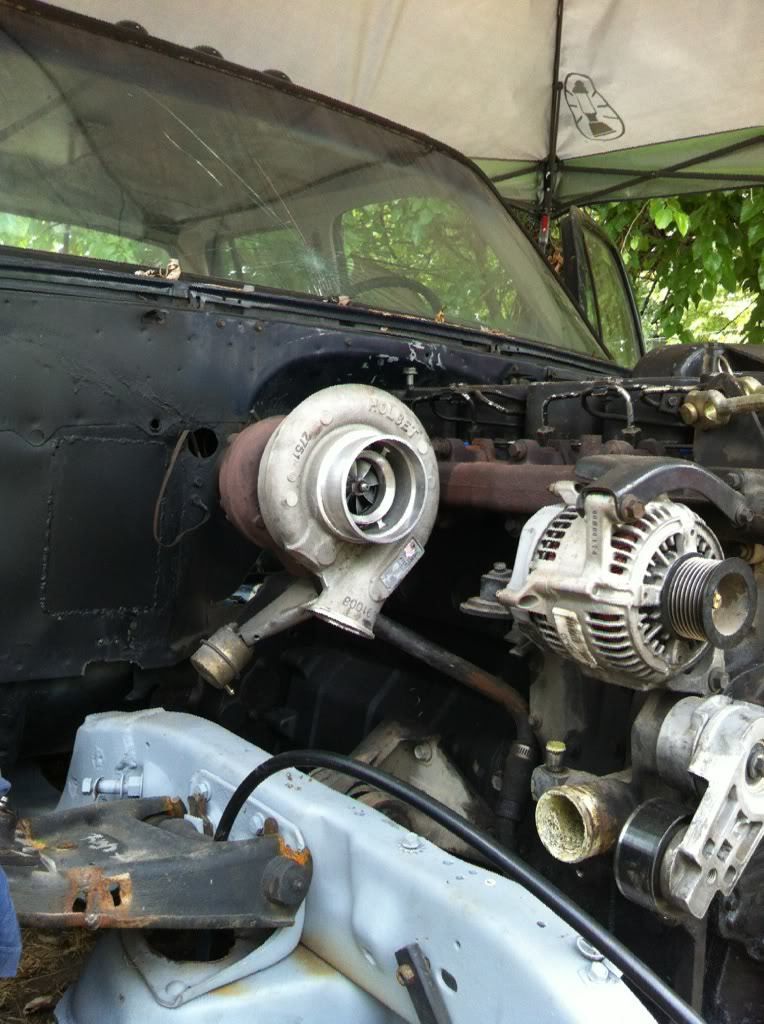
This next picture is the clearance of the firewall and last valve cover. In the pic it looks like it has some space but my cab is lifted up about 1.5". So the coal area is going to have to be notched. Luckily everything that needs notched to clear is in the cowl area. That should make it a little easier than trying to weld behind the dash.
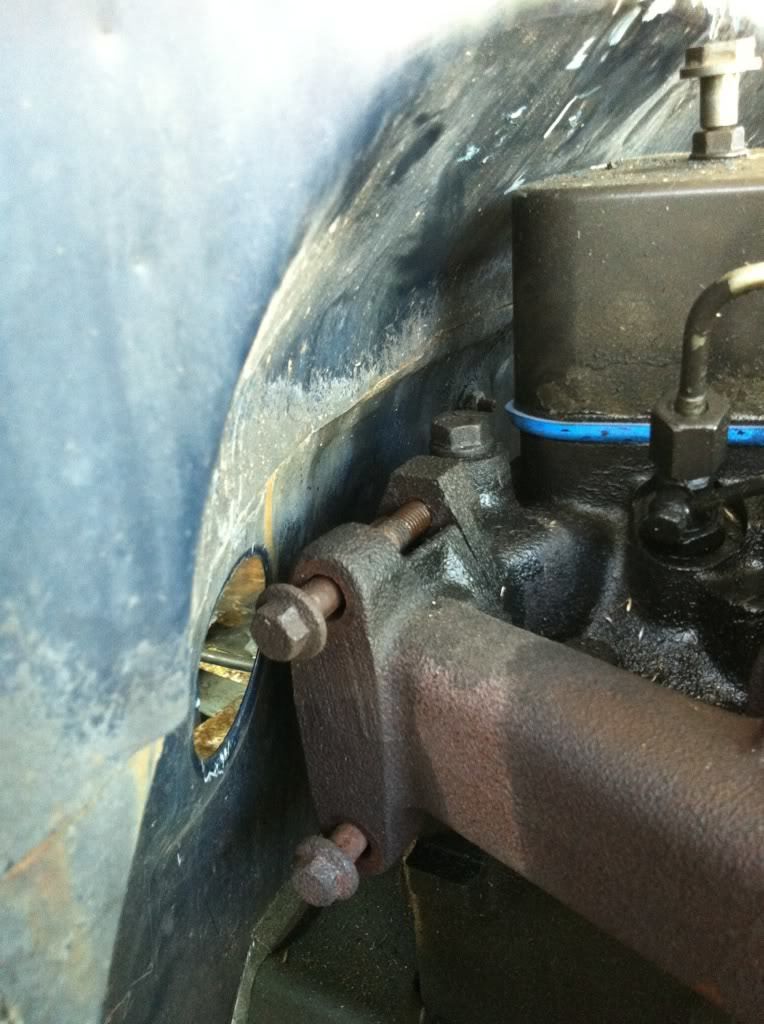
In this picture you can see how far the starter nose cone has came into the floor pan. I may have to move gas pedal over a bit but no big deal. Just part of the swap I guess.
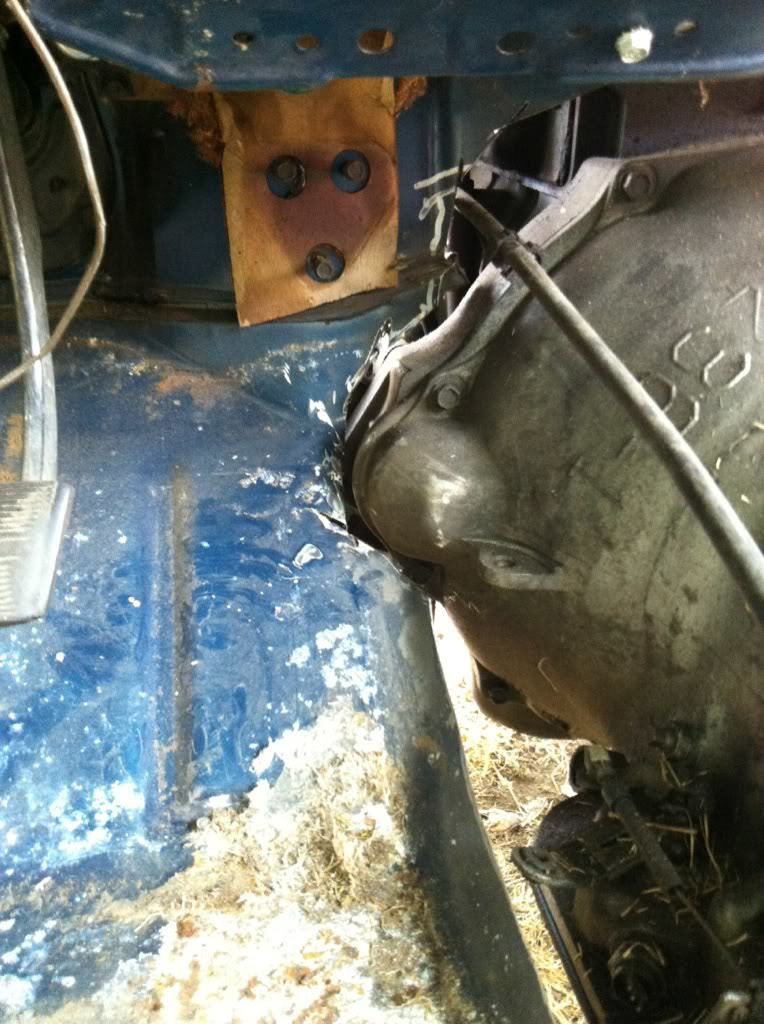
You can really see how far the engine and trans have come into the cab. I really wanted this setup as far back as possible. The amout i cut out about the bell housing might look a little excessive but remember the cab is still sitting 1.5" roughly higher than it will in the end.
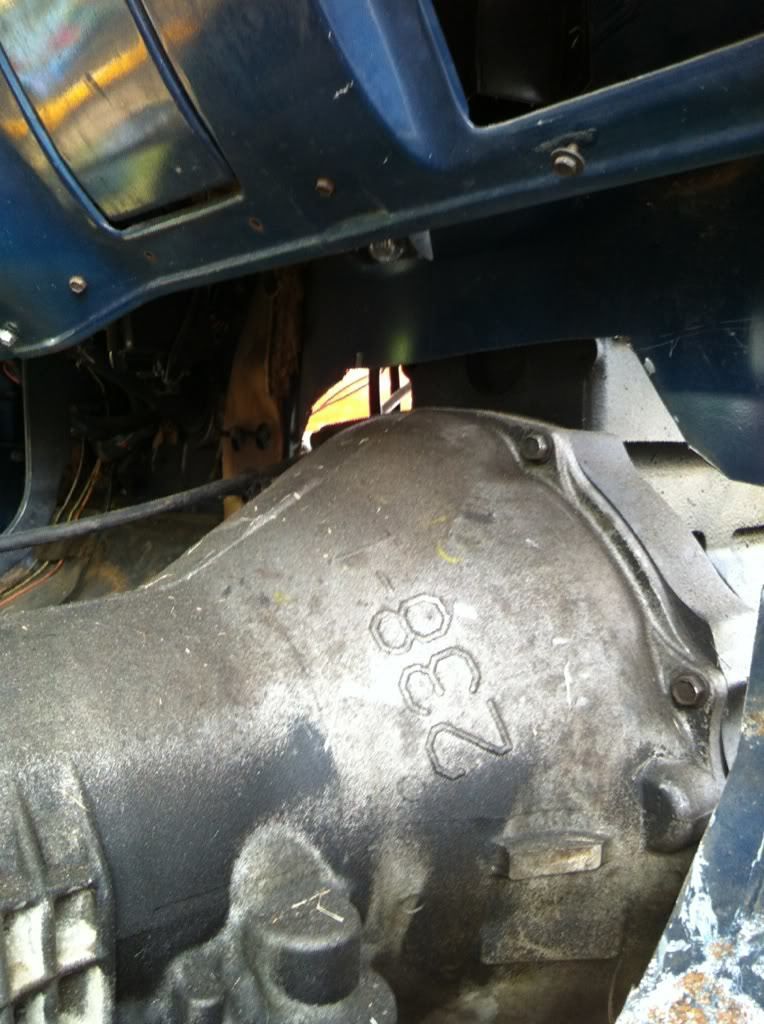
This is the trans mount and cross member I built today. I still need to get the center 1' section fabbed to be a bolt in section in case I ever need to drop the trans.
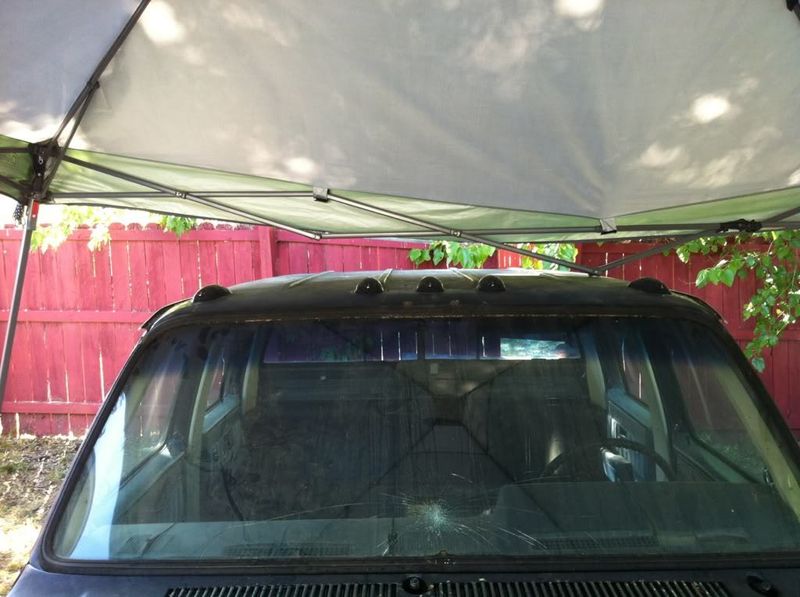
I almost forgot to mention that I took the blacked out 1995 dodge donor cab lights and put them on the dually. Not wired up yet but bolted on.
Well hopefully that'll keep you picture junkies happy till I can get some more work done. Sorry for the long posts. Just trying to give people as much info as possible for future swaps.
If anyone wants a picture of anything not included just let me know and I'll get it for you.

This next picture is the clearance of the firewall and last valve cover. In the pic it looks like it has some space but my cab is lifted up about 1.5". So the coal area is going to have to be notched. Luckily everything that needs notched to clear is in the cowl area. That should make it a little easier than trying to weld behind the dash.

In this picture you can see how far the starter nose cone has came into the floor pan. I may have to move gas pedal over a bit but no big deal. Just part of the swap I guess.

You can really see how far the engine and trans have come into the cab. I really wanted this setup as far back as possible. The amout i cut out about the bell housing might look a little excessive but remember the cab is still sitting 1.5" roughly higher than it will in the end.

This is the trans mount and cross member I built today. I still need to get the center 1' section fabbed to be a bolt in section in case I ever need to drop the trans.

I almost forgot to mention that I took the blacked out 1995 dodge donor cab lights and put them on the dually. Not wired up yet but bolted on.

Well hopefully that'll keep you picture junkies happy till I can get some more work done. Sorry for the long posts. Just trying to give people as much info as possible for future swaps.
If anyone wants a picture of anything not included just let me know and I'll get it for you.
BD
bagged dually
+1y
I didn't have a lot of time today but I had enough time to get some of the engine mount fab work done. I figured out what parts I was going to use and got the passenger side almost done. I used the Chevy engine mount plate that bolts in from the top of the frame rail to the cross member. I'm going to weld a 1/4" plate to the under side of it to make sure it's strong enough. I deified to use some 4 link parts for the rest of it. I cut out a 3/16" plate and bolted to the block with all 4 bolts instead of only using 3 like the stock dodge mounts. After that I welded 2 tabs off of the plate that were meant to mount a 4 link bar to a frame. On the frame side of the mount on top of the plate I welded up a 3" wide 4 link bushing and boxed it all in with 3/16" plate. That should be plenty of steel to be hold the cummins in.
In the picture of everything sitting in the truck the actual bushing isn't in and it's not bolted in its just sitting there.
This when I first got started on it. The 3/16" plate bolted to the engine with the 4 link tabs tacked on and the 3" bushing loosely bolted in. The engine plate still needs some trimming.
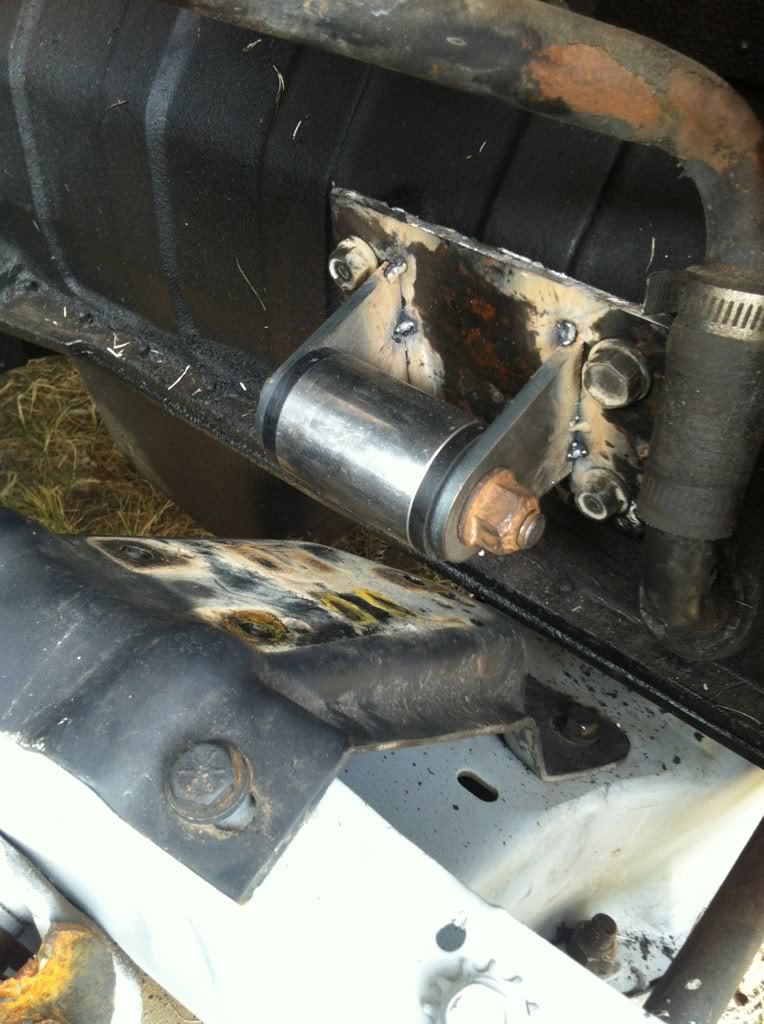
This is the frame side all welded up and just sitting in to give you guys an idea of what I'm going for here.
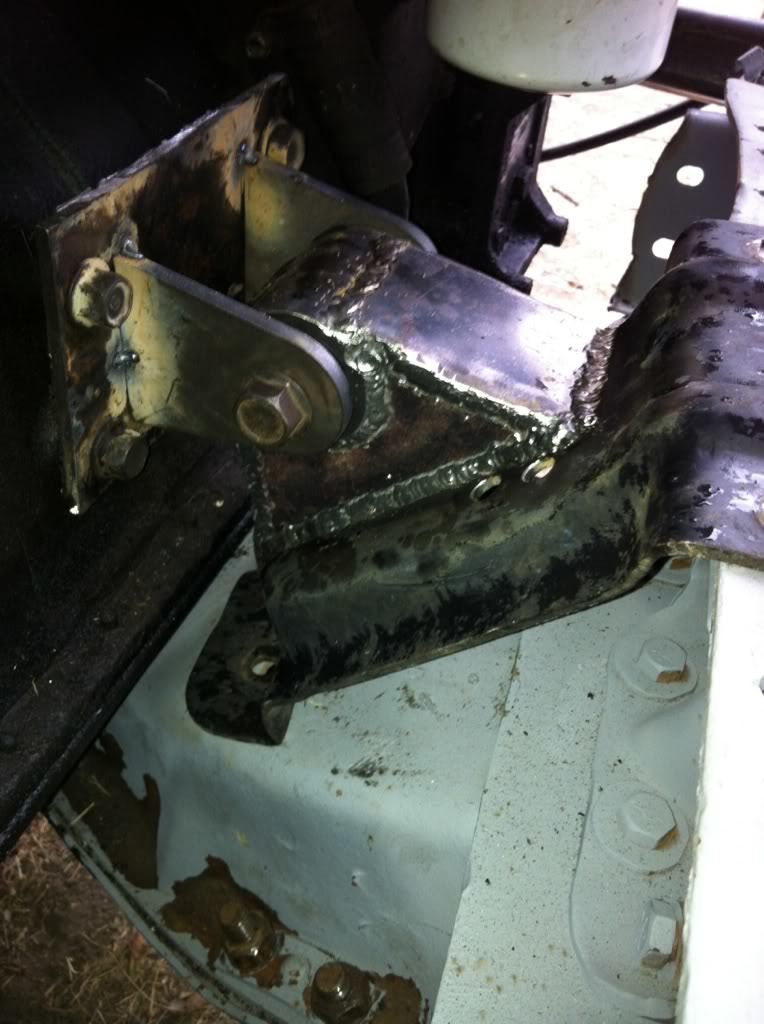
Hopefully with all of that plate fully welded and all of the bracing I welded into it it'll be stout enough to hold up.
In the picture of everything sitting in the truck the actual bushing isn't in and it's not bolted in its just sitting there.
This when I first got started on it. The 3/16" plate bolted to the engine with the 4 link tabs tacked on and the 3" bushing loosely bolted in. The engine plate still needs some trimming.

This is the frame side all welded up and just sitting in to give you guys an idea of what I'm going for here.

Hopefully with all of that plate fully welded and all of the bracing I welded into it it'll be stout enough to hold up.
Related Discussions in Dually Projects
Thread
Posts
Last Post
546
A
last post by
Airnewb91 +1y
193

last post by
Airnewb91 +1y