1990 B2200 Ground Up

vsawmike
+1y
I used the crane to pull the stock frame clip off the frame table. I then put the new clip back on and got it straight and clamped it down. Next step is the pieces out to the side and then back to the rear.
I will have more on this today.
I will have more on this today.

mymmeryloss
+1y
Hell yeah! In for updates
D
dealwithit
+1y
thats a sweet overhead system.... like a mini version of what they use at the pick and pull. those impala trunks look like they will donate some interesting curves

vsawmike
+1y
I will post a pic of the crane all the way up. The Impala trunks are donating the LED third brake lights. They have a clear plastic piece inside that breaks up the light into stars. I got the whole trunk because I figured it was easier to cut out the sheet metal hole than make one.
It was half price weekend at the pick n pull. I got both of those out the door for $48. Scrap metal will give me back a few bucks.
more to come.

vsawmike
+1y
Did not do much yesterday. I cut the two main frame rails. They are 93" long each. Ill have to get more steel to make the rest with and some more 1" for spacers. Pics this evening.

vsawmike
+1y
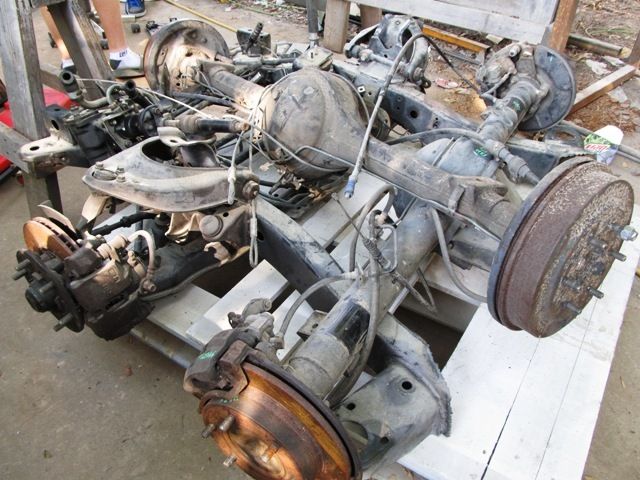
Ok, I got a quite a bit done yesterday and I should get more done today. I started with getting the factory clip off the frame table and then putting the two rearends I have all on a rolling pallet.
Then I started working on cutting the small pieces that go from the front clip out to the main rails. The front clip is 25" wide overall where the factory frame is around 29"
The main rails on this truck are 34" wide overall where the factory frame is about 40" wide. I wanted ths frame to be narrower so the slope in the floor from the doors to the frame is not as much of angle up hill. I cut the main outside rails (93") and clamped them both in place and welded them in.
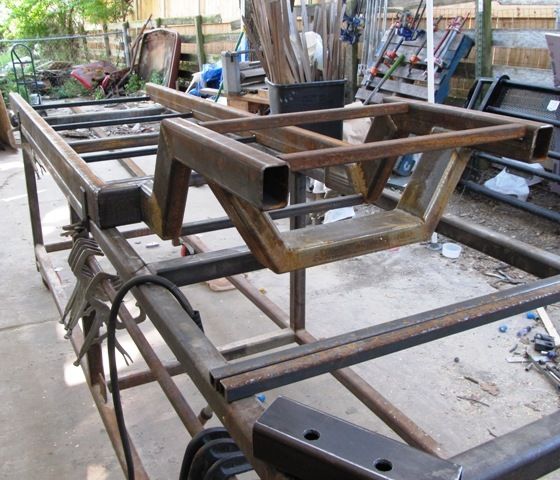
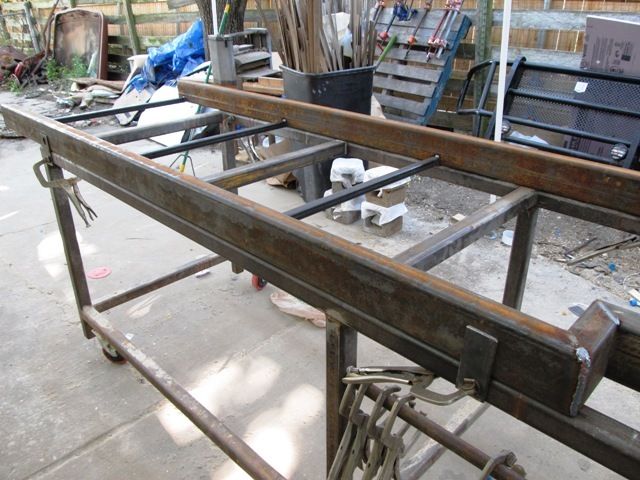
Then I added some 1" square tube braces to the middle and the back and concentrated on the front. The next piece in the front was the down pieces where the steering box and idler arm mount. These required drilling 3/4" holes through both pieces and installing some crush tubes. These have to be welded in pretty well because they hold the steering box on one side and the idler on the other. But also they need to not leak air.
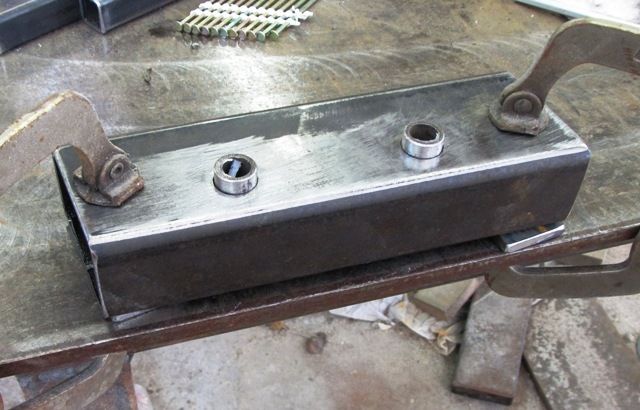
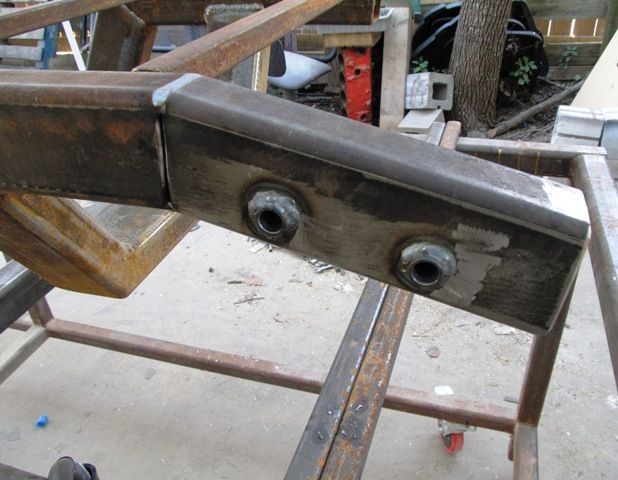
I put a flat piece of steel inside and outside the top rail and clamped them all together. Then welded the right hand side down tube on. Then I clamped the other one on and clamped a 2x3 angle across the top so the angle was the same across both side. I measured up from the table to make sure they were both the same height.
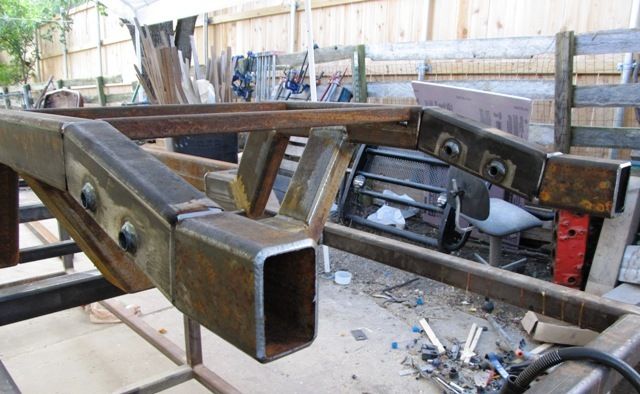
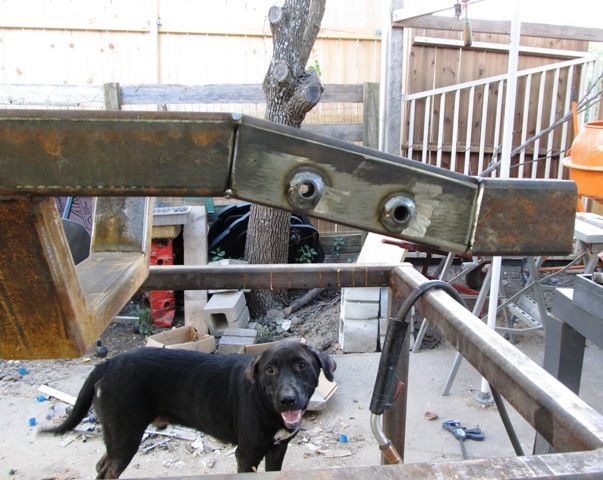
Then I welded on the front stubs. These are level and parallel to the frame rails. I then cut small round holes in the bottom front of these stubs to allow air into the front drop section. Then I made caps for the rails and tacked them on. Notice everything is beveled for a good weld.
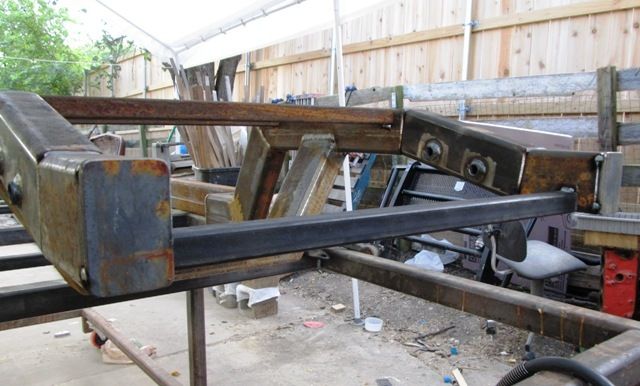
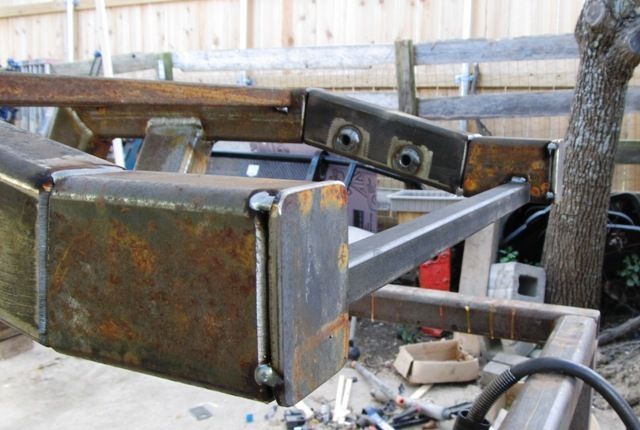
Then I made the drop section on the table and clamped it on and welded it all up.
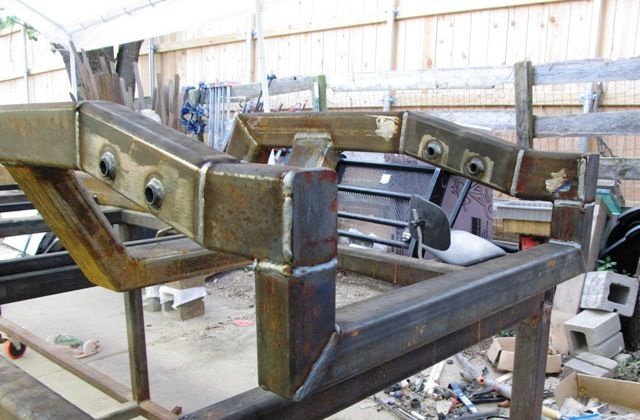
That was all I had time for yesterday. I was also helping my kid pull a 460/C-6 from an 85 Ford truck. It's going in his 66 F-100. I will have to help him more today. He has two friends helpin but I'm certain none of them have pulled a motor before.
Since I won't be able to rip the Sportage motor out while they occupy the driveway I will work on the back of the frame today. Can't make any control arms until I order some DOM tube and some bushings. I might test mount the steering box just for giggles.
So I will work on the rear section and help the kids. More to come.

Then I started working on cutting the small pieces that go from the front clip out to the main rails. The front clip is 25" wide overall where the factory frame is around 29"
The main rails on this truck are 34" wide overall where the factory frame is about 40" wide. I wanted ths frame to be narrower so the slope in the floor from the doors to the frame is not as much of angle up hill. I cut the main outside rails (93") and clamped them both in place and welded them in.


Then I added some 1" square tube braces to the middle and the back and concentrated on the front. The next piece in the front was the down pieces where the steering box and idler arm mount. These required drilling 3/4" holes through both pieces and installing some crush tubes. These have to be welded in pretty well because they hold the steering box on one side and the idler on the other. But also they need to not leak air.


I put a flat piece of steel inside and outside the top rail and clamped them all together. Then welded the right hand side down tube on. Then I clamped the other one on and clamped a 2x3 angle across the top so the angle was the same across both side. I measured up from the table to make sure they were both the same height.


Then I welded on the front stubs. These are level and parallel to the frame rails. I then cut small round holes in the bottom front of these stubs to allow air into the front drop section. Then I made caps for the rails and tacked them on. Notice everything is beveled for a good weld.


Then I made the drop section on the table and clamped it on and welded it all up.

That was all I had time for yesterday. I was also helping my kid pull a 460/C-6 from an 85 Ford truck. It's going in his 66 F-100. I will have to help him more today. He has two friends helpin but I'm certain none of them have pulled a motor before.
Since I won't be able to rip the Sportage motor out while they occupy the driveway I will work on the back of the frame today. Can't make any control arms until I order some DOM tube and some bushings. I might test mount the steering box just for giggles.
So I will work on the rear section and help the kids. More to come.

mymmeryloss
+1y
Lookin good sir

robzilla
+1y
Nice progress! Looking good!

vsawmike
+1y
Well today I worked on the back end. I turned the frame around on the frame table and clamped it back down. I got all the way back to where the fuel tank structure will be. Might even work on that tomorrow if I get some time at the end of my work day.
I will edit and post pics in the a.m.
On a side note I also helped my kid get the 460/C-6 out of the 85 he was taking apart. Now we can sell whatever we can and get it out of the yard. Next uip is the Sportage. more to come
I will edit and post pics in the a.m.
On a side note I also helped my kid get the 460/C-6 out of the 85 he was taking apart. Now we can sell whatever we can and get it out of the yard. Next uip is the Sportage. more to come

vsawmike
+1y
Ok, yesterday I should have worked on something for my business since I worked on the truck Saturday but I said screw it.
So I turned the frame around and started on the back end.
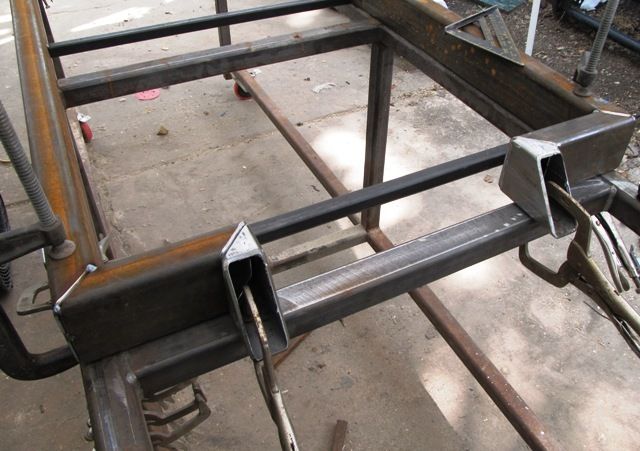
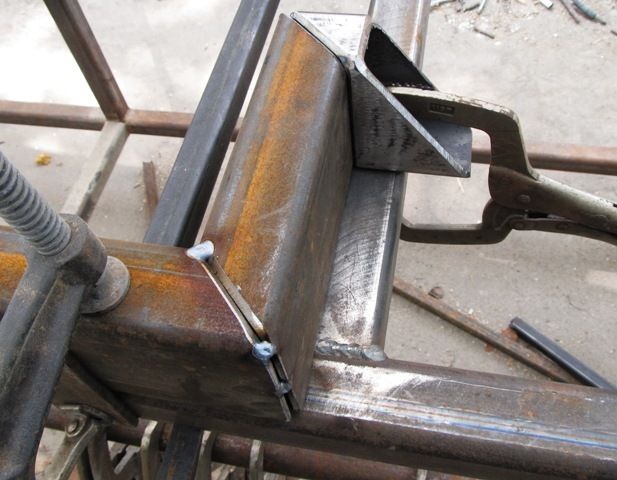
The back has the same inward angles as the front but comes in closer. I needed the back to be real narrow since the Trooper rearend will be narrowed a bit. It also has some caliper mounted E brake pieces that stick way out. I made sure there will be plenty of room for the bags if I choose to put them over the axle.
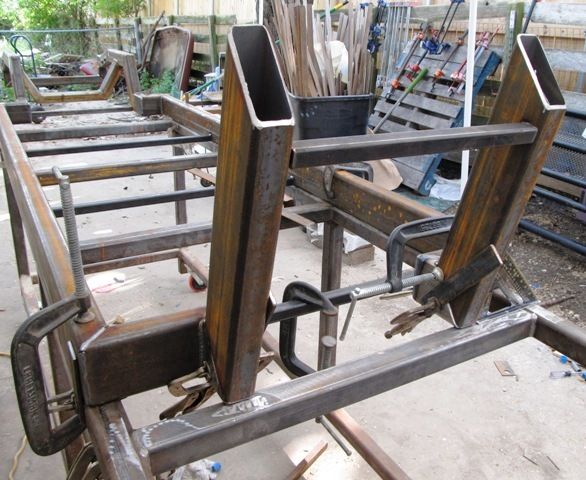
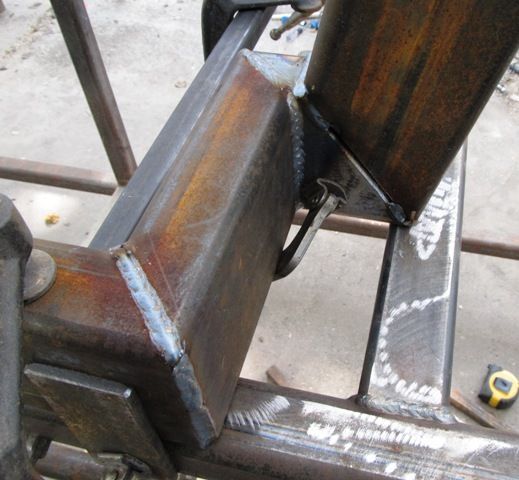
I made all these pieces then added spacers to keep them straight and square. Did not get a chance to get the last one in before dinner time.
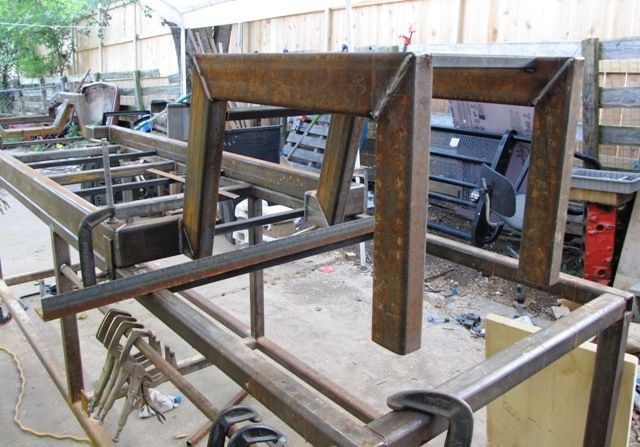
I wish I could have finished it over the weekend but all I have left of the frame itself is the rear section for the fuel tank. I might get time to start on that tonight. More to come.
So I turned the frame around and started on the back end.


The back has the same inward angles as the front but comes in closer. I needed the back to be real narrow since the Trooper rearend will be narrowed a bit. It also has some caliper mounted E brake pieces that stick way out. I made sure there will be plenty of room for the bags if I choose to put them over the axle.


I made all these pieces then added spacers to keep them straight and square. Did not get a chance to get the last one in before dinner time.

I wish I could have finished it over the weekend but all I have left of the frame itself is the rear section for the fuel tank. I might get time to start on that tonight. More to come.
Related Discussions in Mazda Projects
Thread
Posts
Last Post
852

last post by
skrapinsask +1y
150

last post by
cherokeed +1y