tubbin n dubbin
24611 views
237 replies
29 following

tubbin n dubbin

mazdamandan
+1y
yeh I got coffee on and I'm going out right now!

mazdamandan
+1y
So I got sumthin dun.
I had a lot of holes in the cab wall.
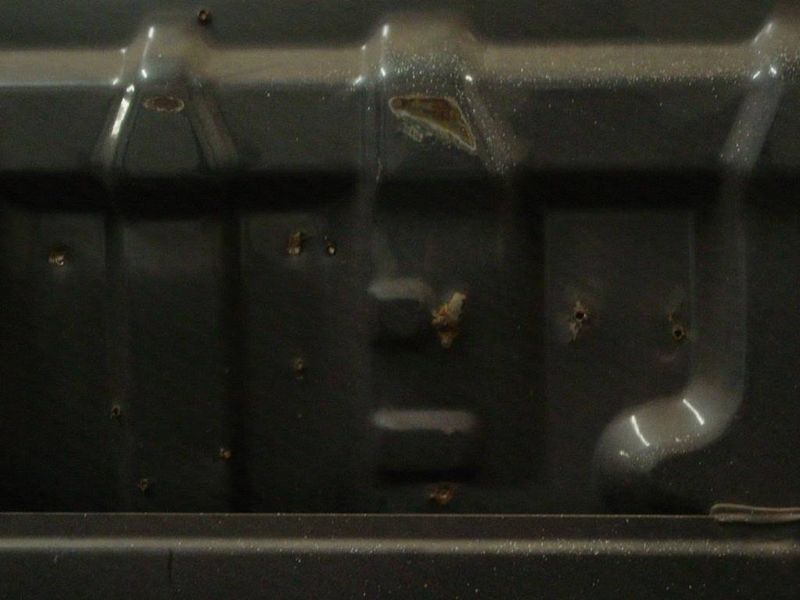
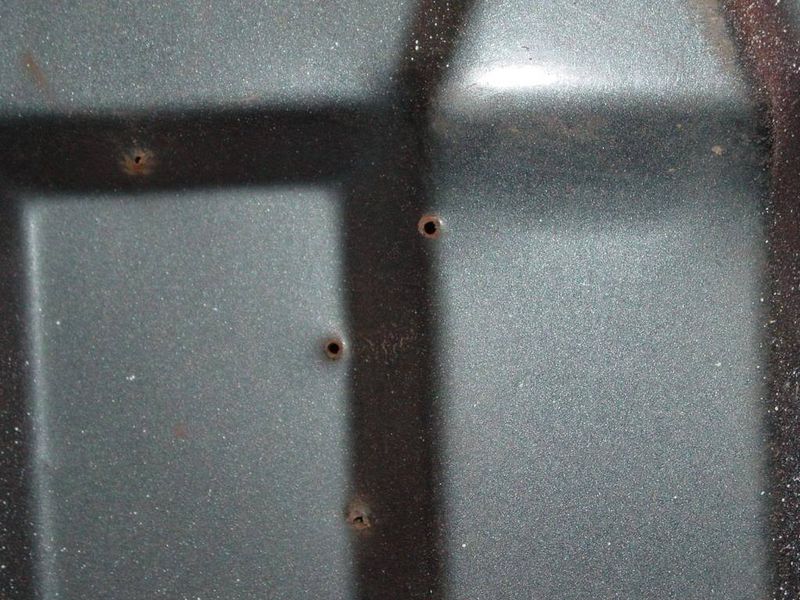
welding tech
Okay so as I promised here is a little tid bit of info about welding thin metal something a lot of peeps ask me about, this is for all who have been loyally following my build thread, and those who just found it!
I want lots of views and feedback on the build!!
And to generate interest in the project, and keep myself motivated.
I am not really interested in feedback on this tech, lol.
I am not a technically trained welder, but I have been welding for many years and have been taught by the best autobody pros in my community.
I am not gonna get into safety or machine calibration much, as I think most of you have some experience.
First thing is RTFM, read , the , flippin, manual, !! Get everything you paid for out of your machine!!
On with the show......................
prep the surface, no rust, or paint, where you expect to weld, and make sure you have a good ground.
I always use tip paste to prevent any slag or beading.
larger holes , 1/8 " or bigger, I use scrap as filler. prefferably a trianges tip like this
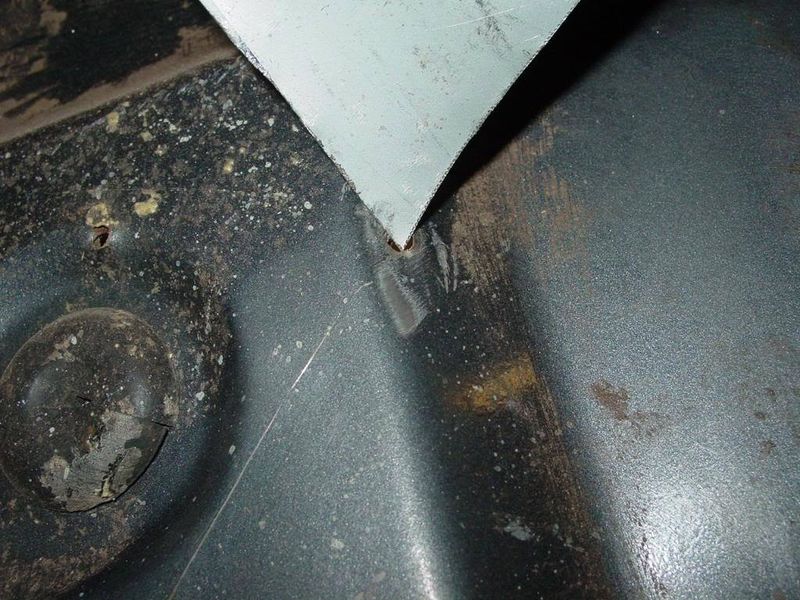
Then I lightly tack the top, using a 1 steamboat timing, lol, in a semi circle touching the wire tip to the filler piece only, while the workpiece is glowing hot I bend it till it breaks off. you should be hearing a consistent popping telling you ya got a healthy arc.
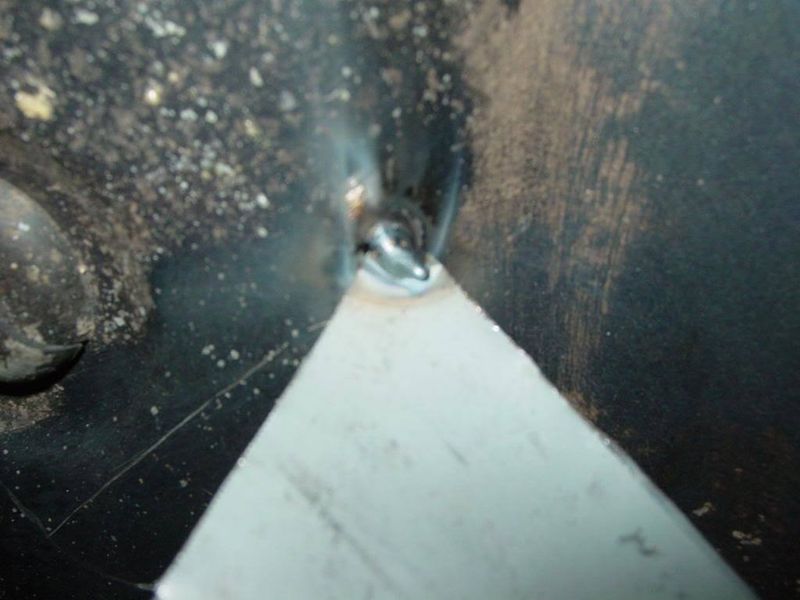
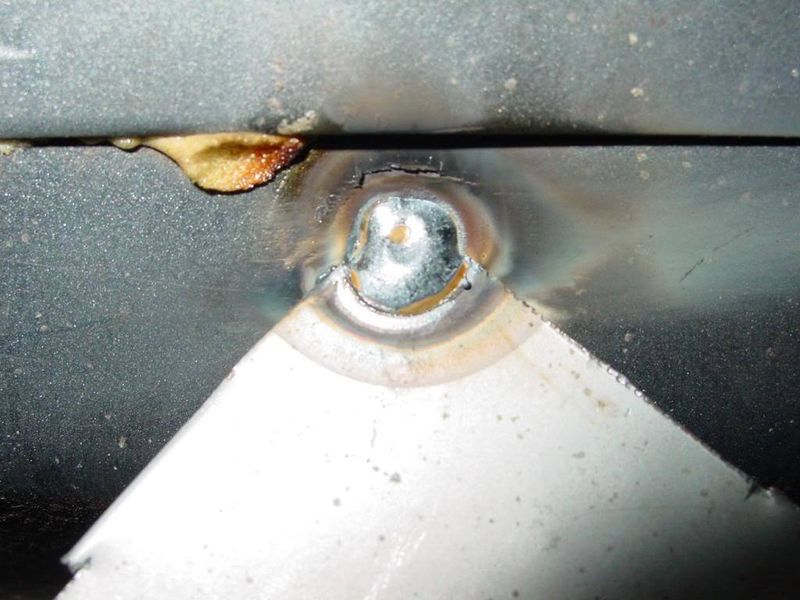
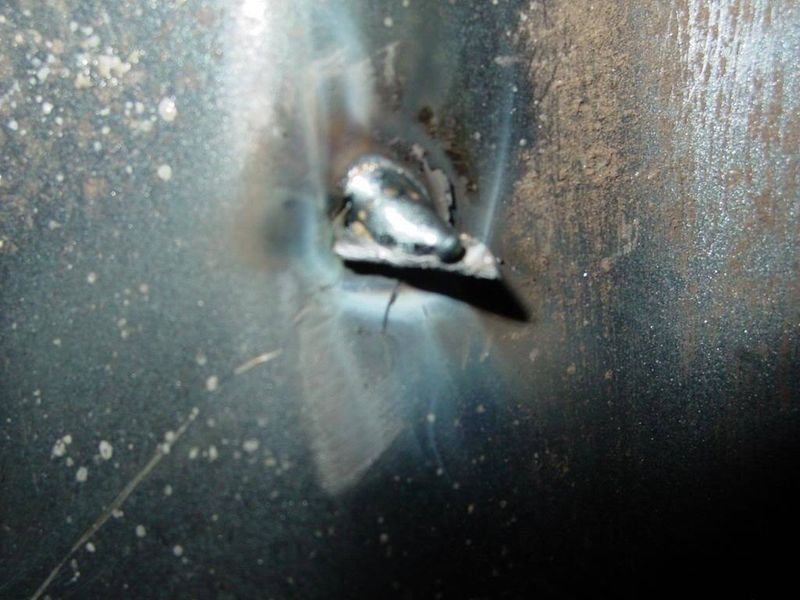
This can be ground smooth now, but you may need to tack the bottom (or other side) to make sure the repair is complete.
At this point you may have it licked, if not you may repeat depending on how much hole is left.
Or you can weld it in like this...........
Small holes, can be welded in with a rosette weld , a nice little circle done quickly filling the hole.
A trick I use that works well is backing off the distance , in other words I let about 5/8 to 1/2 of an inch of wire out of the torch, this technique gives better heat control, and allows the user to see, the hole, your torch should always be held at an angle, as if you were welding normally, this allows shielding gas to be as effective as it needs to be and gives the "bead" direction.
(other basic info on laying a good bead is available on you tube or DVD, books are not as easy to follow , this is a very visual trade, ya gotta see it to apreciate how to do it)
Wire feed welders do not work well upside down, gravity wants to drop the bead, making a bigger hole!
Start at the top of the hole, and steadily but quickly rotate around the hole, direction depends on the angle of the torch , so, if you are right handed and have no obstructions in the way most likely you will be holding the torch, steady with the left hand, with the torch pointing left.
Now pulling the bead in a clockwise motion to complete the weld with a small hole a half circle usually will be enough to fill the hole in.
Many of these welds were one quick shot.
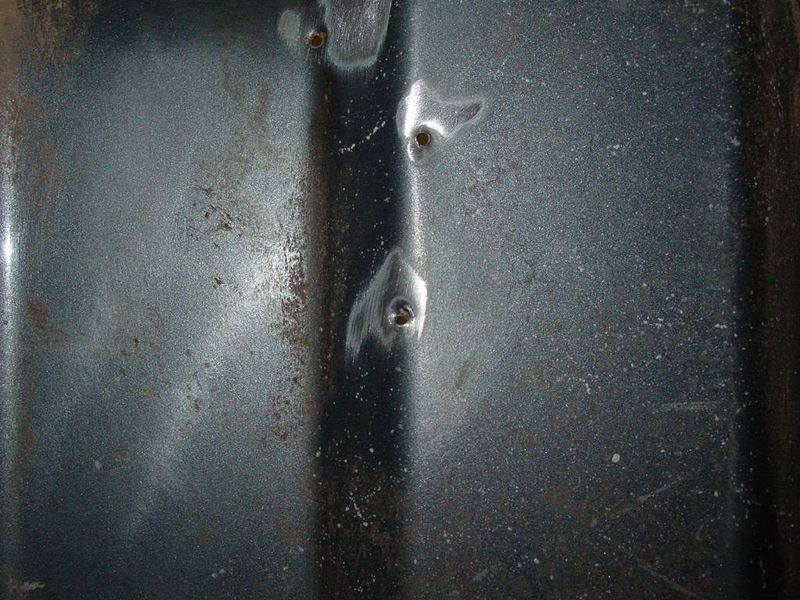
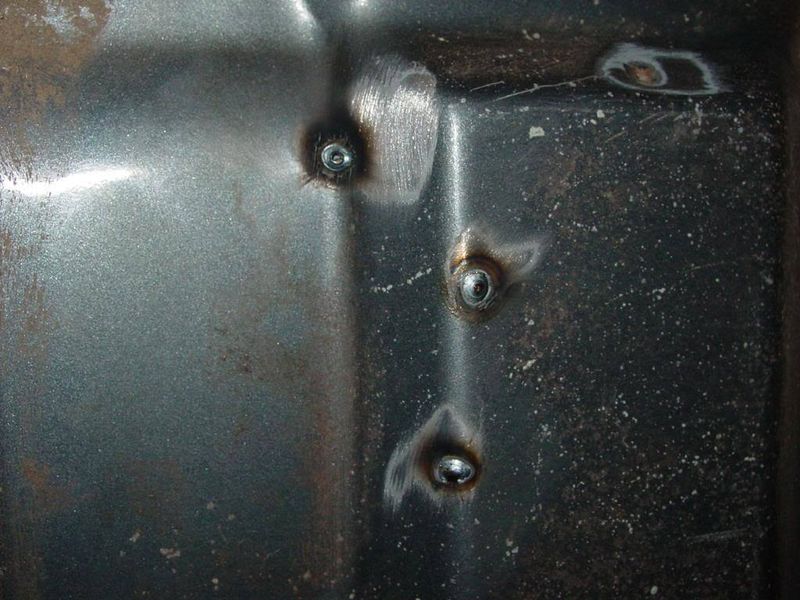
So after some good practice and time spent setting up your welders heat and wire speed try this.
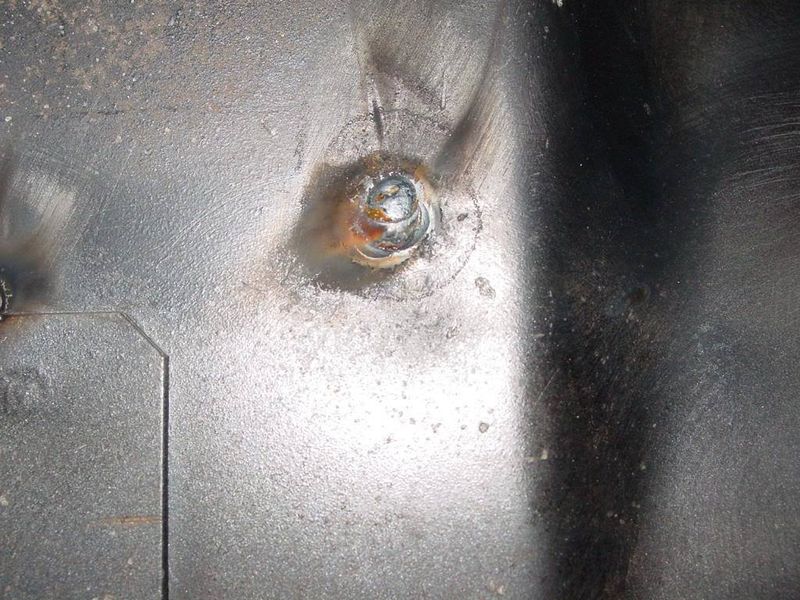
Notice here there are 2 beads one stacked atop the other, this was an oddly shaped hole of a larger 1/8 inch or bigger, but no larger than 3/16 approx. diameter.
Tack the top of the circle, in a slight and quick semicircle, let cool for a moment, then do the same on the bottom.
I suggest tacking the top first however this is not what I did in the pic, the hole was wider at the bottom so I simply reversed the procedure, to give myself something to lay atop of with the second strike.
Hope this helps somebody out there.............
Anywho, back to the build.
I had a lot of holes in the cab wall.


welding tech
Okay so as I promised here is a little tid bit of info about welding thin metal something a lot of peeps ask me about, this is for all who have been loyally following my build thread, and those who just found it!
I want lots of views and feedback on the build!!
And to generate interest in the project, and keep myself motivated.
I am not really interested in feedback on this tech, lol.
I am not a technically trained welder, but I have been welding for many years and have been taught by the best autobody pros in my community.
I am not gonna get into safety or machine calibration much, as I think most of you have some experience.
First thing is RTFM, read , the , flippin, manual, !! Get everything you paid for out of your machine!!
On with the show......................
prep the surface, no rust, or paint, where you expect to weld, and make sure you have a good ground.
I always use tip paste to prevent any slag or beading.
larger holes , 1/8 " or bigger, I use scrap as filler. prefferably a trianges tip like this

Then I lightly tack the top, using a 1 steamboat timing, lol, in a semi circle touching the wire tip to the filler piece only, while the workpiece is glowing hot I bend it till it breaks off. you should be hearing a consistent popping telling you ya got a healthy arc.


This can be ground smooth now, but you may need to tack the bottom (or other side) to make sure the repair is complete.
At this point you may have it licked, if not you may repeat depending on how much hole is left.
Or you can weld it in like this...........
Small holes, can be welded in with a rosette weld , a nice little circle done quickly filling the hole.
A trick I use that works well is backing off the distance , in other words I let about 5/8 to 1/2 of an inch of wire out of the torch, this technique gives better heat control, and allows the user to see, the hole, your torch should always be held at an angle, as if you were welding normally, this allows shielding gas to be as effective as it needs to be and gives the "bead" direction.
(other basic info on laying a good bead is available on you tube or DVD, books are not as easy to follow , this is a very visual trade, ya gotta see it to apreciate how to do it)
Wire feed welders do not work well upside down, gravity wants to drop the bead, making a bigger hole!
Start at the top of the hole, and steadily but quickly rotate around the hole, direction depends on the angle of the torch , so, if you are right handed and have no obstructions in the way most likely you will be holding the torch, steady with the left hand, with the torch pointing left.
Now pulling the bead in a clockwise motion to complete the weld with a small hole a half circle usually will be enough to fill the hole in.
Many of these welds were one quick shot.


So after some good practice and time spent setting up your welders heat and wire speed try this.

Notice here there are 2 beads one stacked atop the other, this was an oddly shaped hole of a larger 1/8 inch or bigger, but no larger than 3/16 approx. diameter.
Tack the top of the circle, in a slight and quick semicircle, let cool for a moment, then do the same on the bottom.
I suggest tacking the top first however this is not what I did in the pic, the hole was wider at the bottom so I simply reversed the procedure, to give myself something to lay atop of with the second strike.
Hope this helps somebody out there.............
Anywho, back to the build.

mazdaman82
+1y
dude that was great...

oldspice213
+1y
yea good details

paparoach1983
+1y
helped me out abit

mazdamandan
+1y
good stuff,
thanx guys,
I will be going away for a little over a month for work so I wont be able to get much progress done, unless I come home on the weekends, and have any energy left, lol
I will bring my laptop with me so I will be on the forum a lot. Between homework and studying, that is.....
thanx guys,
I will be going away for a little over a month for work so I wont be able to get much progress done, unless I come home on the weekends, and have any energy left, lol
I will bring my laptop with me so I will be on the forum a lot. Between homework and studying, that is.....

mazdamandan
+1y
oh dang its good to be home
I convinced the company to send me home early, so I m back after this weekend I gotta go away again but I will be back, I am bumping this for those who have pMd questions about my set up
the next steps are to mock up all pedals and controls etc, then pull motor and tranny, the snow is almost gone so now I can roll out the chassis for final sandblasting and prep before I set up the front end, reconfig the steering Maybe a little Z, balance the camber and set up the front end for good.
c ya soon

immortal1 (linn)
+1y
Great bit of welding advice. Somehow I missed this one earlier but am happy I did not miss it completely. Even taught an old fart like me a few new tricks. As always keep up the excellent work.

mazdamandan
+1y
thanks linn,
I cant wait to start the airbrushing aspect of the build
although I have gone back and forth on a theme,
At first it was gonna be a dark heavy metal theme, with lots of steel sculpture, "metal art"
Then it was gonna be just clean and simple,
Then it was gonna be a busy canvas to advertise my business, a little of everything, flames water, smoke all the different effects I could fit inside and out etc.
Then I was thinkin bout a more personal theme something that represents who I am.
I found some info on the family crest, and that idea stuck for several months, then my Grandpa died, quickly followed by my uncle, and I lost my dad in 98.
At my Grandpas funeral my cousin showed me his new tattoo , it was our crest.
I am not into tatts but I am into art and respect its various forms, I will prolly modernize the crest a bit, and paint it onto the top o the box, as it is smoothed out on the top and a perfect canvas to use.
This may cost me the mag covers but it'll be worth it to me.
Cover has always been a dream of mine.
It may never happen just cuz I am so far away anyways.
I have never even been to a minitruck featured car show, lol

mazdamandan
+1y
today I worked off most of the paint on the box, gotta take the whole thing down to the steel, the previous owner sprayed the wholeoutside of the box in rubberized rocker guard, so its a lot of work to clean up and as I open it up I find shitty repairs,
But I sorta expect those kinds o things from experience, lol
I will post a pic once I have some real progress tubbin the box an all
But I sorta expect those kinds o things from experience, lol
I will post a pic once I have some real progress tubbin the box an all
Related Discussions in Mazda Lowering Static
Thread
Posts
Last Post
12
L
last post by
Low5.0mazda +1y
