
Zanzer's 1986 B2000

mercilessltd
+1y
52 Ford 8N? My grandfather still uses his (the exact same model) to this day.

zanzer
+1y
Yep! It's a 52 Redbelly I think most of them are still running LOL. Ford built over 540,000 8N's from 1947 to 1952 and it's still the top selling tractor of all time in the US.
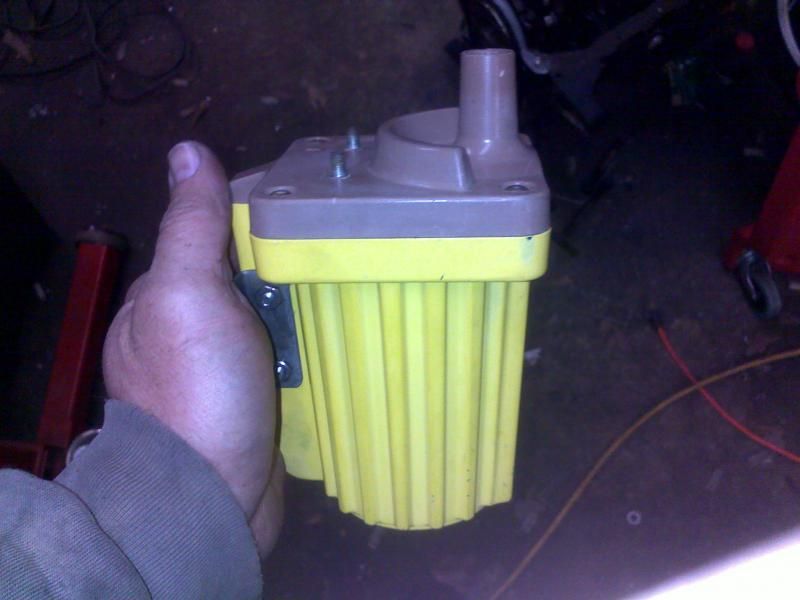
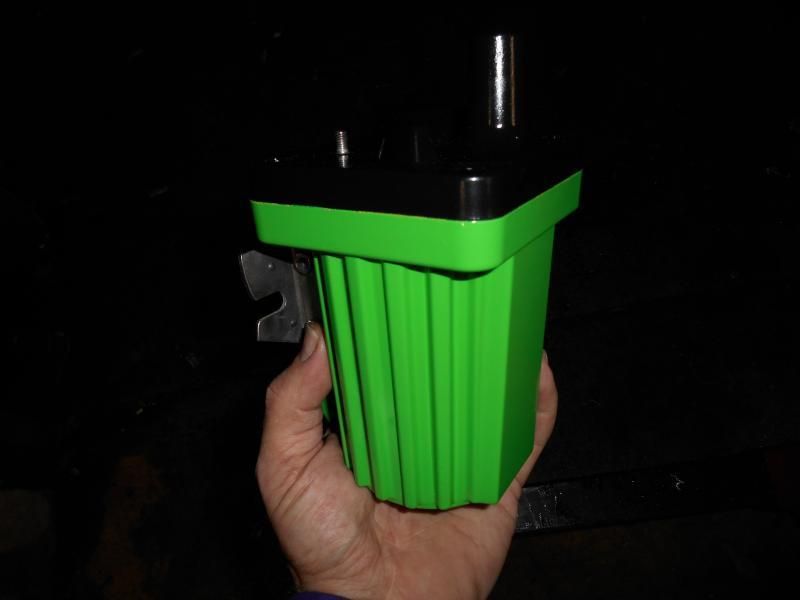
I finally got the coil back together and installed last night
That paint usually comes out a little darker and more dayglow. I guess spraying it over the yellow washed it out a little and I probably should have laid down a prime coat first. But it's just a coil and only temporary so good enough for now
Before:
After:
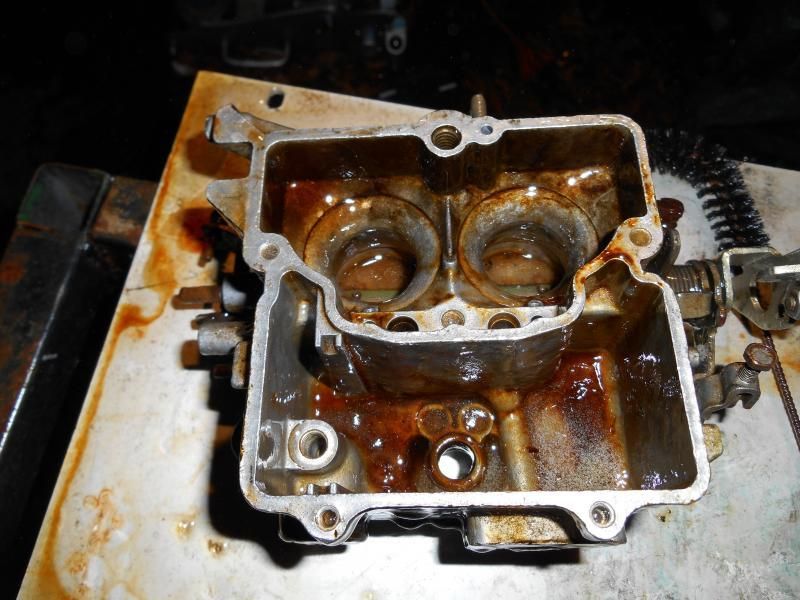
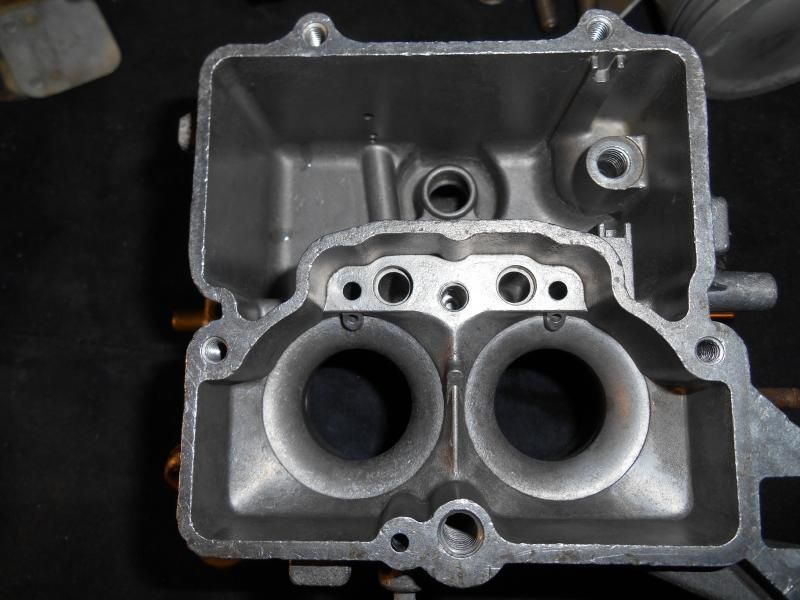
I also started working on this
I finally got the coil back together and installed last night
That paint usually comes out a little darker and more dayglow. I guess spraying it over the yellow washed it out a little and I probably should have laid down a prime coat first. But it's just a coil and only temporary so good enough for now
Before:

After:

I also started working on this


alittlelow
+1y
dude i see that u took tha heat shield off ur stock headers and i know they will probably get a little hot but damn that looks so much better, so what did u do with those other pipes coming from tha bottom of tha headers

zanzer
+1y
Ya, I decided to leave the heat shield off because I used the Mazda 626/MX-6 exhaust manifold gaskets ($6) instead of the B2000 gasket ($20). I have a friend who's running the Pacesetter header without a heat shield with no issues so I thought I'd give it a try. So far so good and I've put a couple of K on the truck since loosing it.
As far as the lines, I made a blockoff plate and ditched them. The lines run down and bolt to a flange beside the CAT exit end. I cut a steel plate the size of the flange and used the steel gasket as a template for bolt spacing. I then installed the blockoff plate, the gasket, and painted it all black so it matches. It looked good enough to pass visual inspection
As far as the lines, I made a blockoff plate and ditched them. The lines run down and bolt to a flange beside the CAT exit end. I cut a steel plate the size of the flange and used the steel gasket as a template for bolt spacing. I then installed the blockoff plate, the gasket, and painted it all black so it matches. It looked good enough to pass visual inspection
S
safooma
+1y
Great thread Zanzer.
Let me start by saying this is my first post(applause).....
I just picked up a standard cab 1986 b2000 5spd as a first car for my 15 year old son. We picked it up from a family member for $900 and it does run but needs some work. It was purchased knowing that we would need to do some work to it and I thought it would be a great opportunity for my son to learn the how's and what's of car wrenching basics.
Myself, I am a computer guy, but I grew up poor and always had to work on my own junk to keep it running. I now have a old boat with a volvo b20, 5 quads(4 of which are carbed) and a 74 chevy, in addition to my modern daily drivers(09 vibe/corolla and a 98 integra), so I do my share of wrenching and often. I picked a 4 cylinder japanese carbed truck on purpose, believe it or not, partly because they are great little trucks, and partly because I knew it would need some basic knowledge to get it working properly and to keep it running.
The patient is a one owner truck and completely stock, having 218,000 miles. We drove it 200 miles so far so it does run, but it has some issues. Here's the list so far:
Fuel gauge not working
Temp gauge not working
Radiator is shot and has a small leak--bad combo with the in-op temp gauge
Back brakes are used up
Smokes like a stove at startup--gotta be valve stem seals
Oil leaks
Windshield wipers not working(needs the plastic piece that holds the tranny part to the motor
Sometimes dies on inclines, then hard to restart(have to give throttle to get it started).
So far I have been able to fix the oil leak--after cleaning the engine it was apparent that the majority of the oil was coming from the valve cover. Turns out that NONE of the bolts were tight. Tightened all of the bolts and now its much better. We also changed the oil and filter and in the process discovered that according to the date on sharpied on the filter, that the oil was last changed 11,000 miles ago. Ugh.
So here's my questions:
You stated earlier you were going to replace the valve stem seals--did you do this? If so, did it fix the smoking at start up issue and how difficult of a job was it?
In all of your junk yard excursions, have you ever seen the plastic part that connects the wiper motor to the wiper tranny intact? Do you know if this part interchanges with any other models? We live in Oregon, some windshield wipers are a priority
Eventually I would like to swap out the carb with a weber( WK675 - 32/36 DGEV WEBER). If I do this, do I need to change out the exhaust manifold too? I notice alot of interaction between the carb and the exhaust manifold-emissions I presume. Can this crap just be deleted?
I have a haynes manual on the way, but any help/advice/encouragement would be greatly appreciated!
Thanks!

zanzer
+1y
Welcome Safooma!
Your truck sounds A LOT like mine when I first got it...right down to the $900 price tag!
I did do the valve stem seals myself. I'd say on a scale of 1-10 the B's are about a 5. I've done easier ones but I've also done MUCH harder ones. The worst (mostly annoying) part is having to remove the rocker rails, which means you also have to remove the front cover, timing belt, and upper housing. But, this would also be a great time to install a new timing belt and camshaft seal. The Haynes manual should be able to walk you through all of this no problem. If you hit any obstacles along the way there are plenty of people on here that can help guide you through any issues.
A couple of tips: Be sure to double check your mechanical timing when you put everything back together. 1 tooth off or 180

zanzer
+1y
Everyone ready for another round of Picapalooza?
Even with all the other ongoing projects (and a newly found health issue...woo hoo), I'm still slowly pursuing the Motorcraft 2150 swap. I knew I had one but I couldn't remember exactly where. I tore the shop apart looking for it with no luck. Then I thought to myself; "I wonder if I threw it away?". Sometimes I get tired of dealing with the mess and snap..at which point things go into the scrap barrels that maybe shouldn't LOL. So I went out to the scrap barrel, dug my way down to the bottom,....and sure enough, there was the 2150..where it had been for about the last 3 years.
I'm currently searching for a Holley 2300 that may have suffered the same fate
And here's the test subject in all it's beauty. I guess it looks pretty good considering it's been stored outside at the bottom of a barrel for a few years.
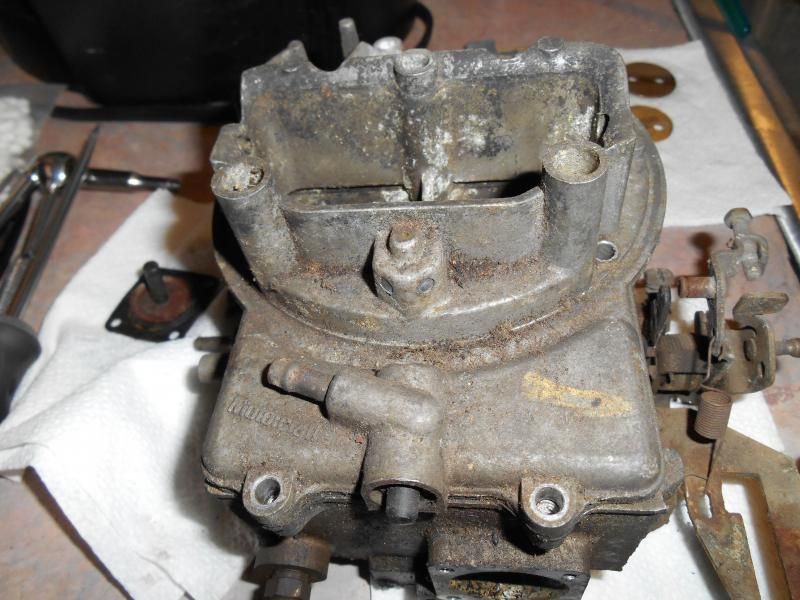
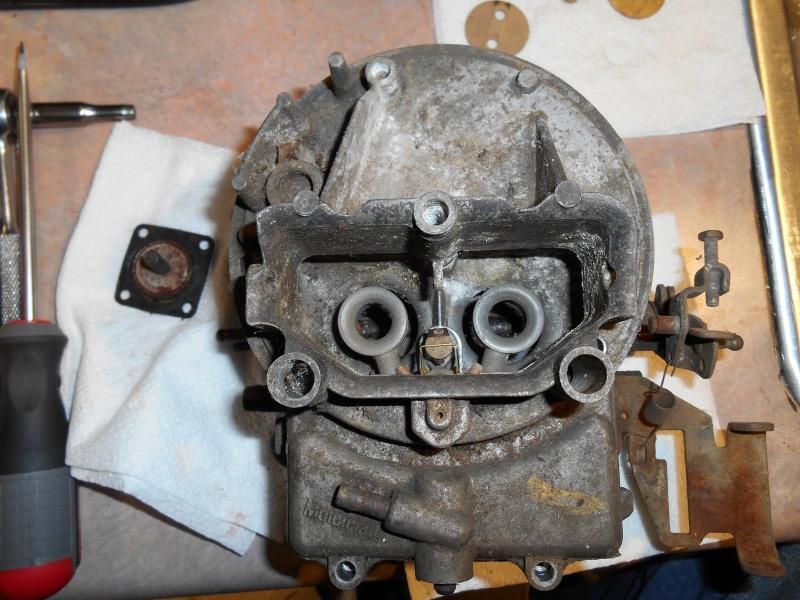
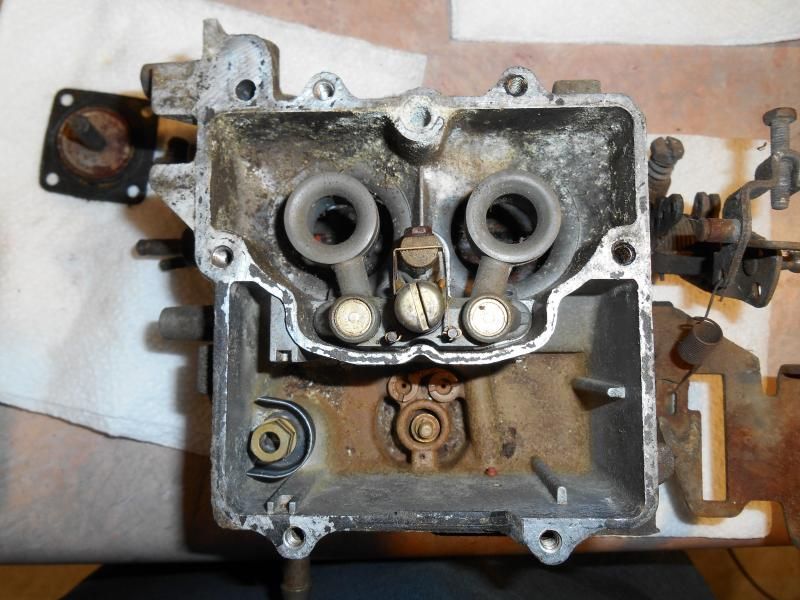
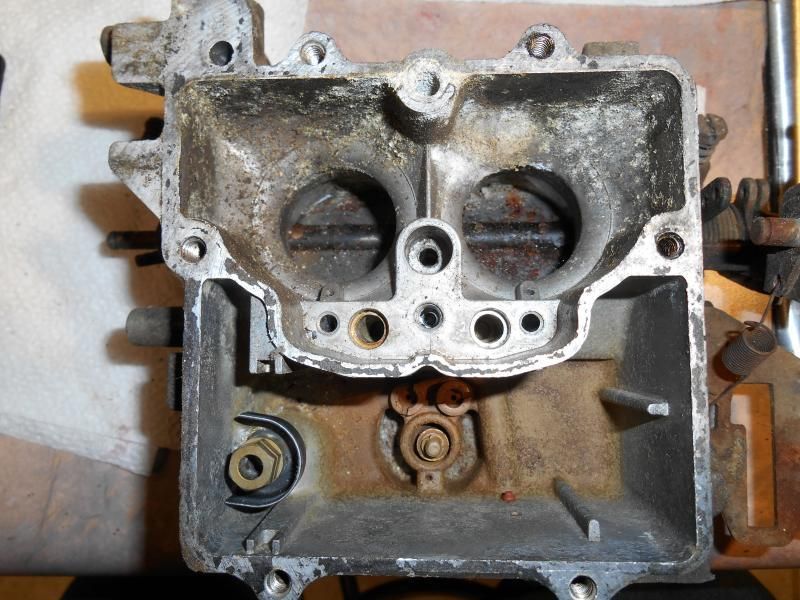
I gave it a good cleaning with Power Dissolver but that didn't really help much. It works great for dirt, grease, and grime....but not so much with oxidation. So I knew I was going to have to do this one the hard way and with some more aggressive chemicals. I wasn't originally going to give it the full "treatment" (cleaning, deflashing, polishing, etc) but once I got to working on it I realized that it really needed some TLC....plus I have a problem with leaving "well enough" alone.
First I had to do battle with my old arch nemesis casting flash. I REALLY HATE casting flash on anything. It looks terrible and it always has a knack for biting you when trying to work in tight areas. It's almost as annoying as Photobucket
I started with the top cover and removed all the flash from the outside areas.
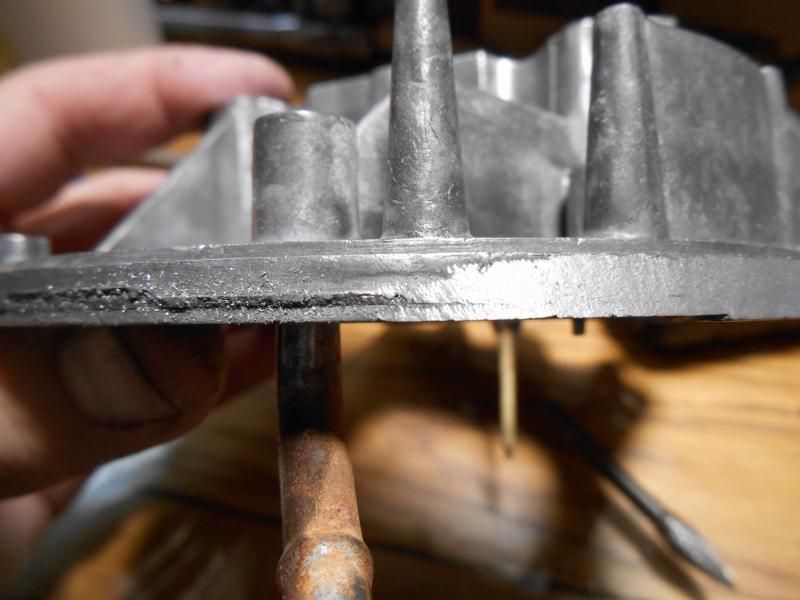
Then I moved on to a more important spot, the air horn. As you can see, mass production doesn't make for smooth finishes. The flash and high spots are easy, but voids just have to be glossed over or you end up digging a hole while trying to "chase" them out.
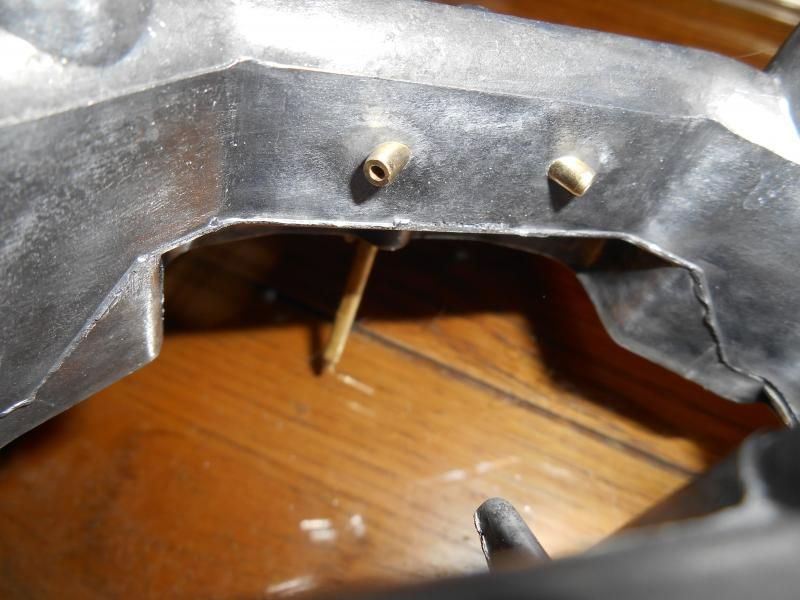
After the first pass with carbide bits.
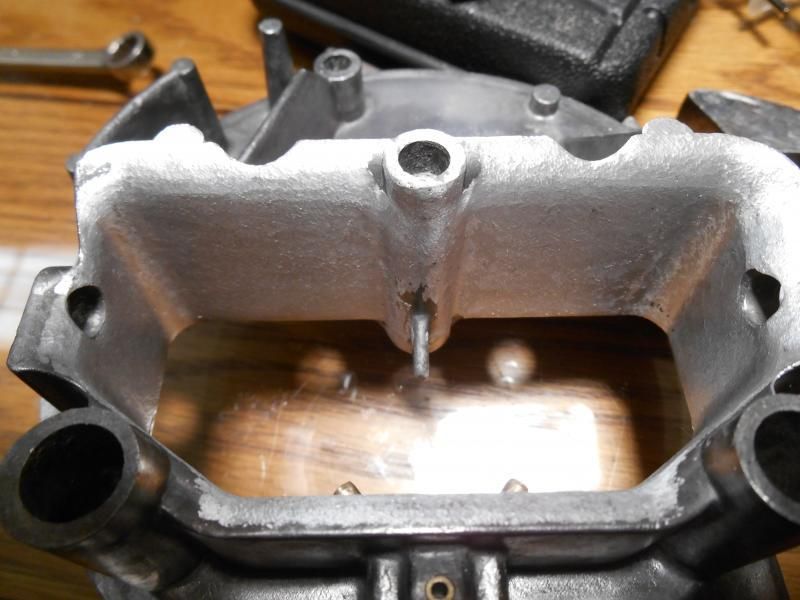
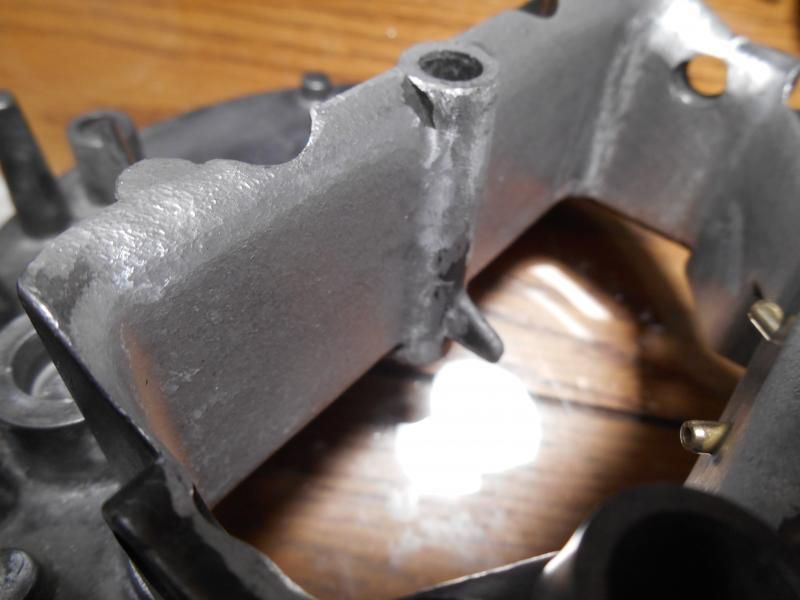
Second pass with 220 grit.
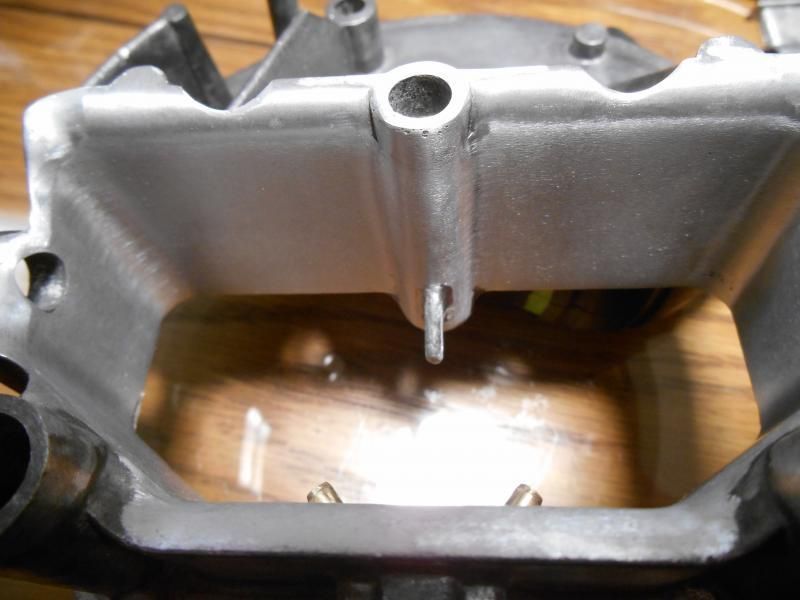
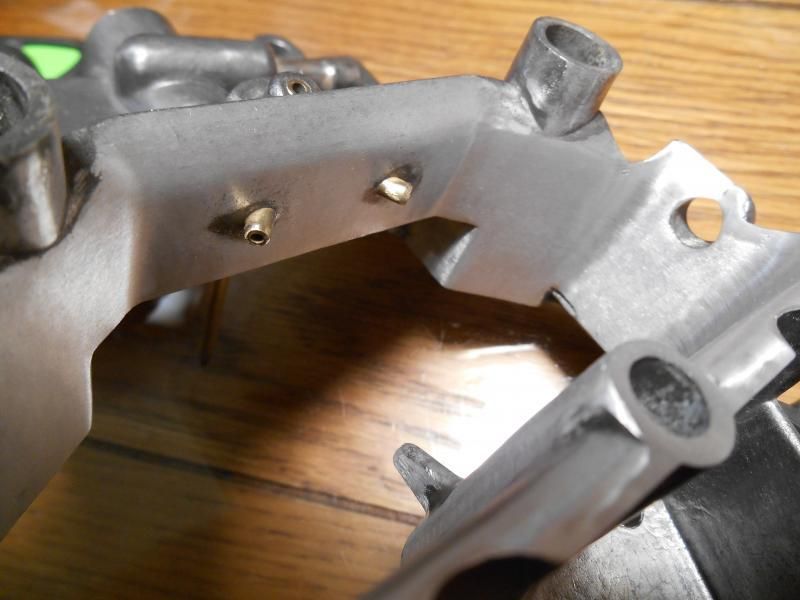
3rd pass with 320 grit.
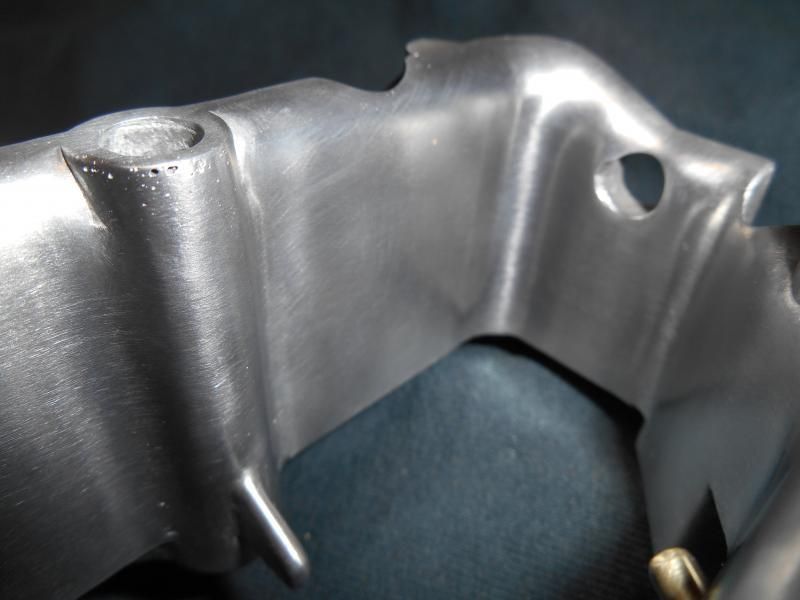
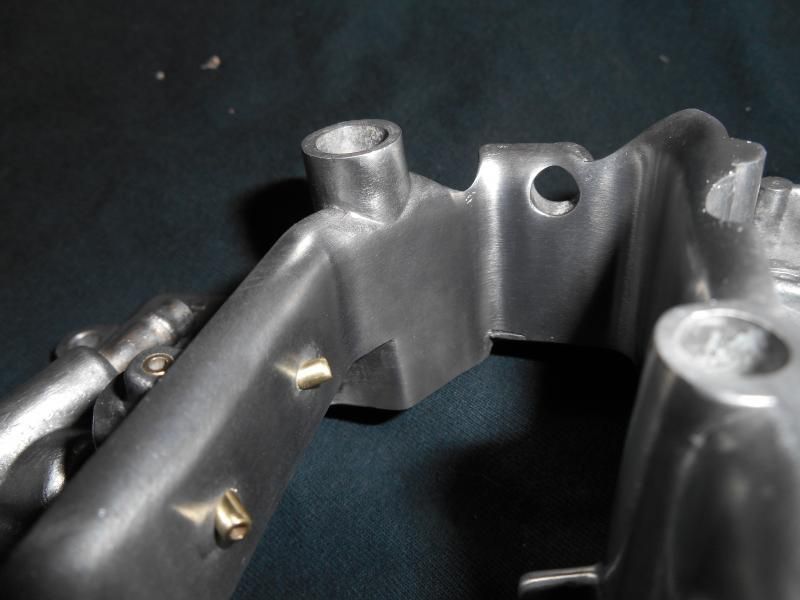
4th pass with Scotchbrite roll and some contrast for reflection
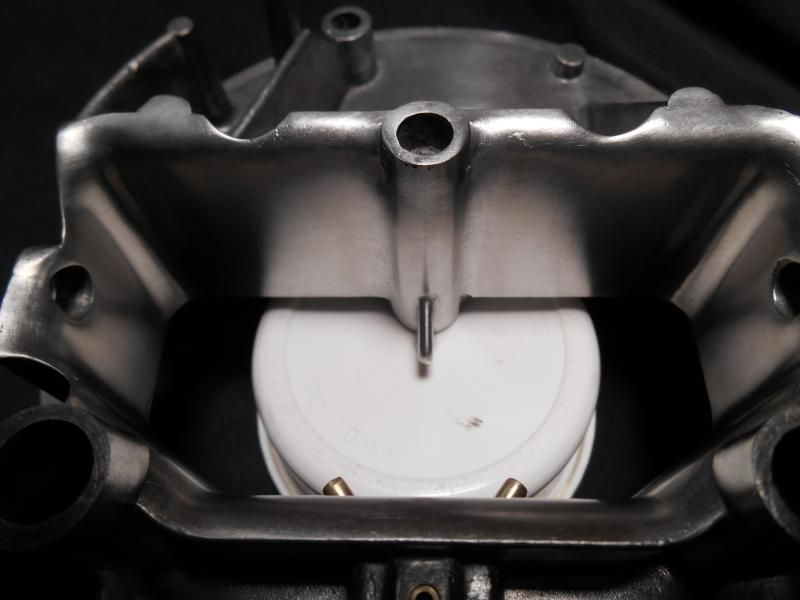
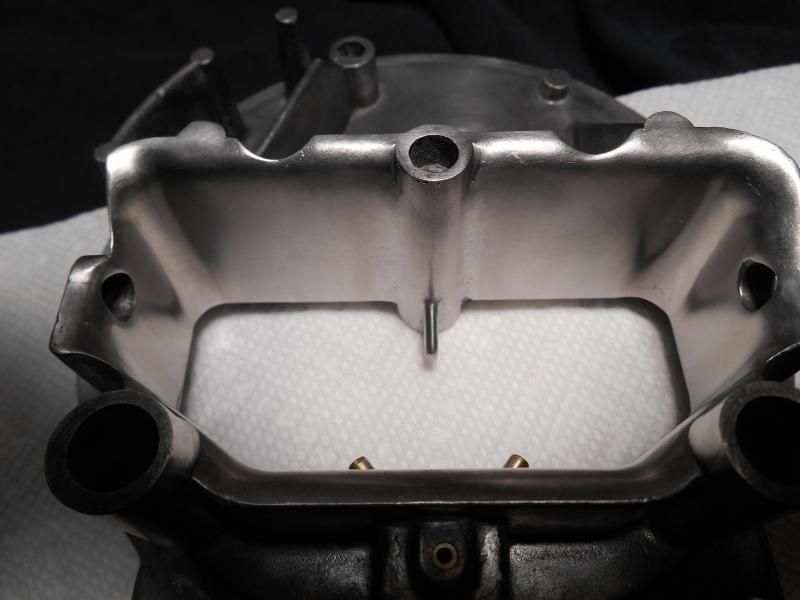
I could have left it like this, but I like to do my stuff where you have to look closely for the mod. I like for people to look at my stuff and wonder if it's been modified or if it came from the factory that way.
So with that in mind I dropped the top plate into some aluminum cleaner I use that contains HF acid. You can buy it off the shelf but it's kind of nasty stuff so you definitely want to wear the proper PPE when handling it. I like it because it cleans great and balances the color.
After about 5 minutes it comes out like this.
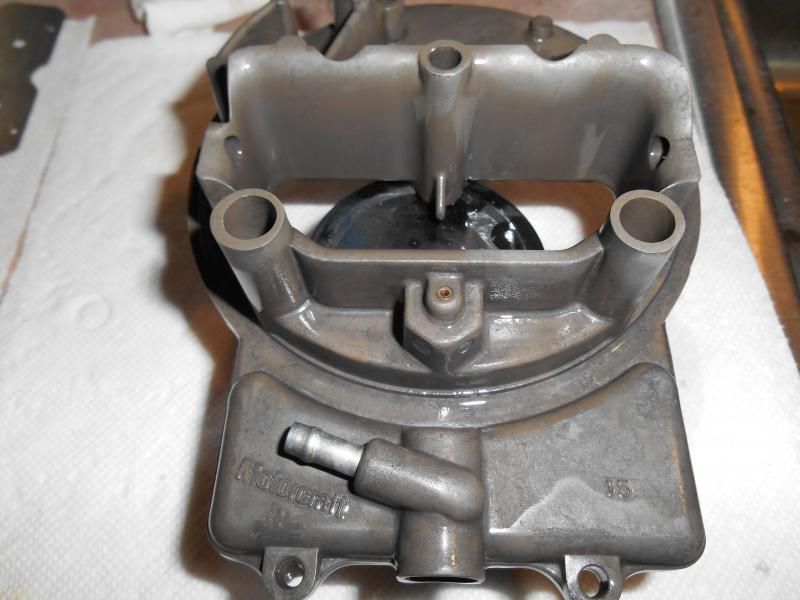
Then after it dries you get this.
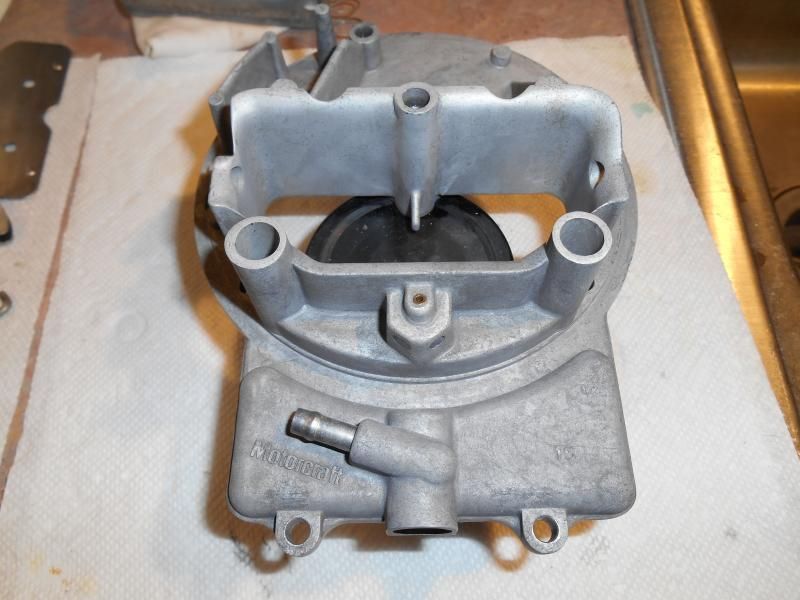
You could leave it like the above pics if you wanted the ROS (rebuilt old stock) look [hint hint class racing guys ] but I knew if I did a quick once over with a small brush I could really make it shine.
All brushed up and shiny
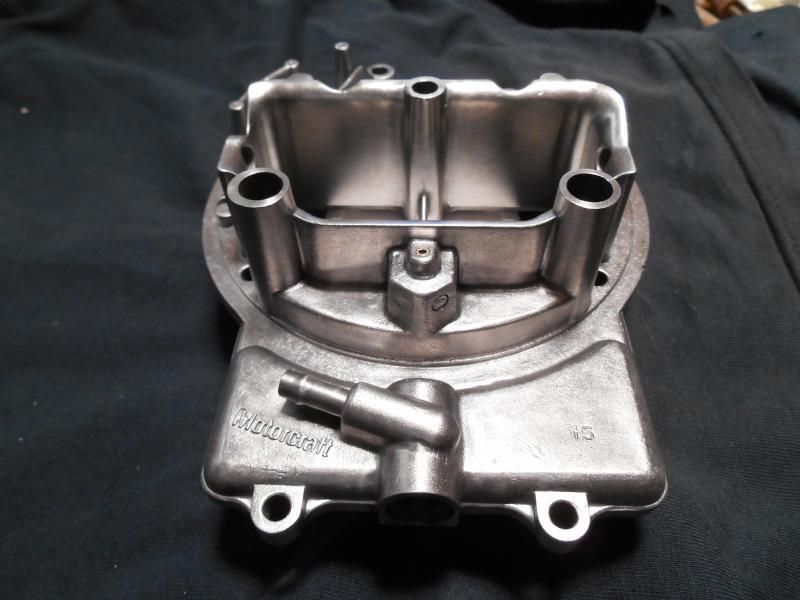
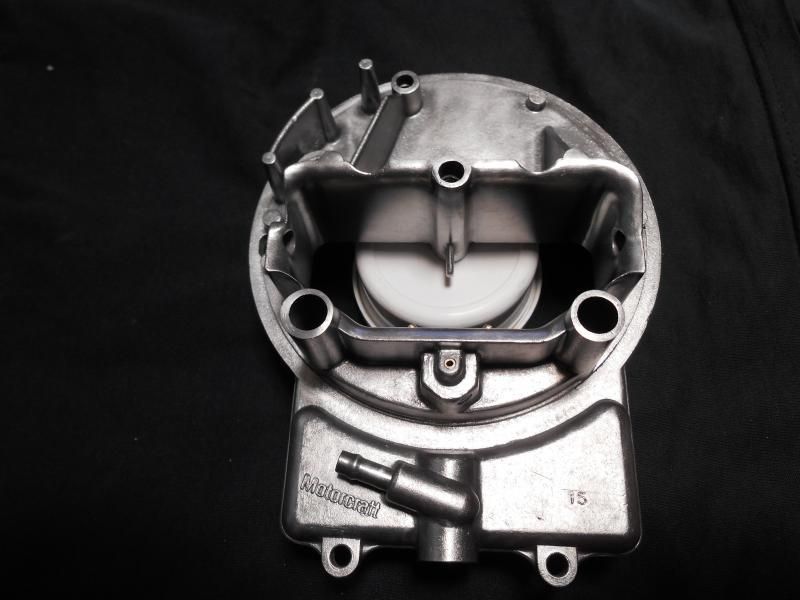
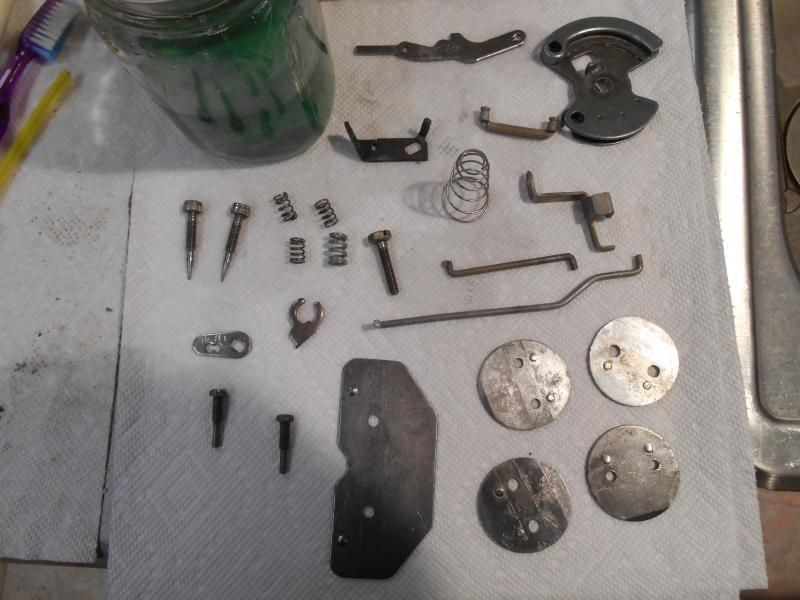
Here's a shot of some of the linkages and small parts after coming out of the rust dissolver bath. Stuff that needs a little extra attention goes into the jar of green stuff on the left
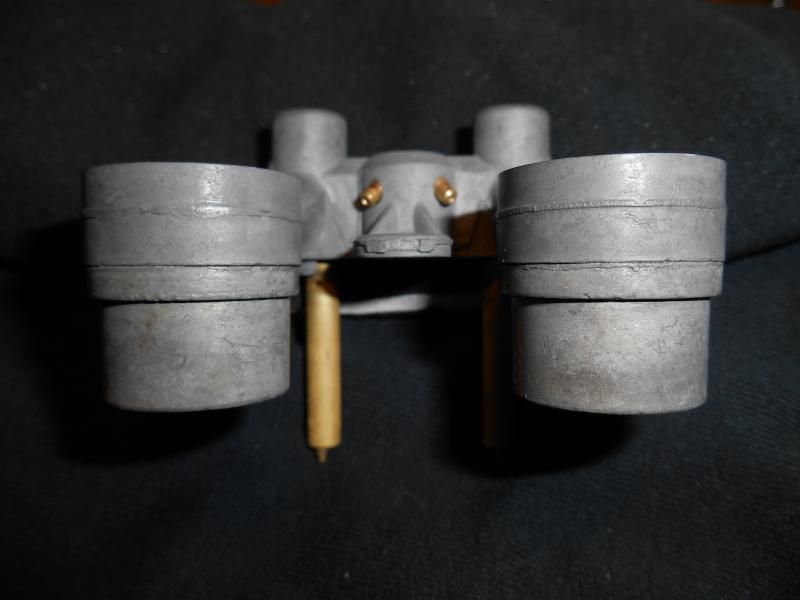
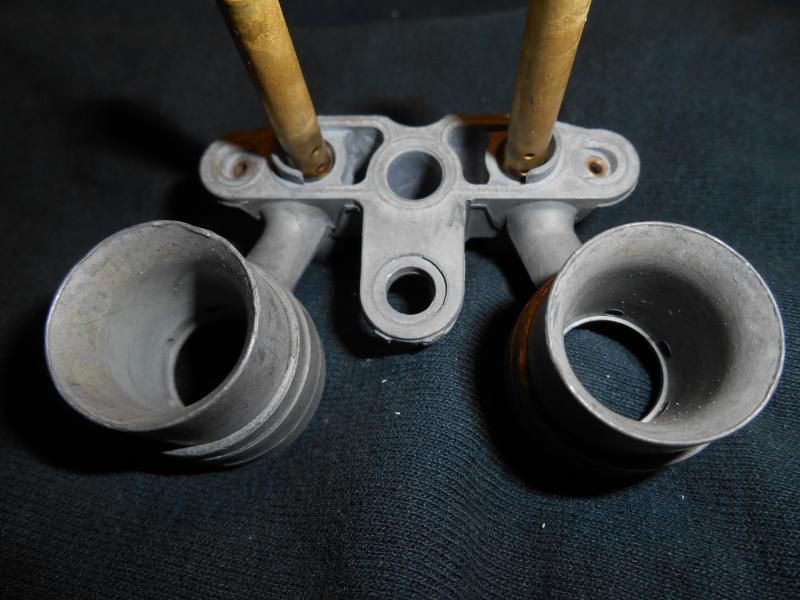
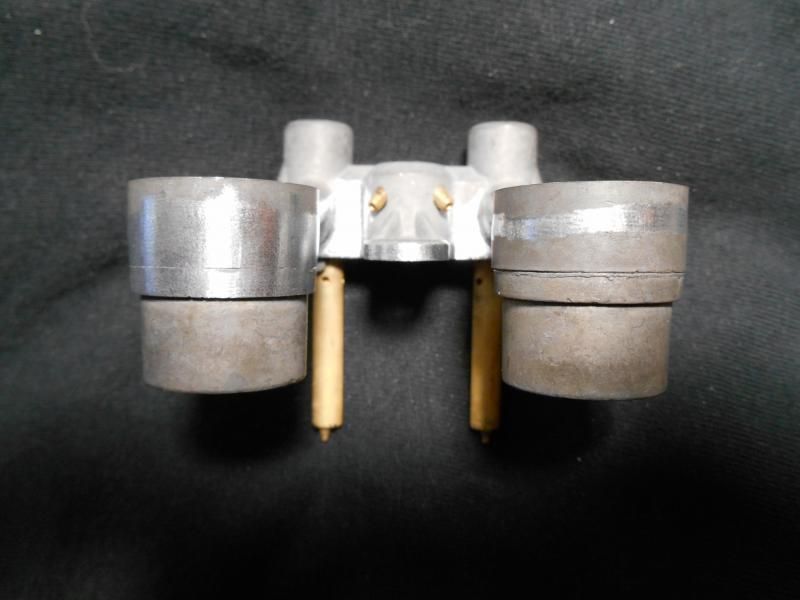
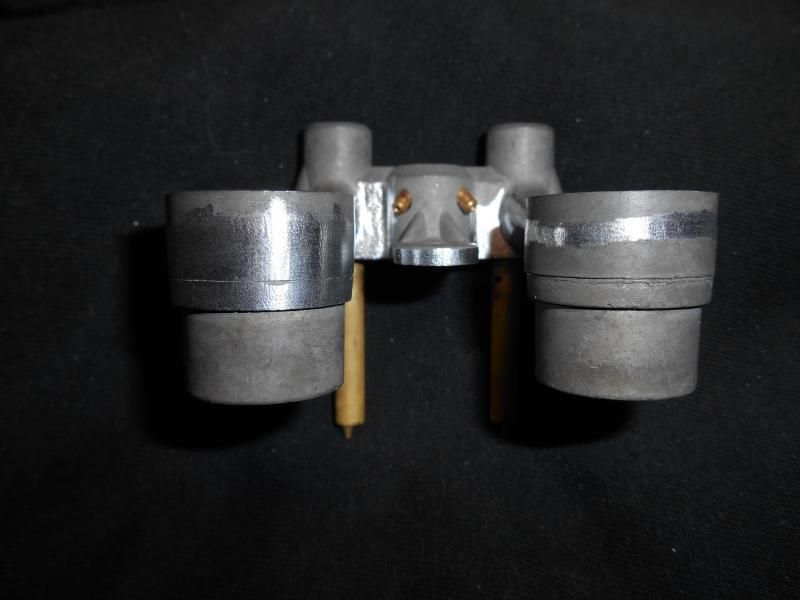
After I finished the top I started on the boosters. This is pretty much where I am now.
Even with all the other ongoing projects (and a newly found health issue...woo hoo), I'm still slowly pursuing the Motorcraft 2150 swap. I knew I had one but I couldn't remember exactly where. I tore the shop apart looking for it with no luck. Then I thought to myself; "I wonder if I threw it away?". Sometimes I get tired of dealing with the mess and snap..at which point things go into the scrap barrels that maybe shouldn't LOL. So I went out to the scrap barrel, dug my way down to the bottom,....and sure enough, there was the 2150..where it had been for about the last 3 years.
I'm currently searching for a Holley 2300 that may have suffered the same fate
And here's the test subject in all it's beauty. I guess it looks pretty good considering it's been stored outside at the bottom of a barrel for a few years.


I gave it a good cleaning with Power Dissolver but that didn't really help much. It works great for dirt, grease, and grime....but not so much with oxidation. So I knew I was going to have to do this one the hard way and with some more aggressive chemicals. I wasn't originally going to give it the full "treatment" (cleaning, deflashing, polishing, etc) but once I got to working on it I realized that it really needed some TLC....plus I have a problem with leaving "well enough" alone.
First I had to do battle with my old arch nemesis casting flash. I REALLY HATE casting flash on anything. It looks terrible and it always has a knack for biting you when trying to work in tight areas. It's almost as annoying as Photobucket
I started with the top cover and removed all the flash from the outside areas.

Then I moved on to a more important spot, the air horn. As you can see, mass production doesn't make for smooth finishes. The flash and high spots are easy, but voids just have to be glossed over or you end up digging a hole while trying to "chase" them out.

After the first pass with carbide bits.


Second pass with 220 grit.


3rd pass with 320 grit.


4th pass with Scotchbrite roll and some contrast for reflection


I could have left it like this, but I like to do my stuff where you have to look closely for the mod. I like for people to look at my stuff and wonder if it's been modified or if it came from the factory that way.
So with that in mind I dropped the top plate into some aluminum cleaner I use that contains HF acid. You can buy it off the shelf but it's kind of nasty stuff so you definitely want to wear the proper PPE when handling it. I like it because it cleans great and balances the color.
After about 5 minutes it comes out like this.

Then after it dries you get this.

You could leave it like the above pics if you wanted the ROS (rebuilt old stock) look [hint hint class racing guys ] but I knew if I did a quick once over with a small brush I could really make it shine.
All brushed up and shiny


Here's a shot of some of the linkages and small parts after coming out of the rust dissolver bath. Stuff that needs a little extra attention goes into the jar of green stuff on the left

After I finished the top I started on the boosters. This is pretty much where I am now.


mercilessltd
+1y
I wish I had the patience for all that. I typically just degrease and done. Looks so nice!

mymmeryloss
+1y
Wow thats amazing!

zanzer
+1y
Thanks guy It's encouragement from members like you that keep me going And at my current rate of progress I should be done with it in 6-8 months LOL
I've got too many other projects going on for ppl who want to give me money so my personal stuff is always last on the list. Luckily I'm an extremely patient person, so I don't like to rush through anything and prefer to do things the way I want them first time.
@ Merciless - I usually do just clean and rebuild them, but I've heard the 2150 responds well to upgrades and wanted to see for myself on this one. After giving this particular carb a good cleaning I found that there was definitively room for improvement. Some due to the carb's condition and some due to manufacturing flaws.
Hopefully my next update will be pics of the new (to me) wheels and tires I just scored for the old girl
Related Discussions in Mazda Projects
Thread
Posts
Last Post
852

last post by
skrapinsask +1y
150

last post by
cherokeed +1y