K
SFBD square with a Cummins and custom chassis
BB
big bear
+1y
Any word on damage? I. Hope it ok
BD
bagged dually
+1y
Ya sorry for the delay. Been super busy this weekend hanging out with the family.
I did get all of the huge ice chunks removed and got the canopy tore down off of the truck and thrown away. It looks like the hood took the most of the impact. Which is actually good news since it was junk anyway. I had just taken my left front fender off to relocate my fuse box wiring or it would have gotten dented up as well so I got luck on that. Other than the hood the only damage I can see is the metal frame of the canopy scuffed up one of the cab lights pretty good and a small dent in the roof. I think I can hit the light with some 2000 grit and buff it out. So all in all I think I got pretty lucky. I think it was just a wake up call to hurry up and get it moved into the shop.
I did get all of the huge ice chunks removed and got the canopy tore down off of the truck and thrown away. It looks like the hood took the most of the impact. Which is actually good news since it was junk anyway. I had just taken my left front fender off to relocate my fuse box wiring or it would have gotten dented up as well so I got luck on that. Other than the hood the only damage I can see is the metal frame of the canopy scuffed up one of the cab lights pretty good and a small dent in the roof. I think I can hit the light with some 2000 grit and buff it out. So all in all I think I got pretty lucky. I think it was just a wake up call to hurry up and get it moved into the shop.
BD
bagged dually
+1y
My truck is finally scheduled to be moved on the 9th so I've been rounding up parts and anything else I might need to get the chassis finished up as quick as we can.
I made it out to meet up with Kyle at Guilty By Design today. I finally got some flanges picked up I had asked him to make me a couple weeks back. They'll make the center section of my 2" square stock trans X member bolt in so I can take it out if need be.
If anyone ever needs any of these flanges Kyle has extras in stock and is the man when it comes to getting parts or brackets cut. Not sure if their on the Guilty By Design website or not but you can always drop him a line.
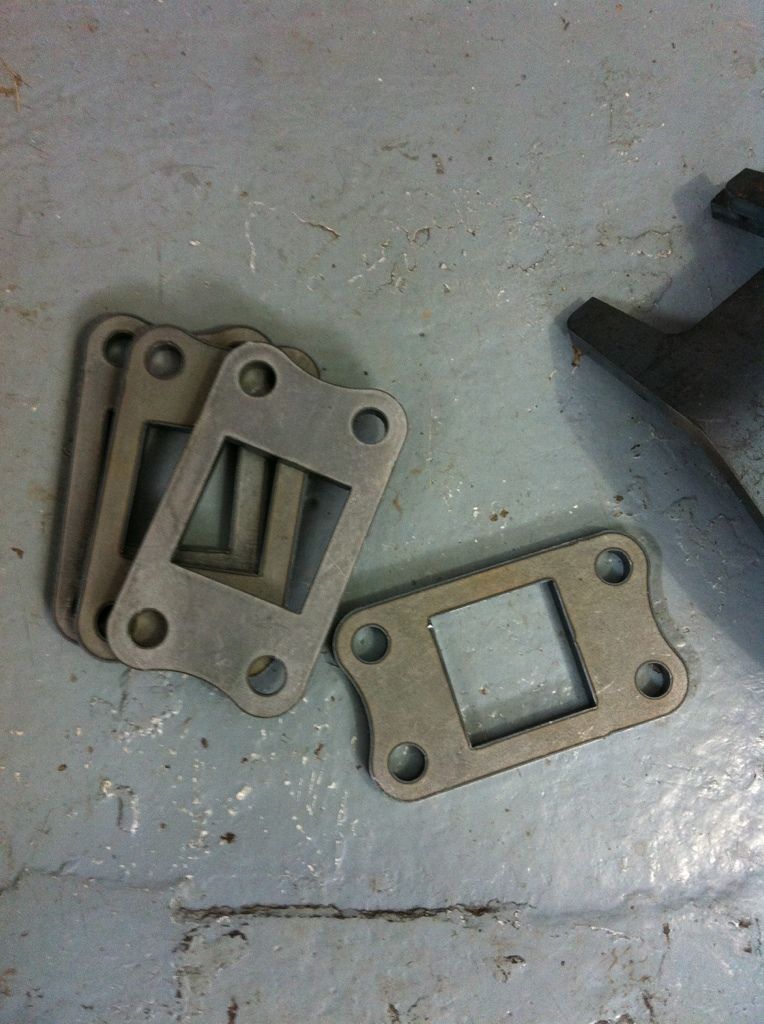


guilty by design
+1y
o they are
BD
bagged dually
+1y
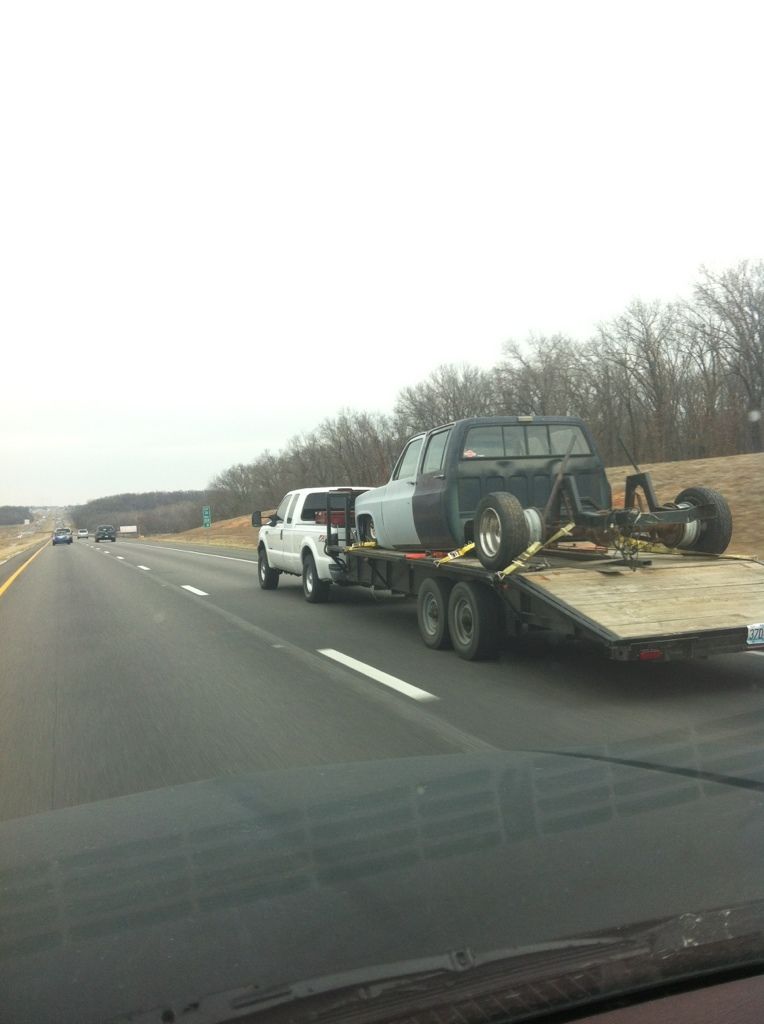
FINALLY!!! The truck finally got moved back to the shop today. I snapped a quick pic of the Dually on the trailer behind my little brothers powerstroke and my shortbed. Not really a big deal but since I've been waiting over a month to get this truck moved I figured it deserved a picture lol.
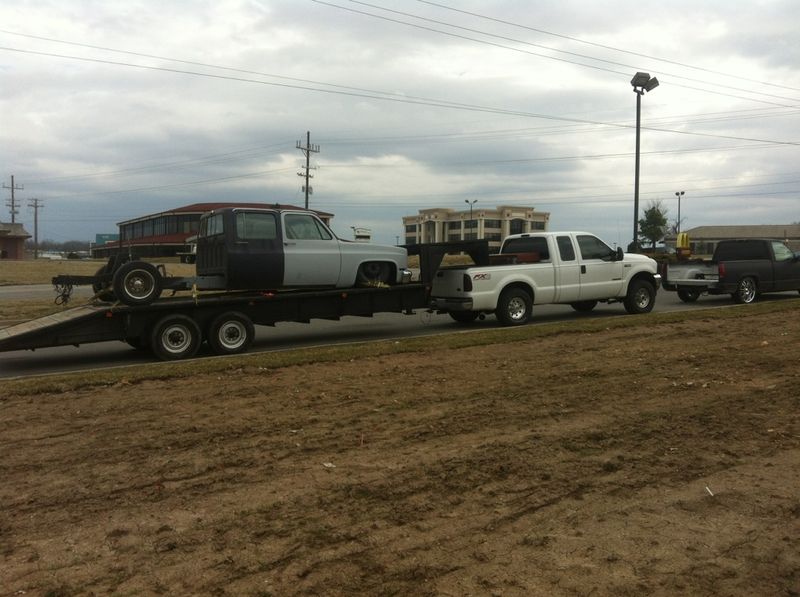
By the time we got the truck moved it didn't leave a lot of time for actually working on it.
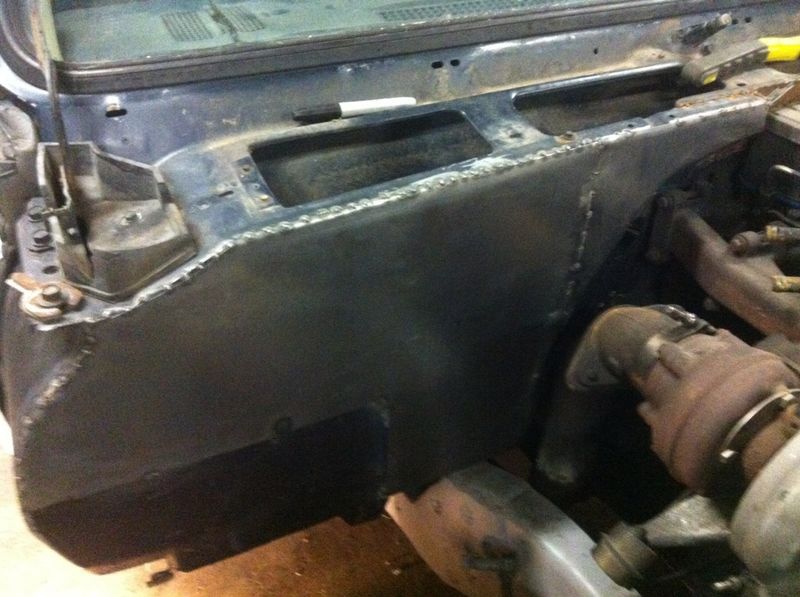
I did get the firewall almost done. Shaved it with a piece of 18ga. I left a notch out of the bottom of it for the tub to be molded in. Also the top inside needs finished. I have the piece cut for it already but I think I'm going to do something different with the notch for the rear valve cover.
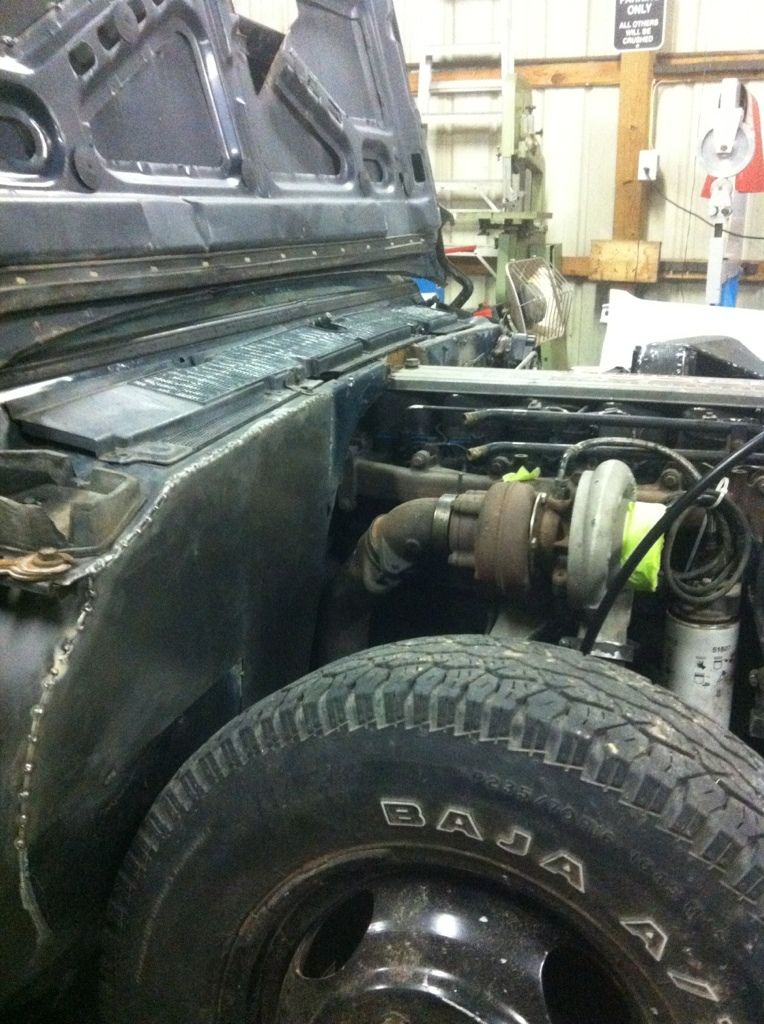
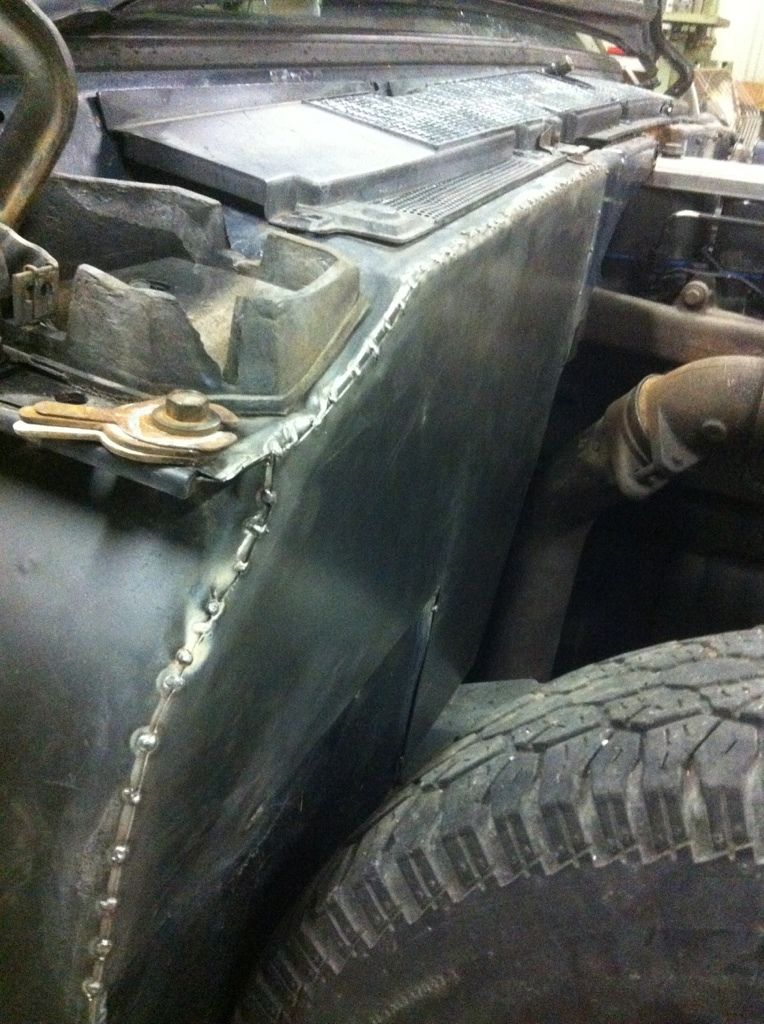
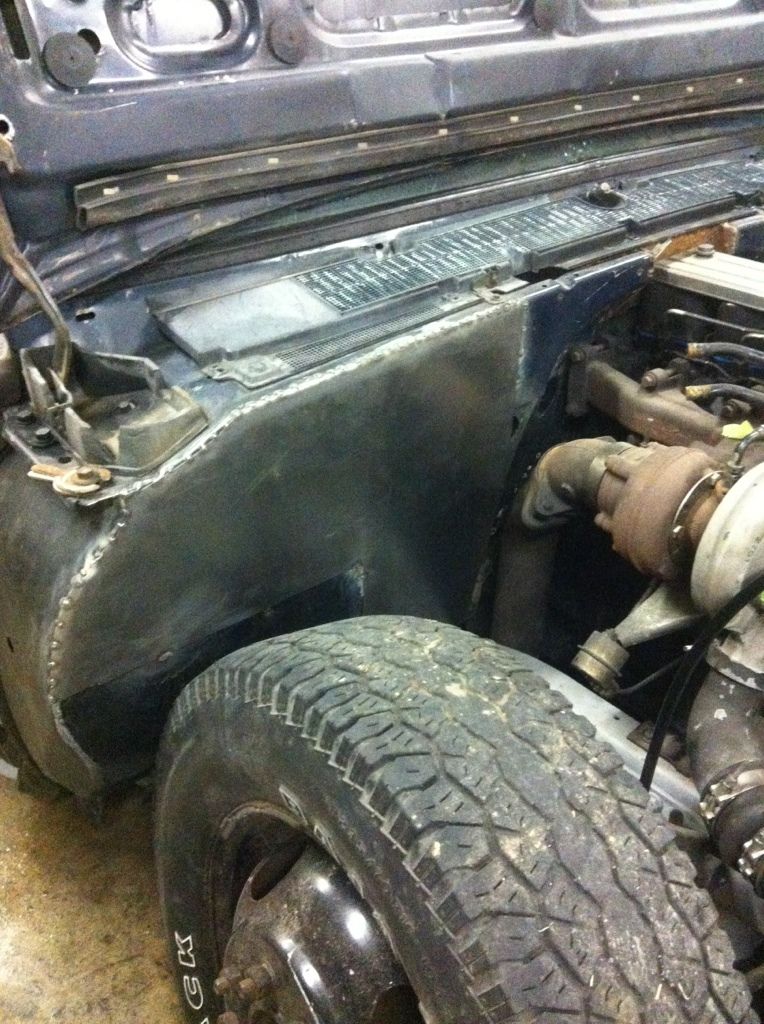


BD
bagged dually
+1y
When my little brother picked up my truck he brought my bed to me to start on at school. So yesterday after a long time of waiting I finally got started on the bed.
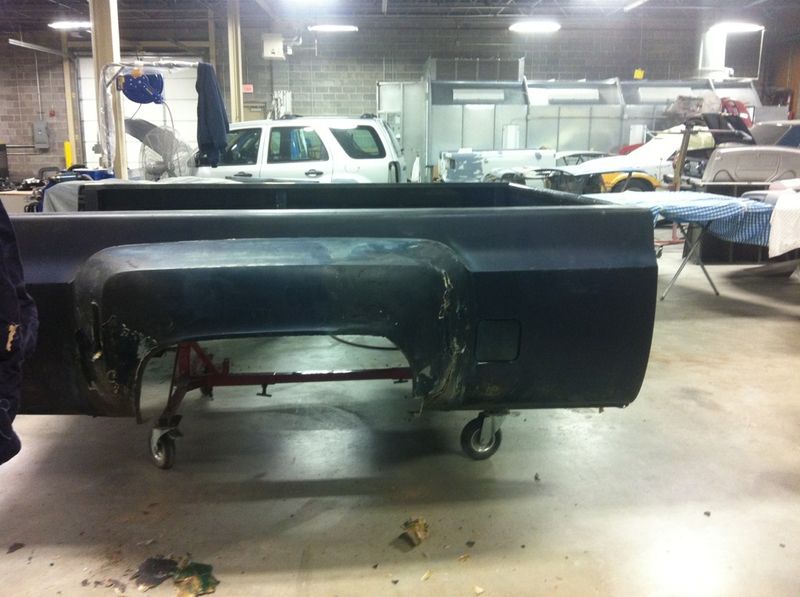
I knew the fenders were pretty bad to start but couldn't tell just how bad with them being covered in someone else old fiber glass and bondo mess. I was just hoping they were good enough to patch up and save so we could cut and raise them. After all of the old shitty repair patches were removed I was amazed at how terrible they really were. The front of the right fender literally fell off in my hand.
Just as I was about to cut them off and throw them my teacher came along and said he could fix them. I really couldn't believe it but I figured hell why not watch him and see how it turns out. If it works it saves me a shit load of cash and if not I just replace them.
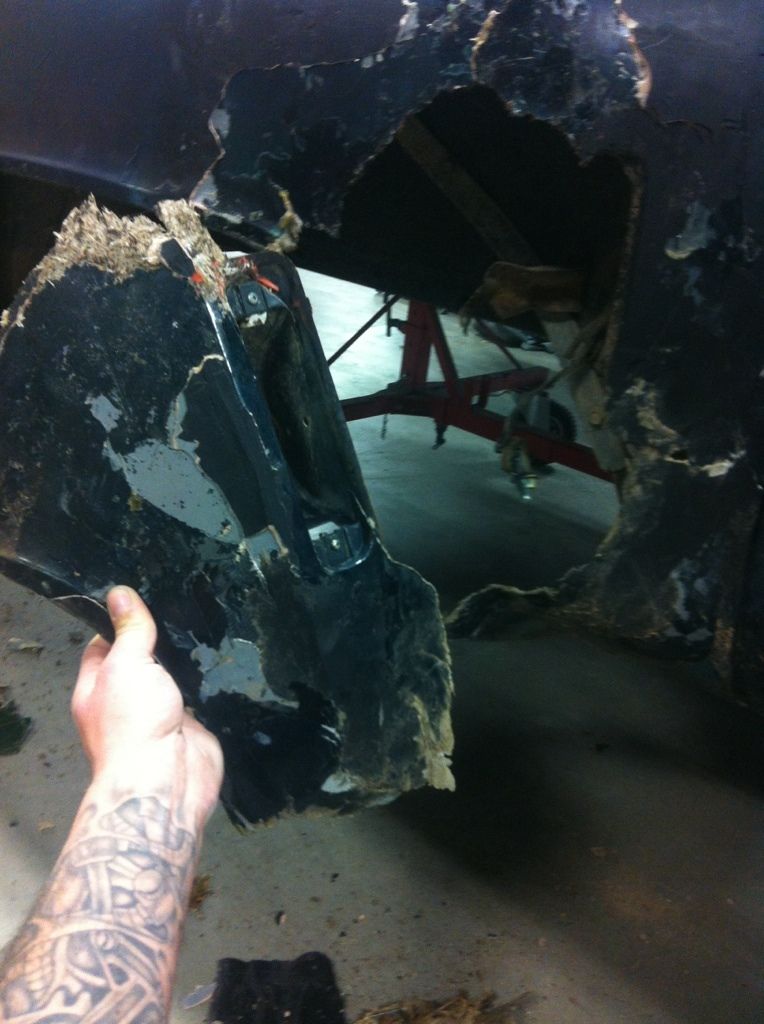

BD
bagged dually
+1y
I've got a small update on the bed. Not much of an update but better than nothing I guess. I'm on spring break from school so I can't get back to work on the bed for a week. I asked if I could work on the bed during break and got told no lol.
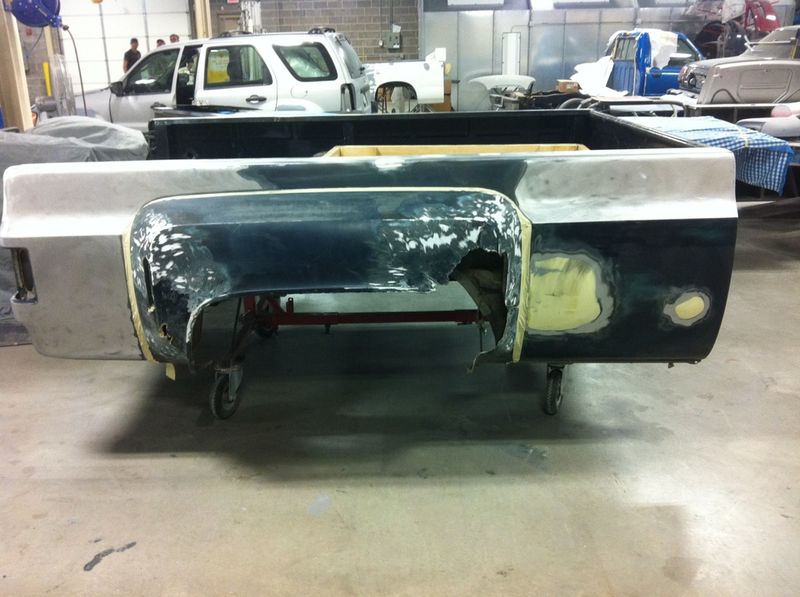
With the help of a couple of people I actually trust to work on the body of this truck we got most of the bed stripped to bare metal. I decided to basically just strip it to bare metal to make sure nothing was hiding under the paint. I'd much rather find it now than after it gets painted.
I cut out some 18 ga sheet metal and shaved the fuel doors on both sides. After it was welded up solid enough, tacks about every 1/2", i covered the welded area in fiber imbedding filler. Should be plenty of strength to hold up.
I also got the Dually fenders stripped and the edges dressed up for repair. The pictures I have show some of the Dually fender prep but I did a little more after that. 1 more week and I can finally get back on it.
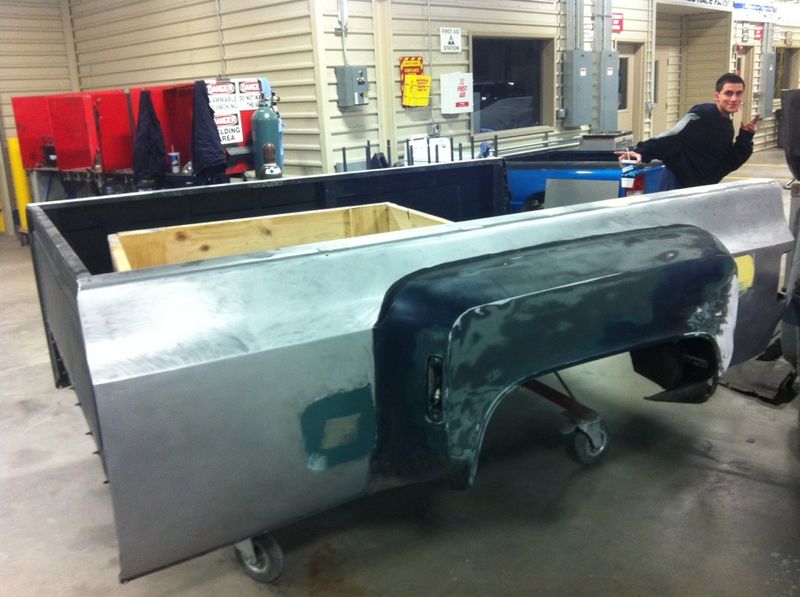
I also found another pic I took when the truck was being moved. Just a pic of us headed up I44. If the back would have been laying out it would have been a lot cooler but its still a pretty sick picture.
With the help of a couple of people I actually trust to work on the body of this truck we got most of the bed stripped to bare metal. I decided to basically just strip it to bare metal to make sure nothing was hiding under the paint. I'd much rather find it now than after it gets painted.
I cut out some 18 ga sheet metal and shaved the fuel doors on both sides. After it was welded up solid enough, tacks about every 1/2", i covered the welded area in fiber imbedding filler. Should be plenty of strength to hold up.
I also got the Dually fenders stripped and the edges dressed up for repair. The pictures I have show some of the Dually fender prep but I did a little more after that. 1 more week and I can finally get back on it.


I also found another pic I took when the truck was being moved. Just a pic of us headed up I44. If the back would have been laying out it would have been a lot cooler but its still a pretty sick picture.

BD
bagged dually
+1y
Last weekend I made it up to the shop and got a little work done. I spent most of my time getting a new shop compressor installed so ill have a steady supply of air at the shop and at home now. Be a huge help with getting this thing finished.
We got the passenger side firewall finished up until body work.
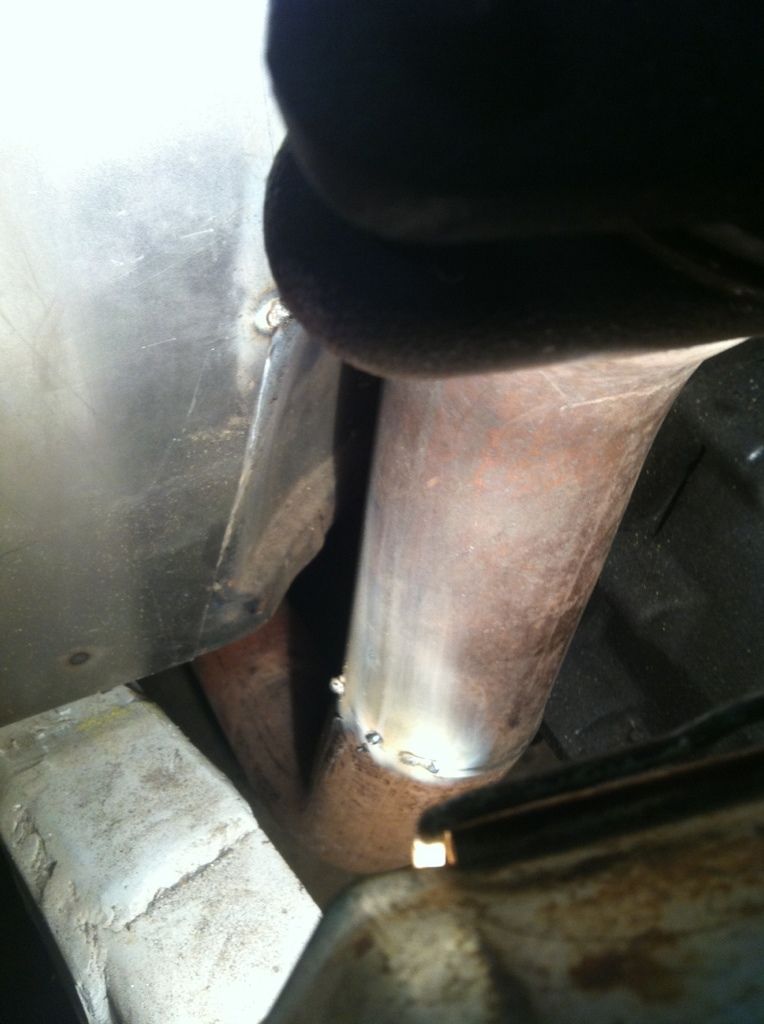
We also got my down pipe done. The exhaust will be all 3.5" back to a 5" adapter that'll run to the stack. I was going to use 4" but the parts truck had 3.5" and it ran really good so it should work and give me some breathing room to run it under the truck. It's all tacked together from the turbo to under the cab now. Luckily when we put a new 5" system on my little brothers powerstroke we saved his stock exhaust and it was all 3.5" so I have all of the bends and tubing I need from that old system.
Last night was my first night back at school so I could work on the bed. I got started on the Dually fenders last night.
I've had a lot of you guys message me asking me to document how I repair the fenders so ill post it as I go and try to explain the best I can now we do it.
First I gathered up all of the broken pieces I could find. I got the edges of the outer side cleaned up and ground down about 2" on each side of the breaks. I used a air die grinder with a 36 grit wheel on it but use whatever you have around. Just be super careful not to get to crazy or you'll get it to thin and make more problems. All I did was ground into the gel coat and tried to expose the actual fibers for the new resin to saturate in.
This is the right front of the fender. It's the worst area. It actually has a huge piece broken out of it.
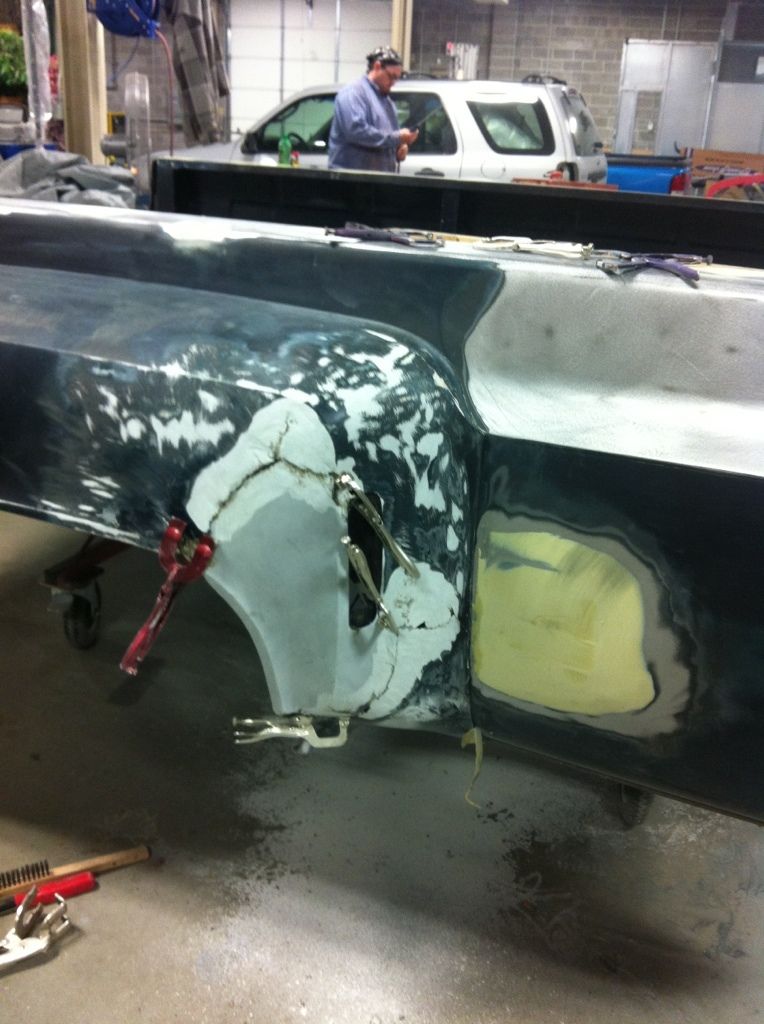
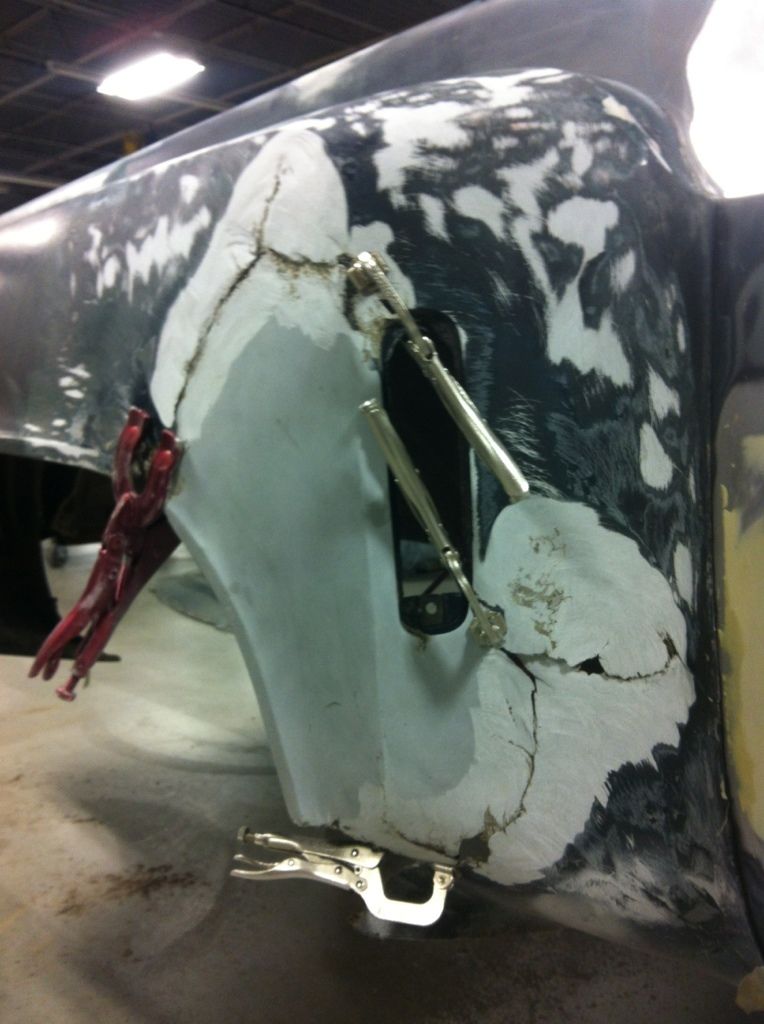
We also did some minor repair on the back of the right fender but I didn't get any pictures of that. It was just a really long split.
This is the other bad area. It's obviously the back of the left fender. I got it ground down and fit back together to the point I was happy that it wouldn't be to hard to to finish the body work on it.
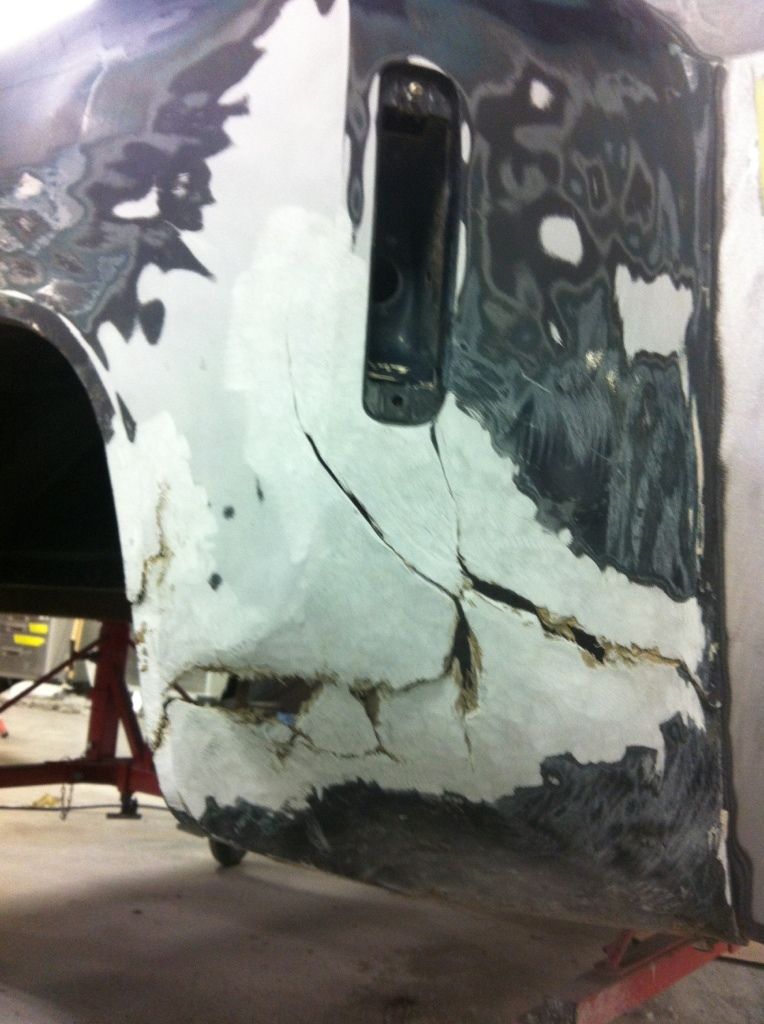
After I got it all together I cut some matting up into strips and layer it on. Just mix up some resin in a mixing cup and brush it into the exposed fibers glass and gel coat. Try to stay off of the paint because it won't adhere to well and will eventually come off. Once the fender has a bit of resin on it lay the matting strips on one at a time and brush them down with resin and a paint brush. Try to over lap the ends and use a couple stacks of matting on them. I used a heat gun to dry it so if your impatient like me heat will speed the dry time up.
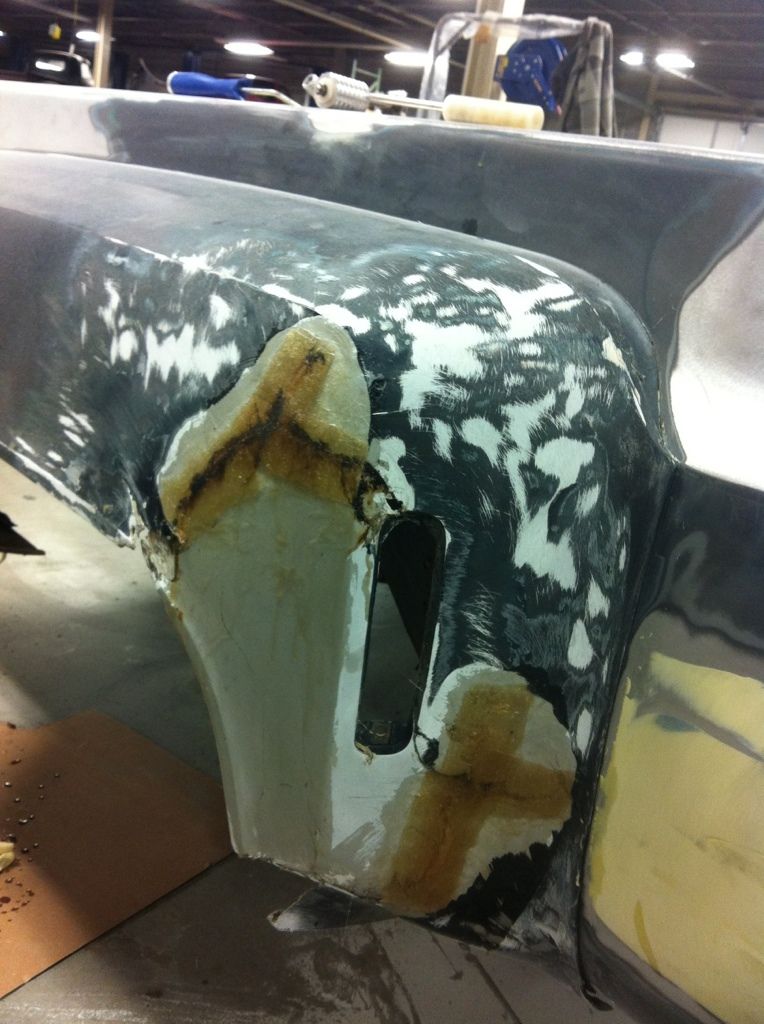
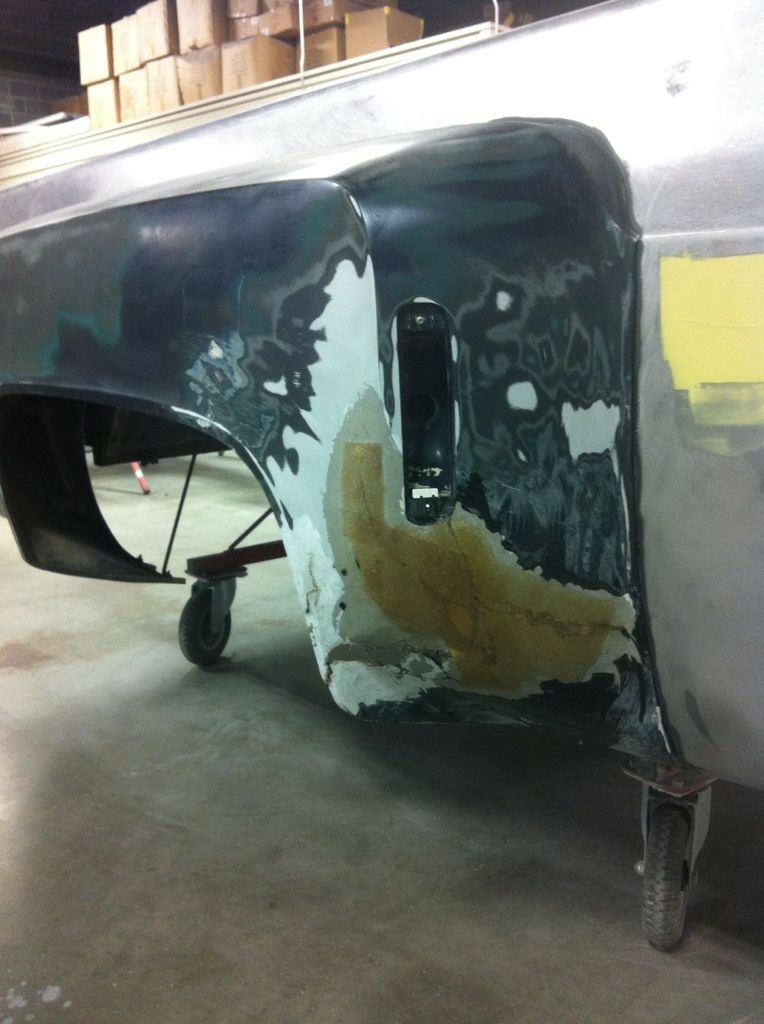
This is basically just a band aid. Tonight ill pull the fenders off and they'll retain their shape now that everything is structurally sound again. It's already strong enough I can grab the broke piece and ya k on them and their not going anywhere. Basically ill build all of my strength into the inside of the fender.
I almost forgot to mention that a fiberglass roller is VERY important in doing this stuff. Once you've layer down the matting and its resin soaked just gently roll the area with a roller and it'll get all of the air out of it and the one I use has spikes all over it so it leaves a rough texture for another lay the have some adhesion. I also have a grooved one my little brother made for me for doing the last layer. It leaves a nice smooth surface to start doing your body work on.
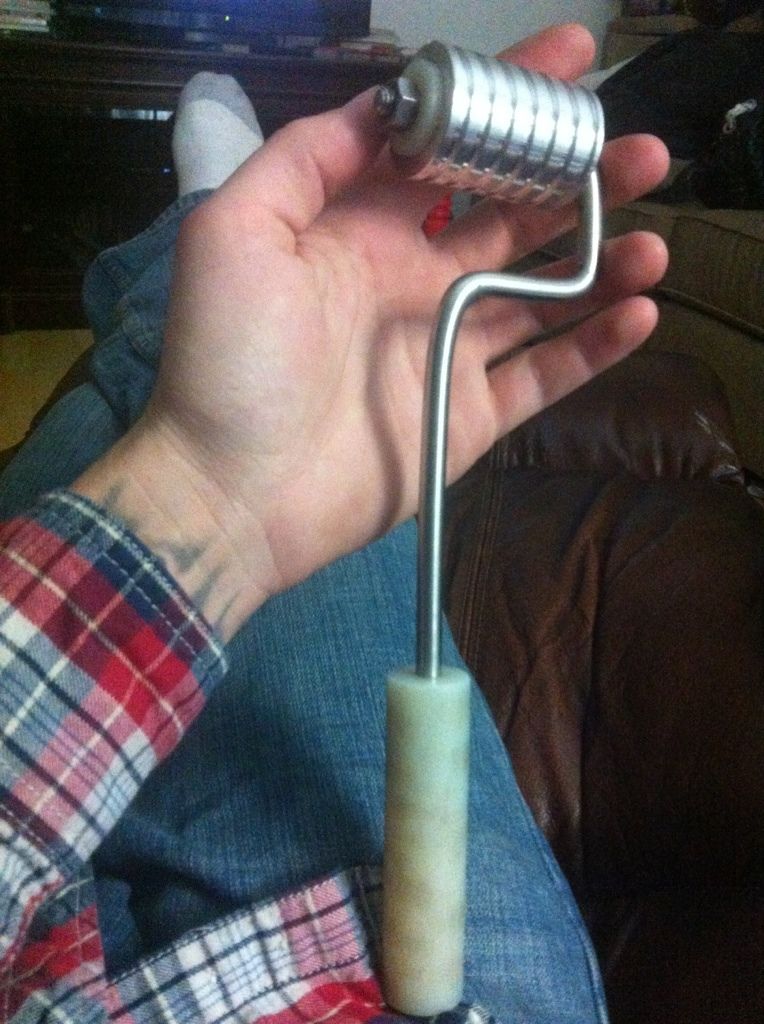
This is the roller we made. Used 1.5" billet stock about 2" long is all you'll need.
I hope this helps someone out there wanting to do fiberglass repair on their own. It sure beats spending the cash for a new set of fenders. Ill keep updating this as I go on them.
Sorry for any typos in advance. I posted all of this from my phone lol.
We got the passenger side firewall finished up until body work.

We also got my down pipe done. The exhaust will be all 3.5" back to a 5" adapter that'll run to the stack. I was going to use 4" but the parts truck had 3.5" and it ran really good so it should work and give me some breathing room to run it under the truck. It's all tacked together from the turbo to under the cab now. Luckily when we put a new 5" system on my little brothers powerstroke we saved his stock exhaust and it was all 3.5" so I have all of the bends and tubing I need from that old system.

Last night was my first night back at school so I could work on the bed. I got started on the Dually fenders last night.
I've had a lot of you guys message me asking me to document how I repair the fenders so ill post it as I go and try to explain the best I can now we do it.
First I gathered up all of the broken pieces I could find. I got the edges of the outer side cleaned up and ground down about 2" on each side of the breaks. I used a air die grinder with a 36 grit wheel on it but use whatever you have around. Just be super careful not to get to crazy or you'll get it to thin and make more problems. All I did was ground into the gel coat and tried to expose the actual fibers for the new resin to saturate in.
This is the right front of the fender. It's the worst area. It actually has a huge piece broken out of it.


We also did some minor repair on the back of the right fender but I didn't get any pictures of that. It was just a really long split.
This is the other bad area. It's obviously the back of the left fender. I got it ground down and fit back together to the point I was happy that it wouldn't be to hard to to finish the body work on it.

After I got it all together I cut some matting up into strips and layer it on. Just mix up some resin in a mixing cup and brush it into the exposed fibers glass and gel coat. Try to stay off of the paint because it won't adhere to well and will eventually come off. Once the fender has a bit of resin on it lay the matting strips on one at a time and brush them down with resin and a paint brush. Try to over lap the ends and use a couple stacks of matting on them. I used a heat gun to dry it so if your impatient like me heat will speed the dry time up.


This is basically just a band aid. Tonight ill pull the fenders off and they'll retain their shape now that everything is structurally sound again. It's already strong enough I can grab the broke piece and ya k on them and their not going anywhere. Basically ill build all of my strength into the inside of the fender.
I almost forgot to mention that a fiberglass roller is VERY important in doing this stuff. Once you've layer down the matting and its resin soaked just gently roll the area with a roller and it'll get all of the air out of it and the one I use has spikes all over it so it leaves a rough texture for another lay the have some adhesion. I also have a grooved one my little brother made for me for doing the last layer. It leaves a nice smooth surface to start doing your body work on.

This is the roller we made. Used 1.5" billet stock about 2" long is all you'll need.
I hope this helps someone out there wanting to do fiberglass repair on their own. It sure beats spending the cash for a new set of fenders. Ill keep updating this as I go on them.
Sorry for any typos in advance. I posted all of this from my phone lol.
BD
bagged dually
+1y
Last night I got the Dually fenders and the inner fenders take off of the bed. The easiest way I could find to get into the Dually fender bolts was to stand the bed straight up. Makes it a lot easier to get to most of the 12 bolts that hold each side on
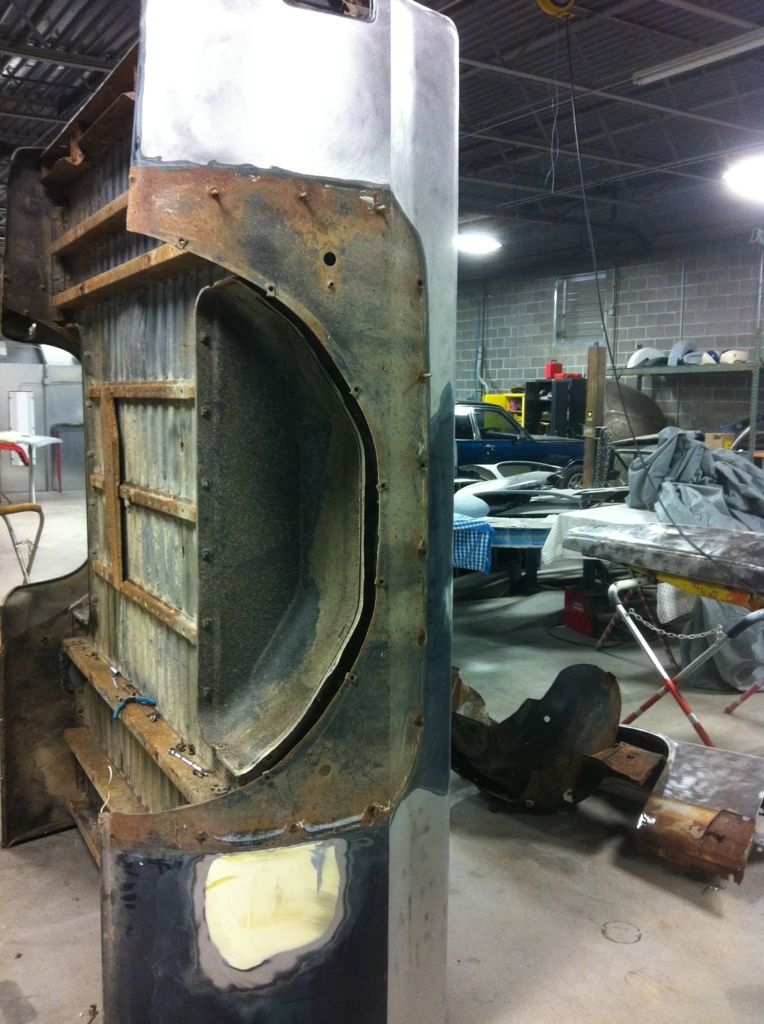
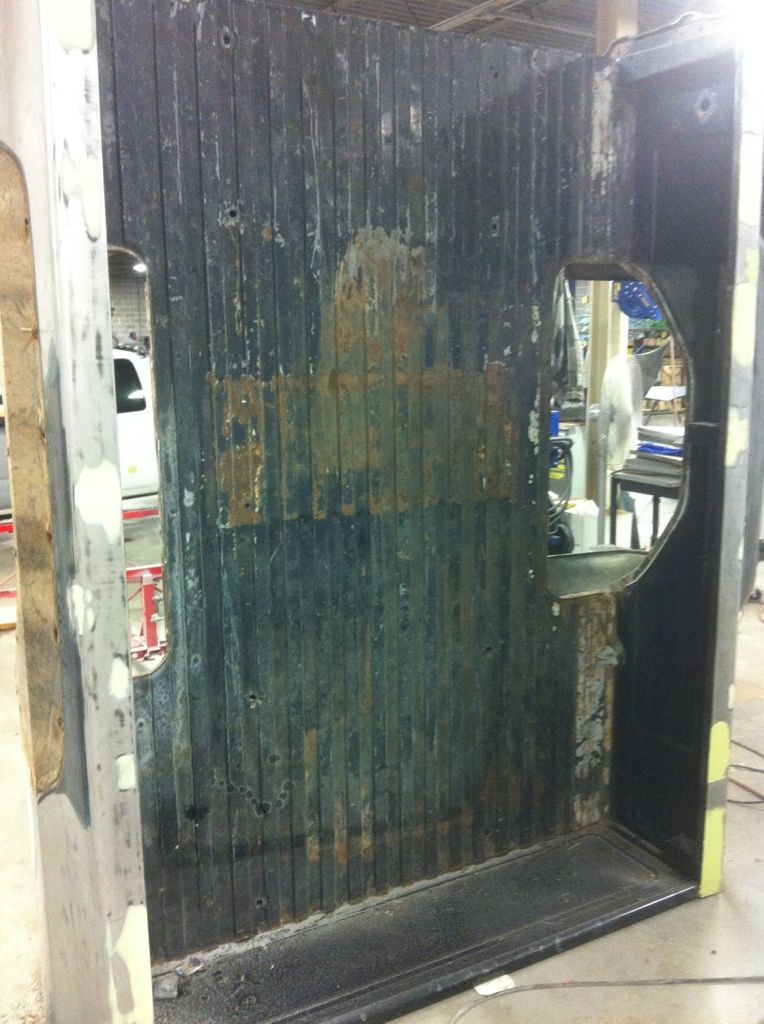
It took use probably an hour to get all of the tar cleaned out from the inside of the Dually fender. Starting with a heat gun and scraper and than finishing it with some reducer and towels was the easiest way we found to get it cleaned. After that I just got a grinder with a 36 grit wheel on it and carefully cleaned the entire broken area to be fixed down just a bit through the gel coat. We got the entire inside of the right side fender done last night. After we got all of the fiberglass on and helped it dry with a heat gun we had probably a quart of resin and about 4-5 layers of matting layer down in all shapes,sizes, and directions. This fender is a lot stronger than factory now I would say. You can basically swing it around and get really rough with it and it doesn't even flinch. I should be able to get the left side down tonight and start the cutting and raising.
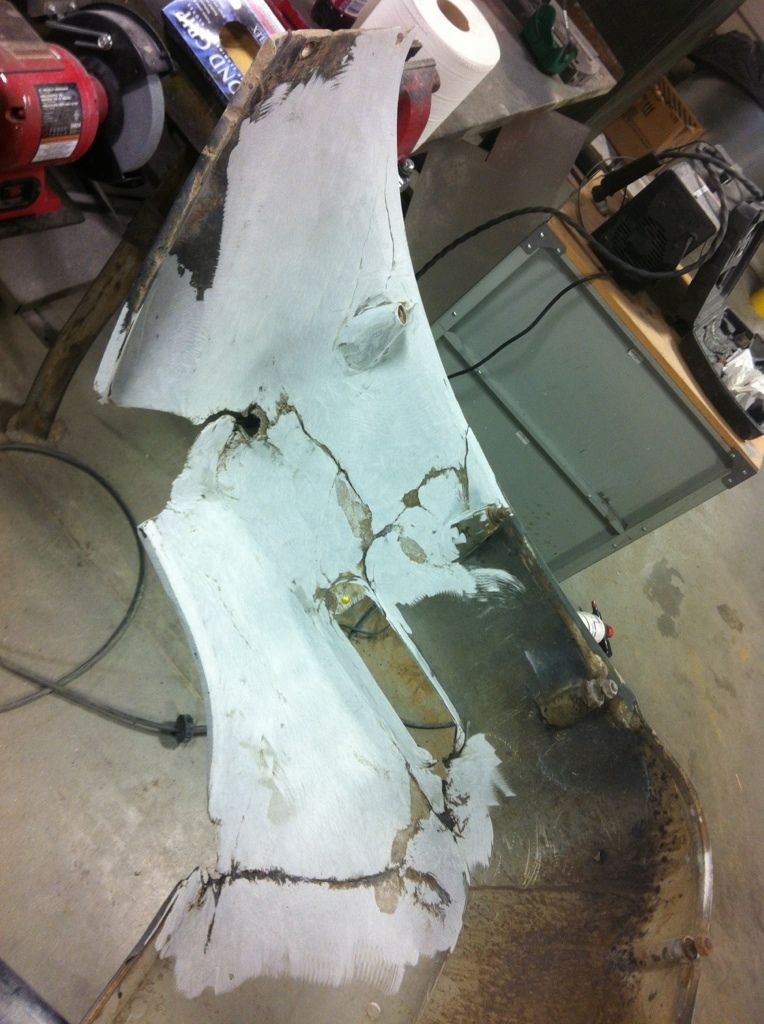
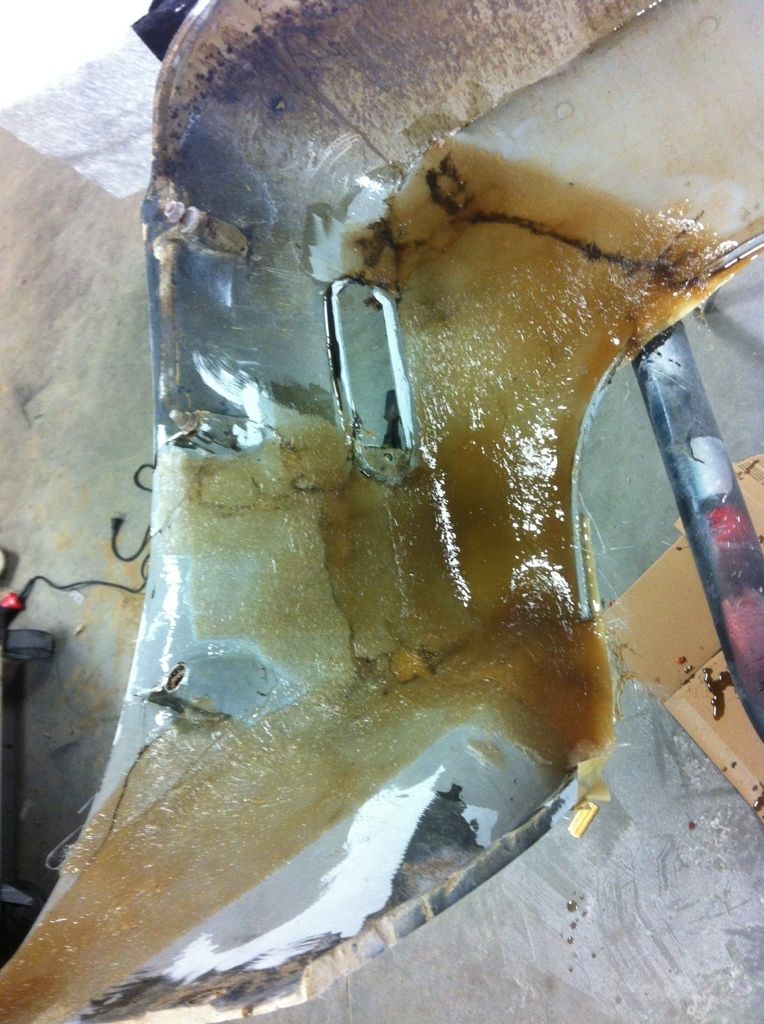
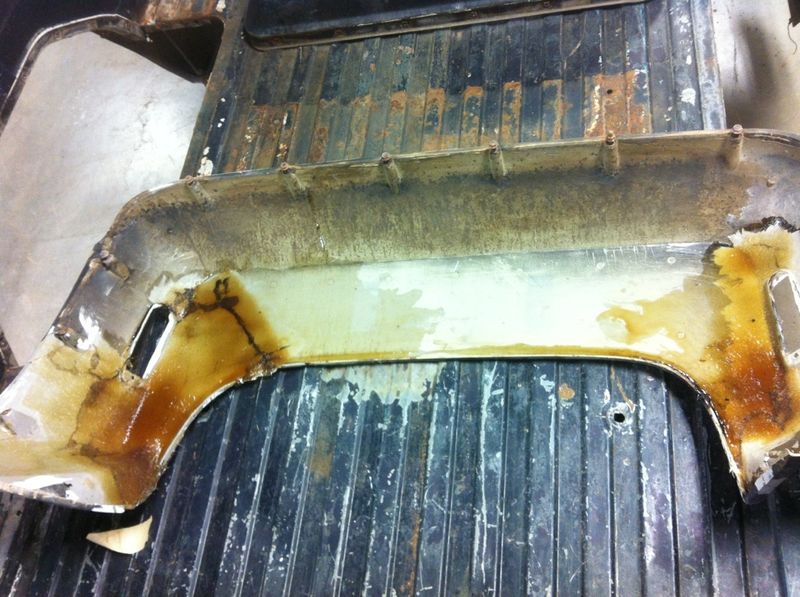
I have a lot more pictures of all of this but I figured everyone could get the general idea from those. If anyone wants any specific picture of how we did an area just hit me up.
Enjoy guys and ill try to update some more as soon as I get more done.


It took use probably an hour to get all of the tar cleaned out from the inside of the Dually fender. Starting with a heat gun and scraper and than finishing it with some reducer and towels was the easiest way we found to get it cleaned. After that I just got a grinder with a 36 grit wheel on it and carefully cleaned the entire broken area to be fixed down just a bit through the gel coat. We got the entire inside of the right side fender done last night. After we got all of the fiberglass on and helped it dry with a heat gun we had probably a quart of resin and about 4-5 layers of matting layer down in all shapes,sizes, and directions. This fender is a lot stronger than factory now I would say. You can basically swing it around and get really rough with it and it doesn't even flinch. I should be able to get the left side down tonight and start the cutting and raising.


I have a lot more pictures of all of this but I figured everyone could get the general idea from those. If anyone wants any specific picture of how we did an area just hit me up.
Enjoy guys and ill try to update some more as soon as I get more done.

comegetsome
+1y
So are you gonna run a short tire on the 16s so you don't have to raise the fenders or are you gonna cut and raise them after you get them repaired?
Related Discussions in Dually Projects
Thread
Posts
Last Post
546
A
last post by
Airnewb91 +1y
193

last post by
Airnewb91 +1y