Scratchy McB. 90 2200 mild re-build

la cucararacha
+1y
O.K., Not to worry, I just went out and checked everything again, and I had to remove that gasket between the two covers. It had gotten so hard, and enough material had been taken off of the head and the block that the two covers are almost touching each-other at this point (and get my stupid tensioner pulley out out the way (duhhh...) I used the 2200 distributor housing cover thing, and it fits fine. I used the 2200 head gasket, because My engine has the restrictor pressed into the block, and according to mazdatrucking's website, the b2000 head gasket has the restrictor built into it. I agree that more oil to the head won't be a bad thing. Especially with the not so great surface finish that my head and cam bearings had. Good luck with the swap!
M
mazdafvr
+1y
so the 2200 (2.2) block has the restrictor pressed into it? and the b2000s have it pressed into the gasket instead? i got the b2000 gasket. hope this wont be a problem
M
mazdafvr
+1y
ok i see the difference now, nice rebuild btw, coming along well

la cucararacha
+1y
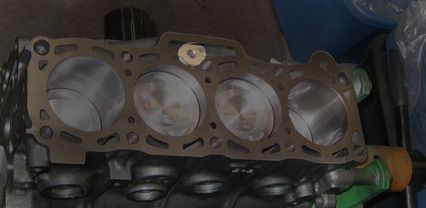
Thanks man! I'd be lying if I said it hasn't stressed me out a little. I haven't done an engine re-build this extensive since my 510. I just want everything to be right. Anyway, here's your plug right heeah:

M
mazdafvr
+1y
always stressfull when your not sure, ive seen 3 different b2200 head gaskets today on google, hard to explain, two were pretty much the same but one had one big oil hole instead of two small ones (oil hole u highlighted and the one down to the right of it were connected in the gasket.) so there was a little uncertainty there but as long as my block looks like yours when I pull the head, (separate holes) I should be good with the gasket I got. thanx for the pic, really helped with some of my un-explainable concerns lol

la cucararacha
+1y
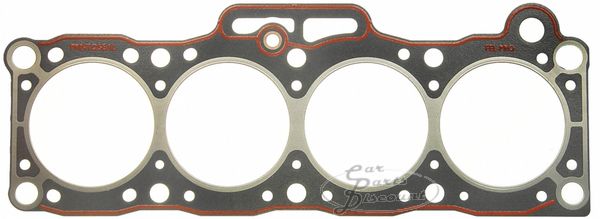
Any time! Just in case it helps, this is the Fel Pro gasket I used:

M
mazdafvr
+1y
cool cool, same one I used except for the oil passage, ill hollow it out some since the restrictor is in my block, got the head out yesterday.

la cucararacha
+1y
Got the head on, started with the oil pump and water pump, (is there a gasket for the oil pump by the way, or is it more ultra grey?) and I Started to do a little research on how I assembled and installed the pistons. I used permatex ultra slick assembly lube on them, and then realized after it was all together that that might be a bad idea. Apparently it's too thick (like honey) and the rings risk not seating properly. So everything came back apart again, and got cleaned completely along with the cylinder bores with simple green and then alcohol. I got two pistons back into their cylinders this morning with WD 40 as the lube (thin, helps the rings seat). It may have been fine, but i don't want to risk having to take it back apart again.

la cucararacha
+1y
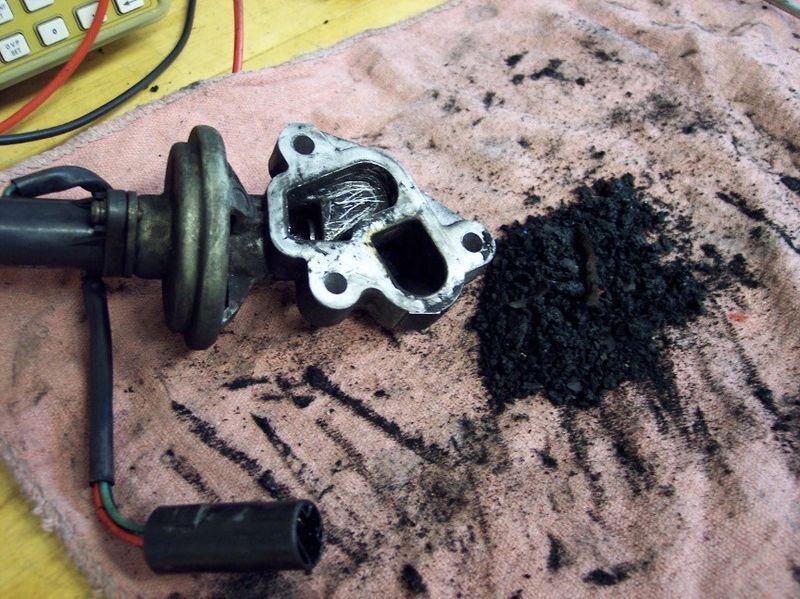
Well, got some stuff done for the weber conversion today. Got a pick of when I Cleaned out the EGR. I can't beleive that much carbon fit in there!
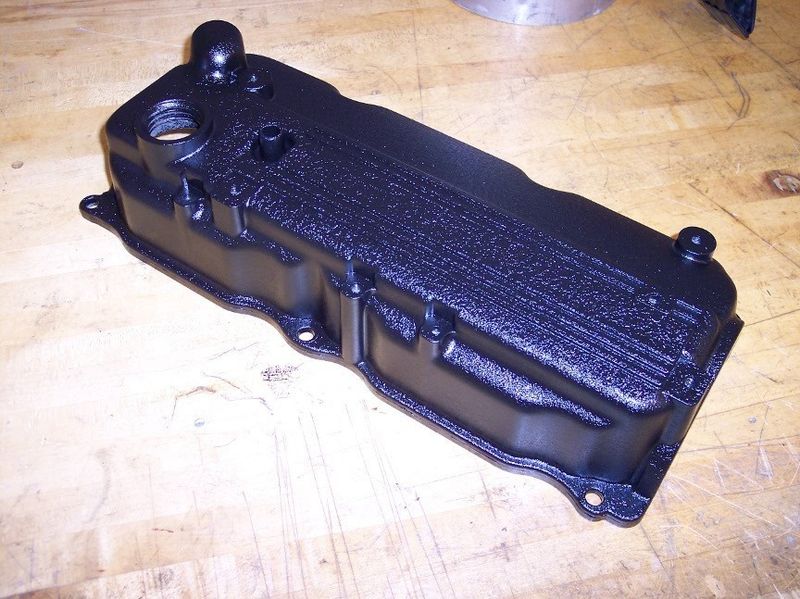
I blasted and painted the valve cover with my favorite paint (wrinkle!)
I milled the adaptor plates flat and also milled out the center section and went back and blended everything with a file. Other than My little oops on the top plate there, everything went Well, I think.
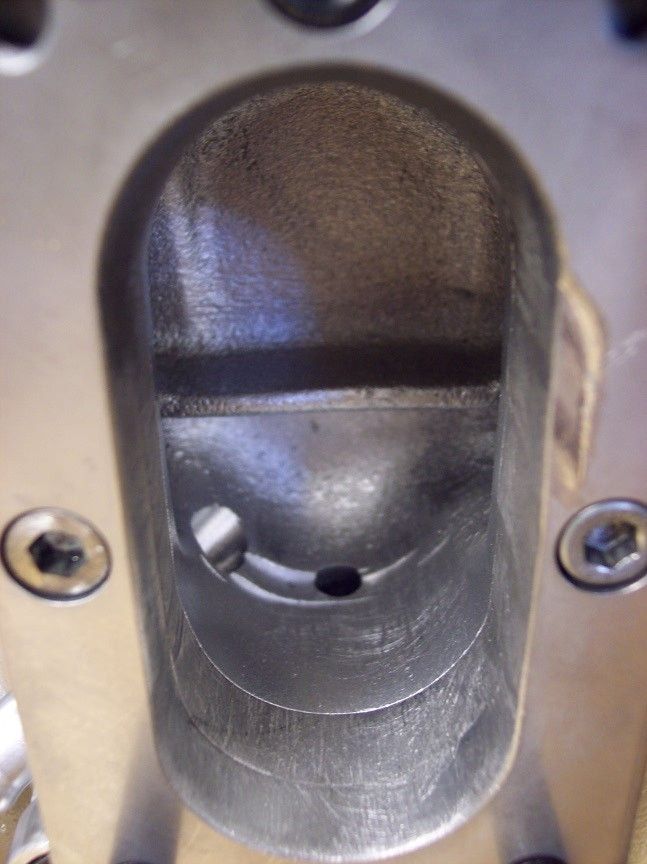
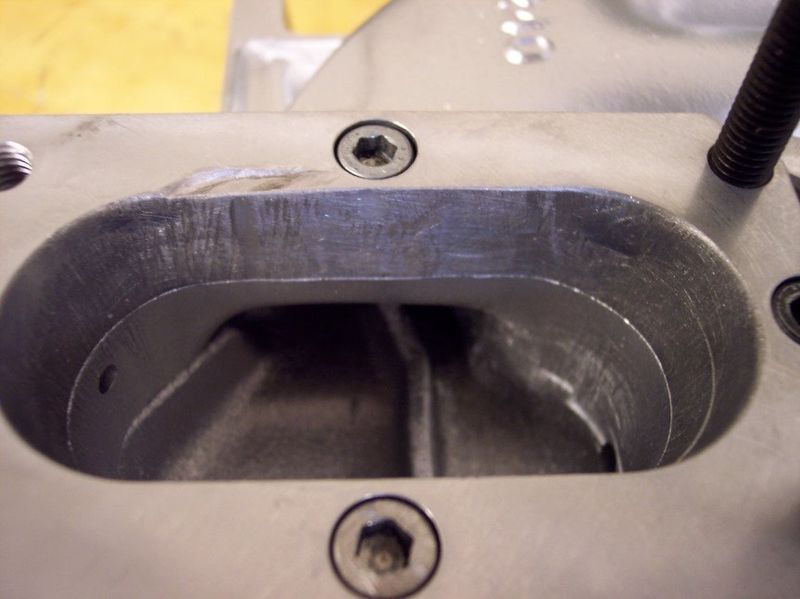
I followed it up with a nice coat of aluminum high temp paint:
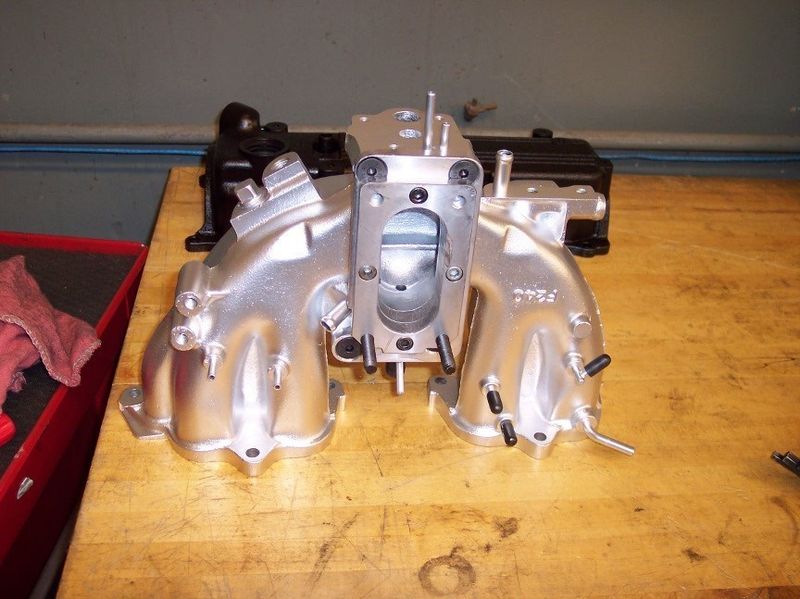
now back to the bottom end...

I blasted and painted the valve cover with my favorite paint (wrinkle!)

I milled the adaptor plates flat and also milled out the center section and went back and blended everything with a file. Other than My little oops on the top plate there, everything went Well, I think.


I followed it up with a nice coat of aluminum high temp paint:

now back to the bottom end...

la cucararacha
+1y
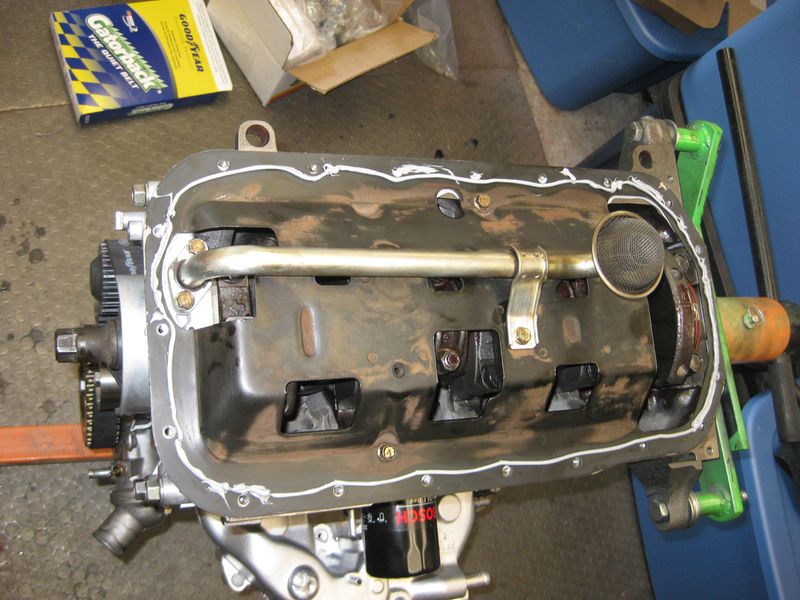
Got my ass in gear today. Engine is almost ready to put in. Couldn't get any feedback on the gaskets, so i just permatexed the parts and put them on. Here's the windage tray going together:
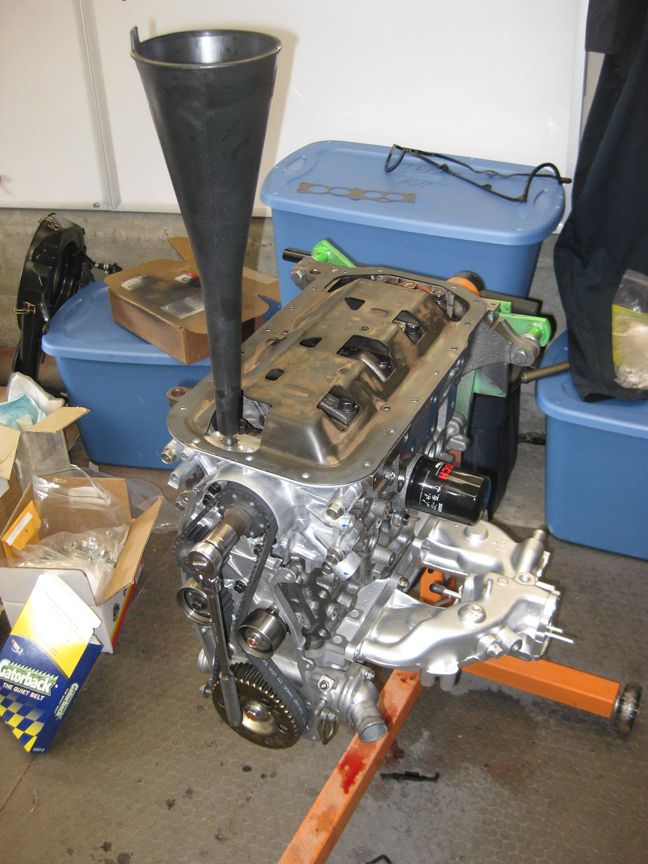
I didn't read anything about it, but it seemed like a good Idea to prime the pump while I was there, so i filled my funnel up a little ways and cranked the engine over until it disappeared into the pump. Why not, right?
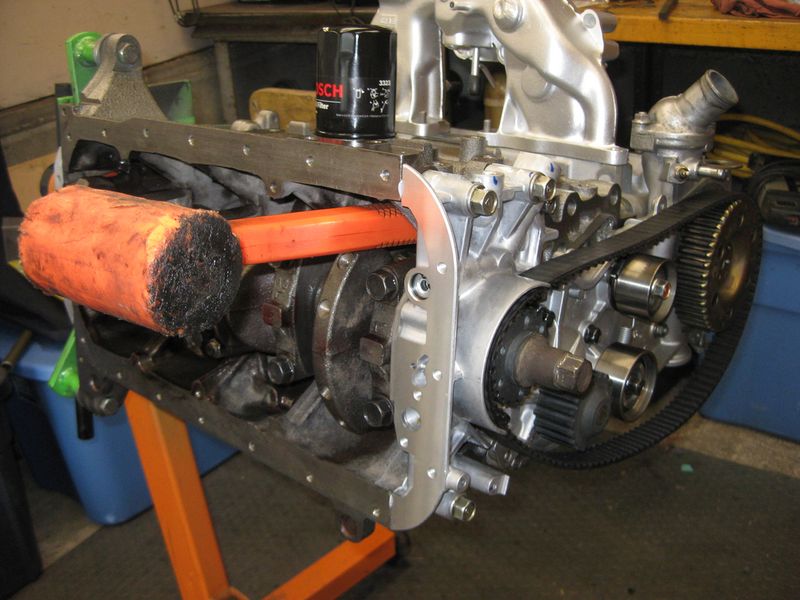
Used this little trick to tighten the timing sprocket at the crank, and put the old timing belt on there to keep the cam sprocket from turning while I tightened it.
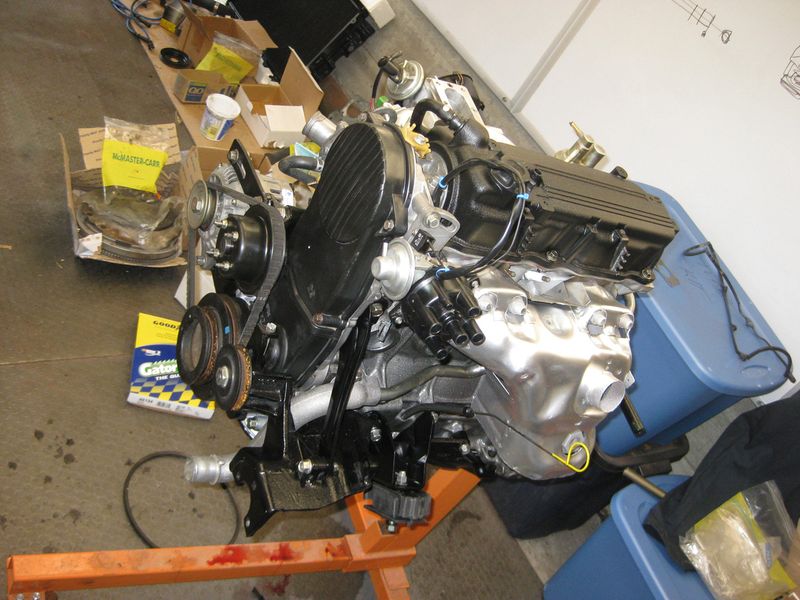
THis is what she looks like after about 5 hours of work, and scrounging through my bolt pile trying to remember what went where.
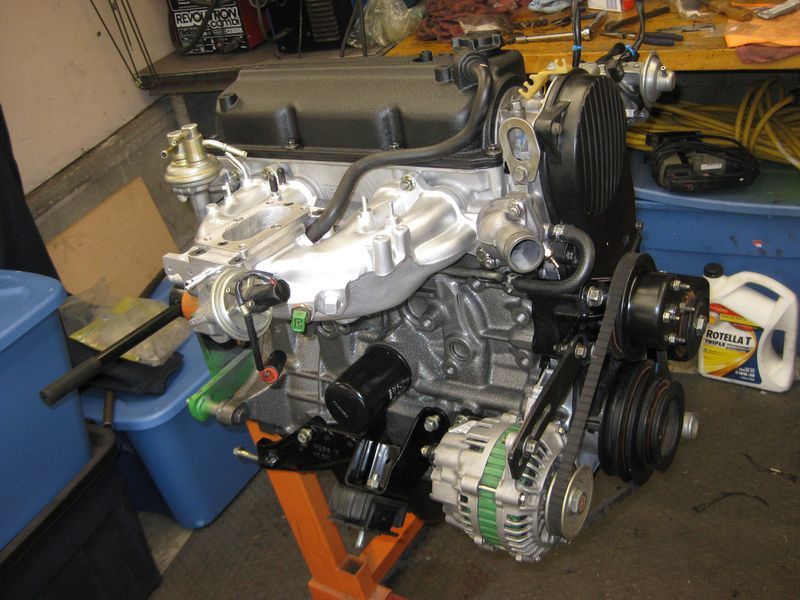
Gotta go borrow the friends hoist now...

I didn't read anything about it, but it seemed like a good Idea to prime the pump while I was there, so i filled my funnel up a little ways and cranked the engine over until it disappeared into the pump. Why not, right?

Used this little trick to tighten the timing sprocket at the crank, and put the old timing belt on there to keep the cam sprocket from turning while I tightened it.

THis is what she looks like after about 5 hours of work, and scrounging through my bolt pile trying to remember what went where.


Gotta go borrow the friends hoist now...
Related Discussions in Mazda Projects
Thread
Posts
Last Post
852

last post by
skrapinsask +1y
150

last post by
cherokeed +1y