Scratchy McB. 90 2200 mild re-build

la cucararacha
+1y
So I had an interesting evening yesterday. Went to a friends house for cinco De Mayo, and I brought some people out to show them the truck. Started it up, and it was sitting there idling, and it just quit after about 30 seconds of idling. I thought that was weird. And then it wouldn't start. Hrmmm.....So much for my demonstration...We noticed my fuel pressure gauge wasn't reading anything, so I pulled the fuel line, and ran it open into a beer bottle (not mine ). No flow out of the pump. Crap. It was too late to go to the store, so I had to leave it there until this morning. I suspected the pump, so I checked at the local parts store, and they had one for 26 bucks. Sounds good. Picked that up, and with my trusty mighty vac in hand, I pulled the feed line to the carb, and hooked up the mighty vac. When I pulled a vacuum on the line, it flowed fuel no problem into the canister. This told me the fuel feed line isn't plugged anywhere downline.
so I pulled the fuel pump off the side of the head, heard a metalic "clink" and this is what I found:
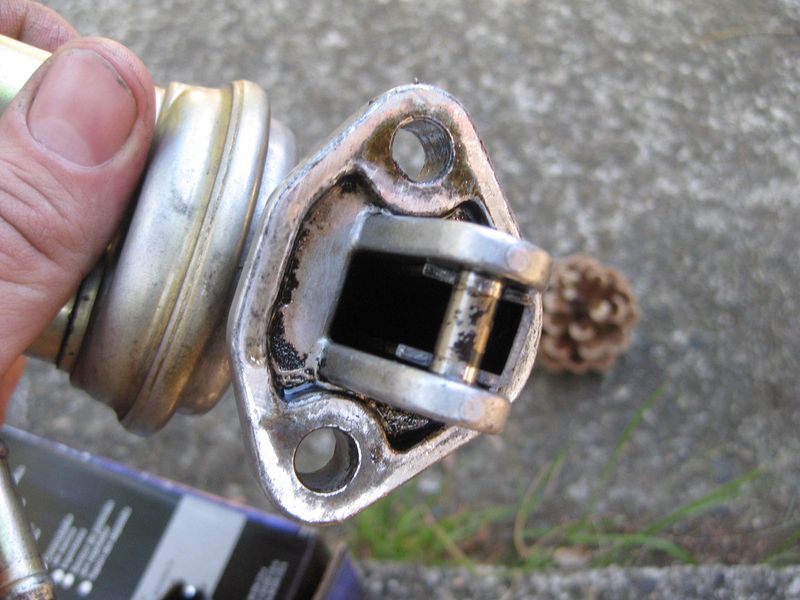
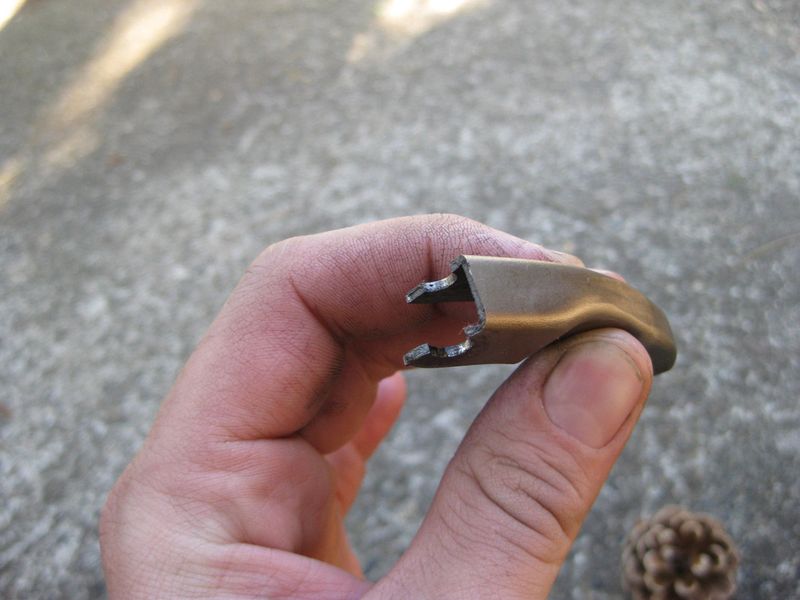
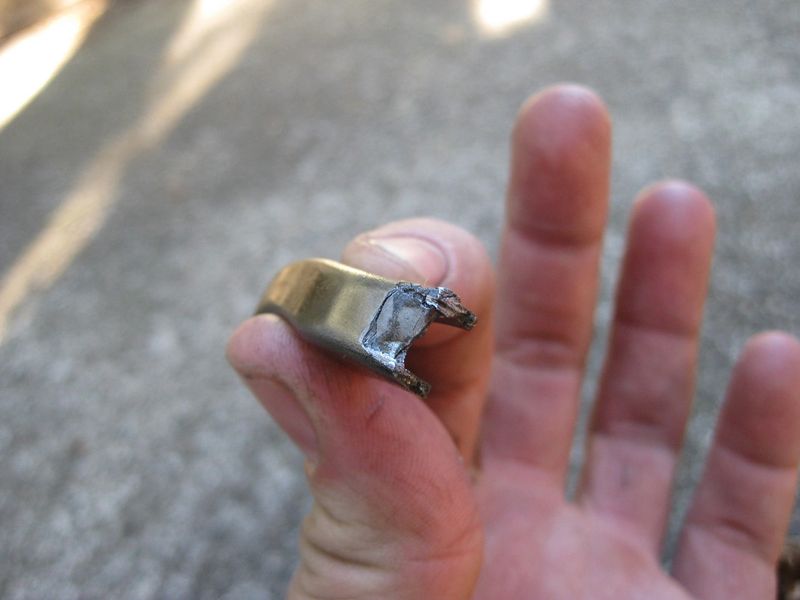
My follower snapped in half. It appears that the tip broke off of it, and then the cam shoved it back into the pump housing, snapping the whole follower off. Yikes. Well if that isn't the problem...
new pump installed, primed the fuel system again by hooking up the mighty van to the carb feed line, and she started up in a few cranks! I got lucky. I'm sure glad that didn't happen on my 120 mile trip the day prior!
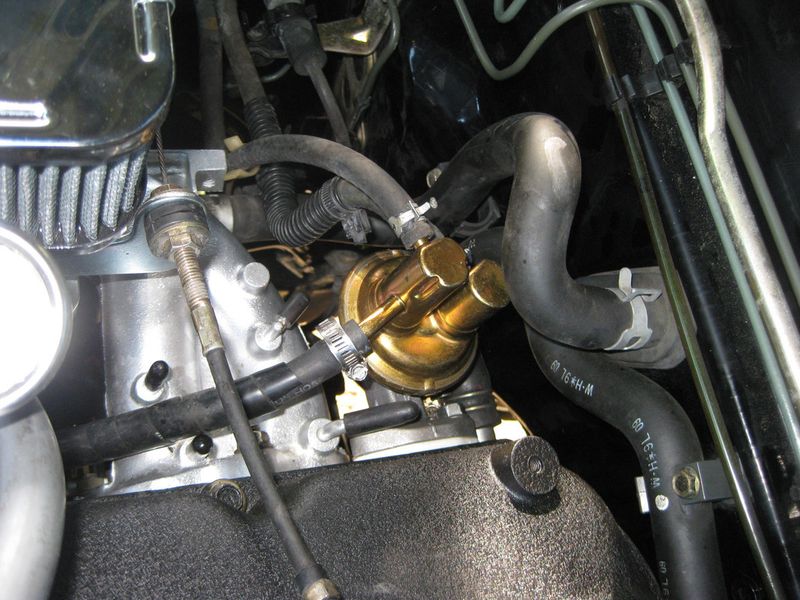
After installation of the new pump, I also noticed that my fuel pressure that previously moved the needle around quite a bit on the fuel pressure gauge is now rock steady, and doesn't budge during running. So apparently this pump has been on the way out for awhile.
As a warning sign to anyone who doesn't have a steady reading on their gauge, your pump may be fatiguing, and ready to fail un expectedly.
so I pulled the fuel pump off the side of the head, heard a metalic "clink" and this is what I found:


My follower snapped in half. It appears that the tip broke off of it, and then the cam shoved it back into the pump housing, snapping the whole follower off. Yikes. Well if that isn't the problem...
new pump installed, primed the fuel system again by hooking up the mighty van to the carb feed line, and she started up in a few cranks! I got lucky. I'm sure glad that didn't happen on my 120 mile trip the day prior!

After installation of the new pump, I also noticed that my fuel pressure that previously moved the needle around quite a bit on the fuel pressure gauge is now rock steady, and doesn't budge during running. So apparently this pump has been on the way out for awhile.
As a warning sign to anyone who doesn't have a steady reading on their gauge, your pump may be fatiguing, and ready to fail un expectedly.
Post was last edited on May 07, 2013 05:18. Edited 1
time.

la cucararacha
+1y
I got in and adjusted the valves today as well, it really smoothed out and quieted the engine. That was nice, they were way out of adjustment.. Checked the torque on the head bolts while I was in there too. All seems good. I also opened up my carb to see what jets my Weber kit came with, so I know what my baseline tune is. This is what I found:
140 for the two main jets
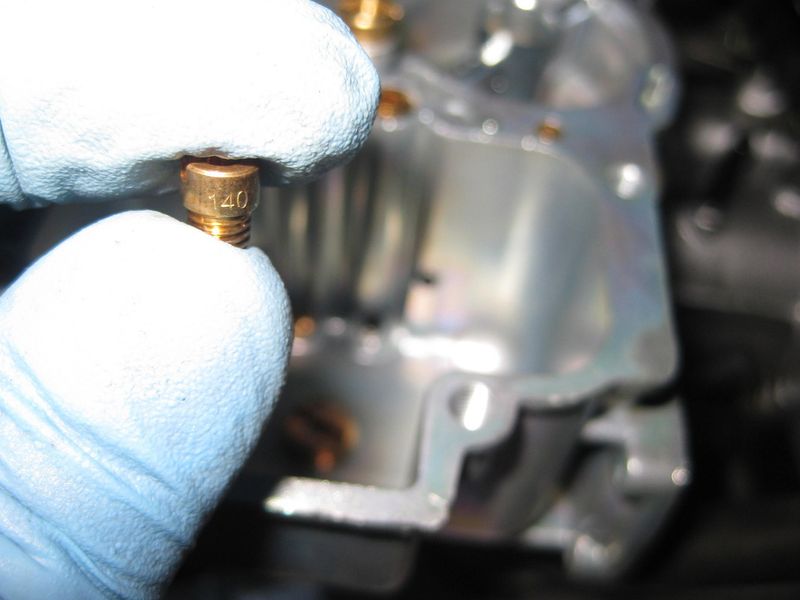
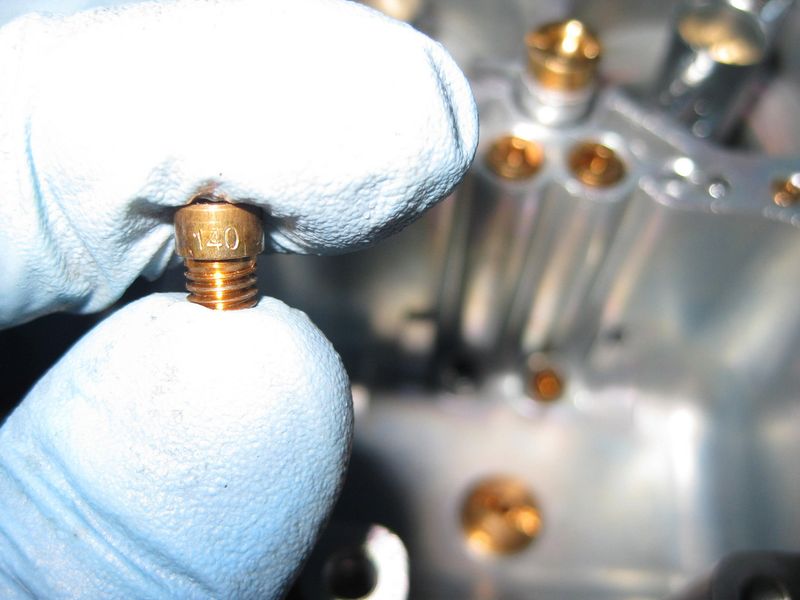
170/180 air corrector jets
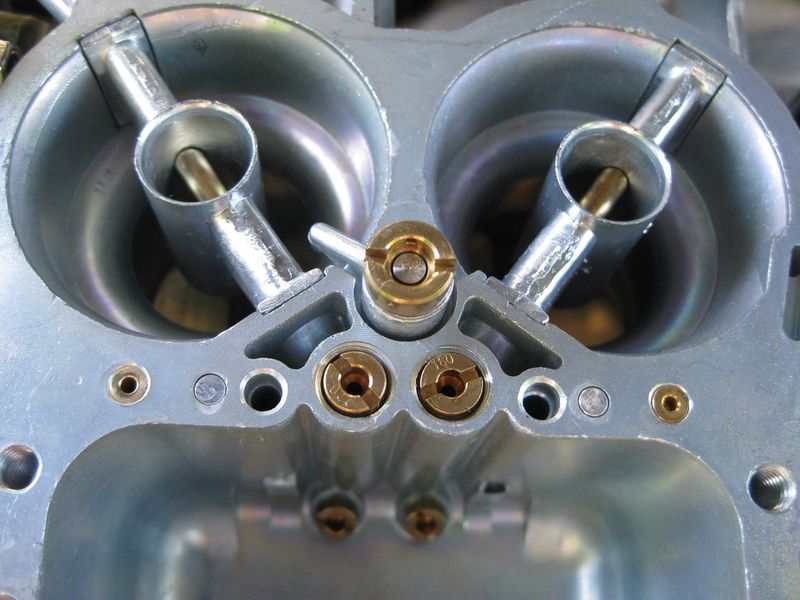
Now I know what I need to order to richen up that secondary circuit at lower engine speeds. Most places say you should go up two steps per change. So that puts me at 150 size if I'm not mistaken.
140 for the two main jets


170/180 air corrector jets

Now I know what I need to order to richen up that secondary circuit at lower engine speeds. Most places say you should go up two steps per change. So that puts me at 150 size if I'm not mistaken.

la cucararacha
+1y
Just got some bigger main jets in the mail today, as well as a larger Idle jet. I know there are already a few good links to Weber carb tuning on this forum, but so far this is one was the most methodical in my opinion. It also actually mentions the use of a wideband AFR, and what you should look for
Put Gas-Adjust shocks on the rear to balance everything out, and the truck actually rides pretty well! Ideally I would really like to get front and rear anti-sway bars, but that is a luxury at the moment. I need new tires much worse. Once I get the cash, i'm going to shoot for the Belltech anti-sway bar kits.
I also got my new fuel tank sending unit in, so I'm going to install that this weekend. It will be really nice to be able to see my fuel level for once!

la cucararacha
+1y
I opened up the carb and checked the rest of my jet settings, and also check the float height. It was off by about 1/8 of an inch to the full side. So I bent the tab enough to attain the recommended raised setting of about 3/8 of an inch:
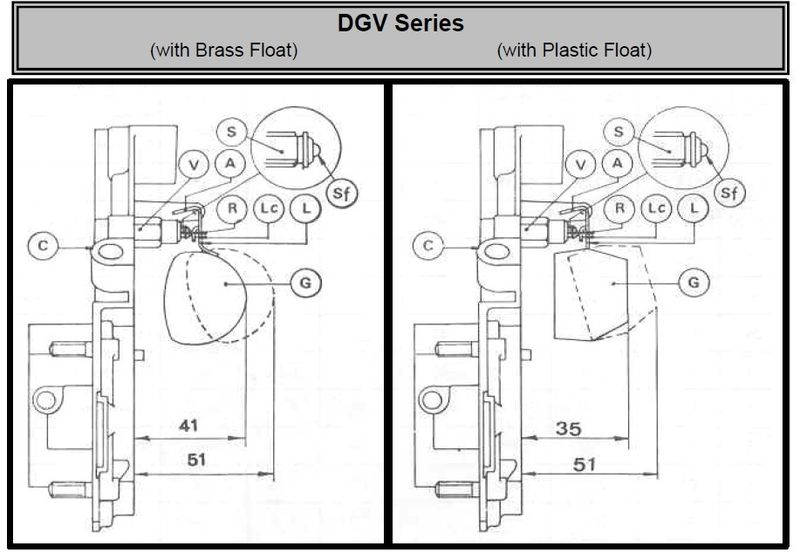
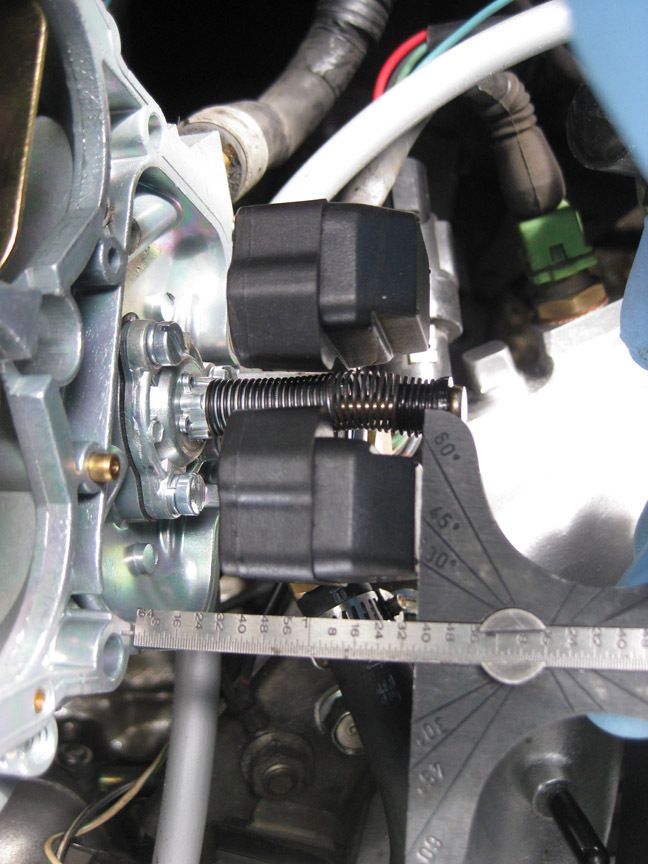
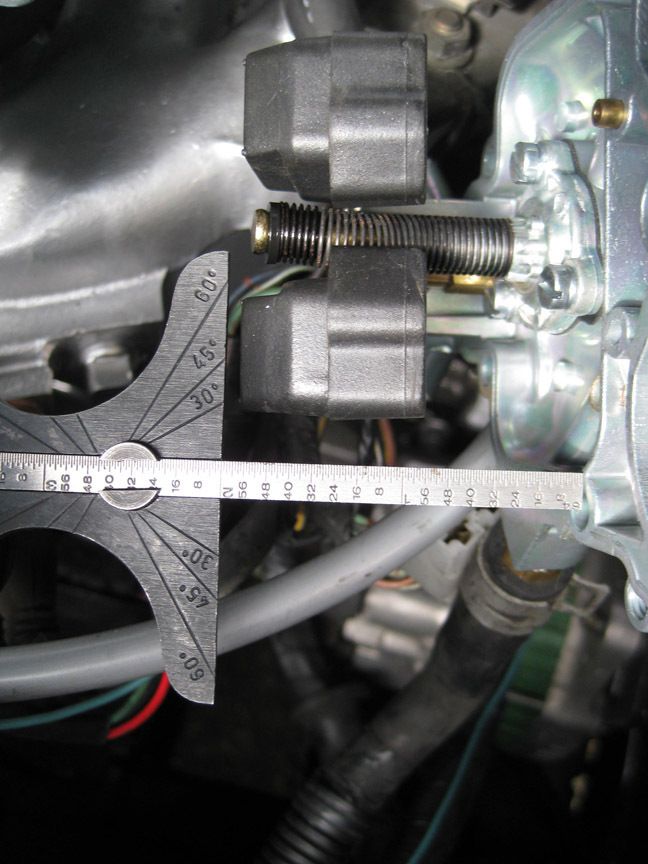
the full extension setting is a bit odd. It's supposed to be 2 inches from the carb body. I don't really understand how you are supposed to adjust it, so I just left it as is:
My stock jetting from Redline came as follows:
main jet primary: 140
Main jet secondary: 140
air jet primary: 170
air jet secondary: 180
Idle jet primary: 60
Idle jet secondary: 50
main venturi: 3.5
aux venturi: 3.5
primary emulsion tube: F50
Secondary emulsion tube: F50
I'm having a hard time getting a smooth consistent Idle, and strange inconsistencies seem to pop up here and there. I think I have a vacuum leak somewhere, so I'm going to pop the carb off this weekend and seal between all of the adapters, and probably replace the PCV valve and line.
I also put my new fuel sender in this morning. It wasn't too bad at all. Took about an hour. The most difficult part was getting the unit in and out without bending the float.
I found the easiest way to get it in was from the back of the truck. You can kind of start it with the tubes pointing down, and give it a clockwise twist, and it will go in. I was afraid to lift my bed any further, because it was going to get a bit precarious if I did.
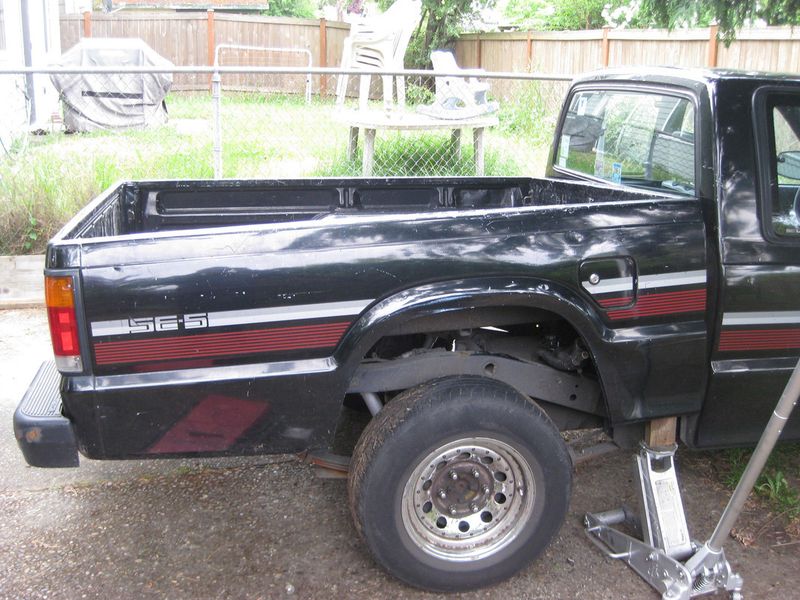
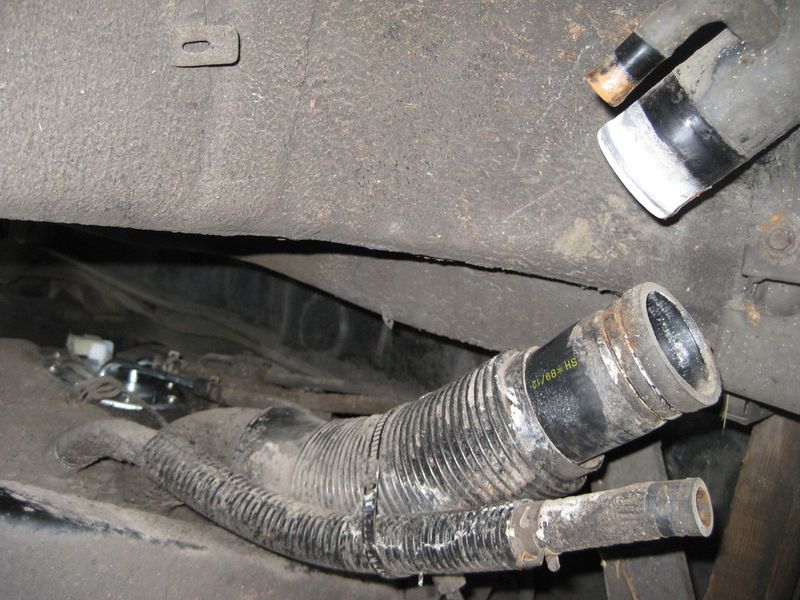
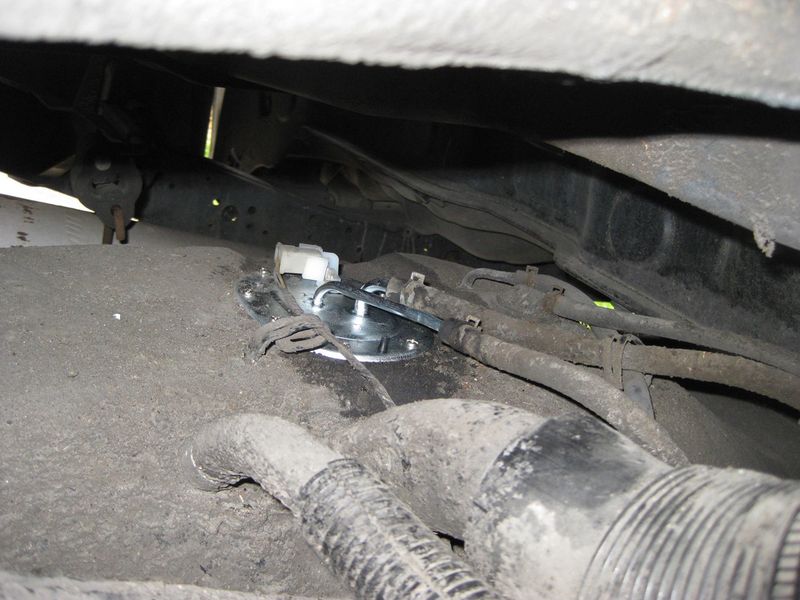
There was allot of crap sitting on top of the lines, and it looked like there used to be a fender liner of some sort, but there was none to be had. The wet dirt had sat on the lines long enough that when i removed the main clamp, it just fell apart:
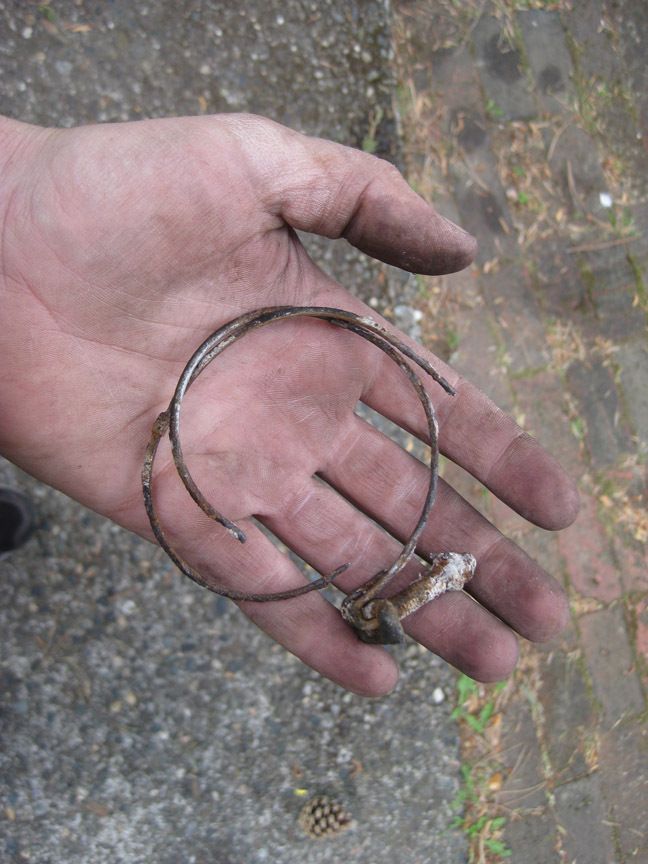 oh, well. Easy fix.
But It works now, and I have a working gas gauge! It's the little things in life...


the full extension setting is a bit odd. It's supposed to be 2 inches from the carb body. I don't really understand how you are supposed to adjust it, so I just left it as is:

My stock jetting from Redline came as follows:
main jet primary: 140
Main jet secondary: 140
air jet primary: 170
air jet secondary: 180
Idle jet primary: 60
Idle jet secondary: 50
main venturi: 3.5
aux venturi: 3.5
primary emulsion tube: F50
Secondary emulsion tube: F50
I'm having a hard time getting a smooth consistent Idle, and strange inconsistencies seem to pop up here and there. I think I have a vacuum leak somewhere, so I'm going to pop the carb off this weekend and seal between all of the adapters, and probably replace the PCV valve and line.
I also put my new fuel sender in this morning. It wasn't too bad at all. Took about an hour. The most difficult part was getting the unit in and out without bending the float.
I found the easiest way to get it in was from the back of the truck. You can kind of start it with the tubes pointing down, and give it a clockwise twist, and it will go in. I was afraid to lift my bed any further, because it was going to get a bit precarious if I did.


There was allot of crap sitting on top of the lines, and it looked like there used to be a fender liner of some sort, but there was none to be had. The wet dirt had sat on the lines long enough that when i removed the main clamp, it just fell apart:

But It works now, and I have a working gas gauge! It's the little things in life...

la cucararacha
+1y
Also, an update on the fuel pump issue. I went to move my old head the other day, and low and behold, under all of the gunk there was a pump spacer still stuck to the head. I never gave it a second thought, because when I bought a new pump gasket, it only came with one. I installed the pump with no spacer, and it was therefore too close to the cam. This probably lead to it's early demise. Oops.

la cucararacha
+1y
This Monday I took apart the adapter stack for the Carb, and used the good'ol ultra grey between all of the adapters. Re-assembled, and the idle is a little more steady, but not much difference. My choke also seems to be working too well. I had to adjust it back a bit, because it was mis-firing, and billowing black smoke on cold starts, but hot starts were totally fine. I went through the electric choke procedures, and re-adjusted the choke plates to be a little open with a cold start. Tried it this morning, and it was a little hard to start, but no black smoke, and no mis-fires. I will adjust the plates back towards close just a little, and it should be good. Kind of weird that the cold start circuit would work fine for the first few weeks, and then all of a sudden run super rich. Who knows.
I am still having the issue with going lean (very lean) right when the secondary throttle opens. It is really irritating, because I don't want to burn a valve or anything. Then I came across this picture when I was investigating transition circuits in the carb. From this diagram, it's pretty obvious that I need to go up a jet size or two on the secondary "idle jet". It is a terrible name for that jet, because if you look at that pic, there is no actual idle circuit. It is solely dedicated to the transition or "tip-in" of the secondary circuit. I'm going to order larger secondary "idle jets" and see what happens.
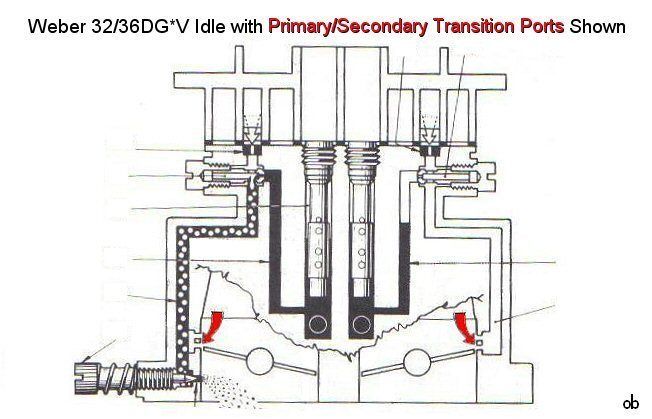
(courtesy of )
The rest of the carb cam tuned pretty well from the factory, other than that lean spot. My only other issue is I go super rich (12:1) in the very early part of the throttle. This is a problem, because this is where I do the majority of my cruising, and also where I need the least amount of power. In other words, it's a waste of gas, and it smells. But looking at this diagram, I don't see how I could resolve this issue without running a smaller idle jet, or larger air corrector on the primary circuit. I guess I will try a smaller jet there, and see if it totally screws me up.
I am still having the issue with going lean (very lean) right when the secondary throttle opens. It is really irritating, because I don't want to burn a valve or anything. Then I came across this picture when I was investigating transition circuits in the carb. From this diagram, it's pretty obvious that I need to go up a jet size or two on the secondary "idle jet". It is a terrible name for that jet, because if you look at that pic, there is no actual idle circuit. It is solely dedicated to the transition or "tip-in" of the secondary circuit. I'm going to order larger secondary "idle jets" and see what happens.

(courtesy of )
The rest of the carb cam tuned pretty well from the factory, other than that lean spot. My only other issue is I go super rich (12:1) in the very early part of the throttle. This is a problem, because this is where I do the majority of my cruising, and also where I need the least amount of power. In other words, it's a waste of gas, and it smells. But looking at this diagram, I don't see how I could resolve this issue without running a smaller idle jet, or larger air corrector on the primary circuit. I guess I will try a smaller jet there, and see if it totally screws me up.

la cucararacha
+1y
A little tid bit of info here. There are a few people who have asked on these forums about installing a weber in a stealth manner, possible for emissions reasons. They asked and if there is a weber adapter for their stock air cleaner. Well, if you are still looking for one, I found one here when I was in the middle of buying jets:

la cucararacha
+1y
I just figured I would give everybody an update on Scratchy. I have gotten the MX-6 injection conversion to work, with a little help from prior posts here, MX-6.com, and a lot of studying a factory wiring manual for the 90-92 MX-6. I will document in detail what I used, and what my wiring is in detail, but it will take me a little while to put it all together. I want it to be right, and I want it to be clear so people don't end up making the mistakes I did. (bought the wrong manifolds, computers, etc.) Most of the info for this swap is very vague, dis-organized, or completely missing on the internet these days, as the original posts were like 10 years ago. So anyways, I'm happy with the swap thus far, more torque and better mileage than my Weber conversion. If you want some pics of the almost finished swap, they are in my albums. It's been awhile since I posted, and putting pics in posts seems to have changed a bit. Thanks!

la cucararacha
+1y
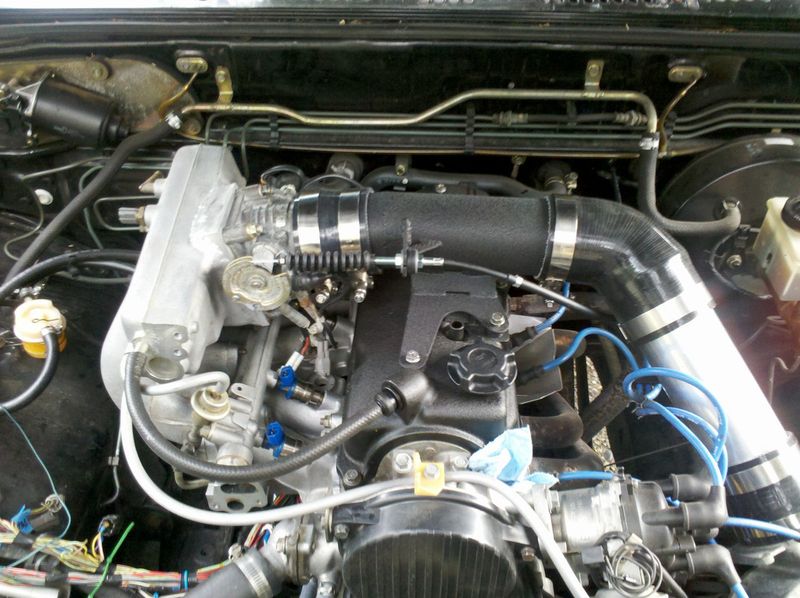
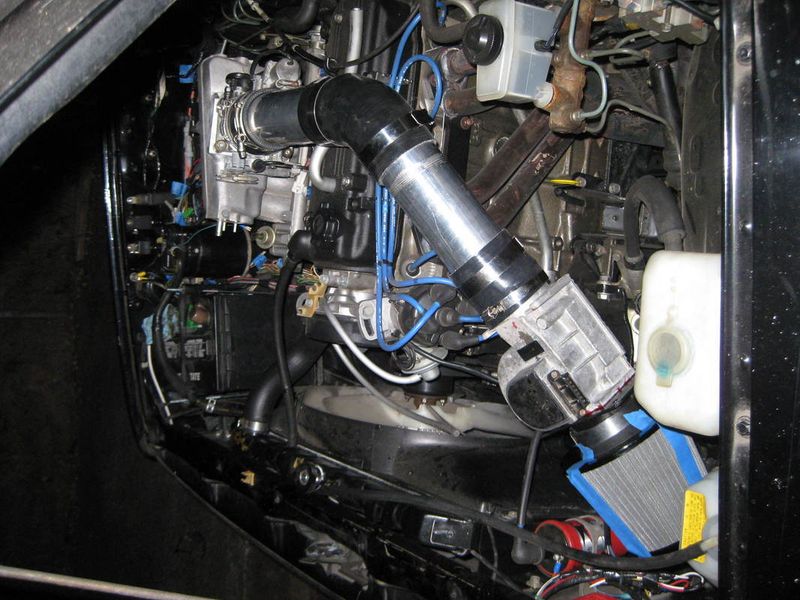
Nevermind, I just remembered how to do it. Just as a quick rundown:
-Early 626 turbo lower intake and matching fuel rail and regulator. My head has no EGR port, so no EGR for me.
-California or Canadian upper intake B2200i modified to fit Probe/MX-6 turbo Throttle body by way of adapter plate welded on, cut larger ovalized hole in intake to match.
-90-92 MX-6 NA injectors
-90-92 MX-6 NA manual transmission wiring harness
-custom adapter plate to pass the MX-6 engine harness through the firewall where AC lines normally would be (non AC truck)
-90-92 MX-6 ECU (mx transmission, non turbo!)
-b2600i fuel pump/sending unit with separate relay circuit
-90-92 MX-6/Probe turbo air flow meter (same as NA)
-B2200i throttle cable
-custom made 3 inch crossover pipe with baseplate to match the valve cover
-silicone reducers and tube connectors from siliconeintakes.com
-New FI hoses and clamps
Post was last edited on Jan 27, 2015 05:22. Edited 1
time.

la cucararacha
+1y
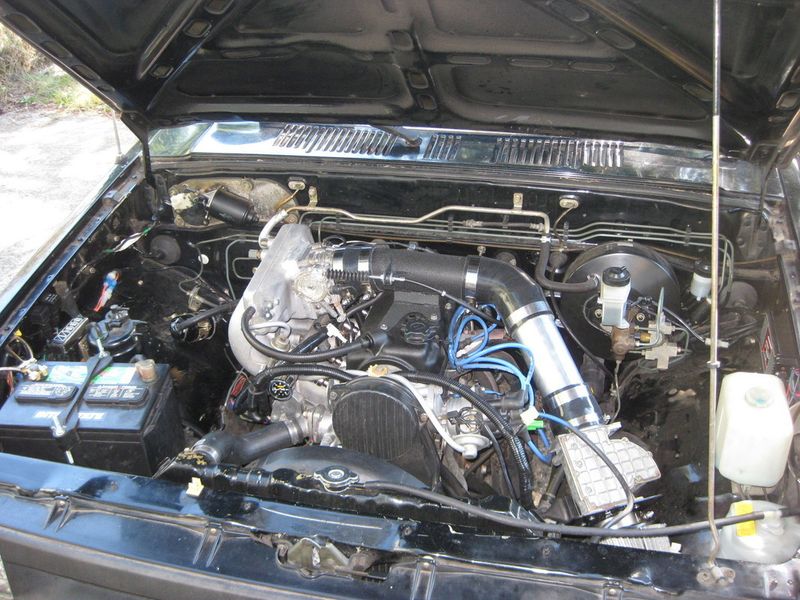
With harness installed:

Related Discussions in Mazda Projects
Thread
Posts
Last Post
852

last post by
skrapinsask +1y
150

last post by
cherokeed +1y