Scratchy McB. 90 2200 mild re-build

la cucararacha
+1y
The AFM is kind of dangling there like a limp Whale-you-know-what at the moment, so I need to attach a bracket to it that allows it to move with the engine, but not hit anything. I think I will use two rods with spherical bearings on the ends. The Idle is still too high, about 900 RPM. It should be more like 700. This may be because the guy who had the turbo Probe before me screwed with the idle (there were some questionable mods done to the car that resulted in a blown headgasket). I'm going to check the TPS adjustment first. It may also be because I have yet to hook up any of the load compensation inputs to the ECU (headlights, AC, blower fan, etc) and it may think there is a load on the engine that isn't really there, and increasing the idle to compensate.
D
dealwithit
+1y
that paint scheme looks pretty slick in there man! nice work

la cucararacha
+1y
Thanks! It runs great, but for some reason it's guzzling gas like no other, even though I've been driving it conservatively. I think i may not be getting a proper signal from my coolant temp gauge, and the computer thinks the engine is always cold. Either that, or I have a gas leak somewhere. But I have no smell anywhere, and I don't see any leaks. Any Ideas? Anybody? One of the main reasons I did this swap was to improve my gas mileage, and now it's worse than my carb.

la cucararacha
+1y
OK, so I did a voltage check on the coolant temp sensor, and it seemed to check good at about 2.5v key on, and about 68 degrees F. Same with the intake air temp sensor on the AFM. Went for a 5 mile drive. Parked it for an hour, got back in, and the gas gauge dropped about 1/4 tank. AHAAAH.......I think my used sending unit is bad! So I go to the gas station and fillerup, since I re-set my trip meter the last time I filled my tank. I went 80 miles, and pumped 4.25 gallons into the tank before it popped. So that puts me in the high 18MPG range for mostly short trip city driving with occasional hooliganism. Not that bad. Better than the 15MPG I was getting with the same driving and my faulty Weber carb. Now we'll see what happens when I drive it all boring after the oil change I did today..... I've never been so happy to have a bad sending unit, but now I have to take the stupid bed off again after I find a new one. Anybody have a good used b2600 sending unit?

la cucararacha
+1y
It's been a bit since I posted any updates for Scratchy. I haven't been sittin' round though!
Most recent changes involved a replacement Brake master from the internets. And according to the package, Taiwan:
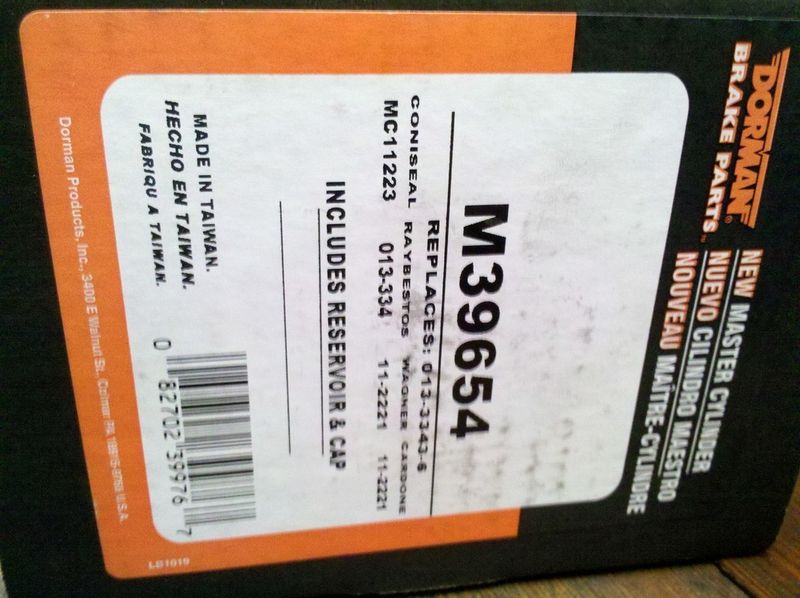
Nothing but the best! My stock one was pissing fluid all over the booster and steering shaft from the base gaskets for the reservoir. When the new one came, I was surprised to find it is aluminum, and weighs almost nothing compared to my cast Iron one.
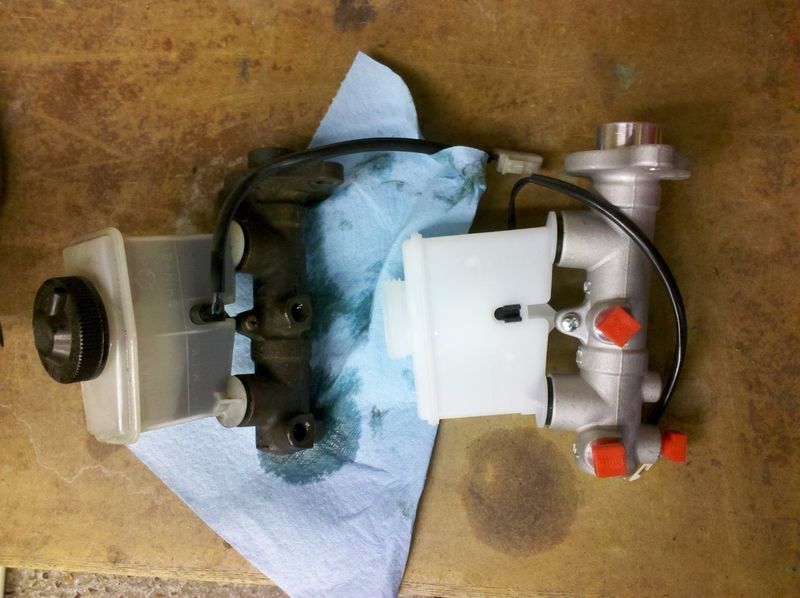
Quality seems good from what I can tell, so to the workbench vice it went to get filled and manually bled out. The new master came with spare plugs to put in the old master as the lines are dis-connected. This is the only tricky part, as it's impossible not to do without some spilling.
After getting it installed and everything wiped down with denatured alcohol, I decided to give these puppies a try:
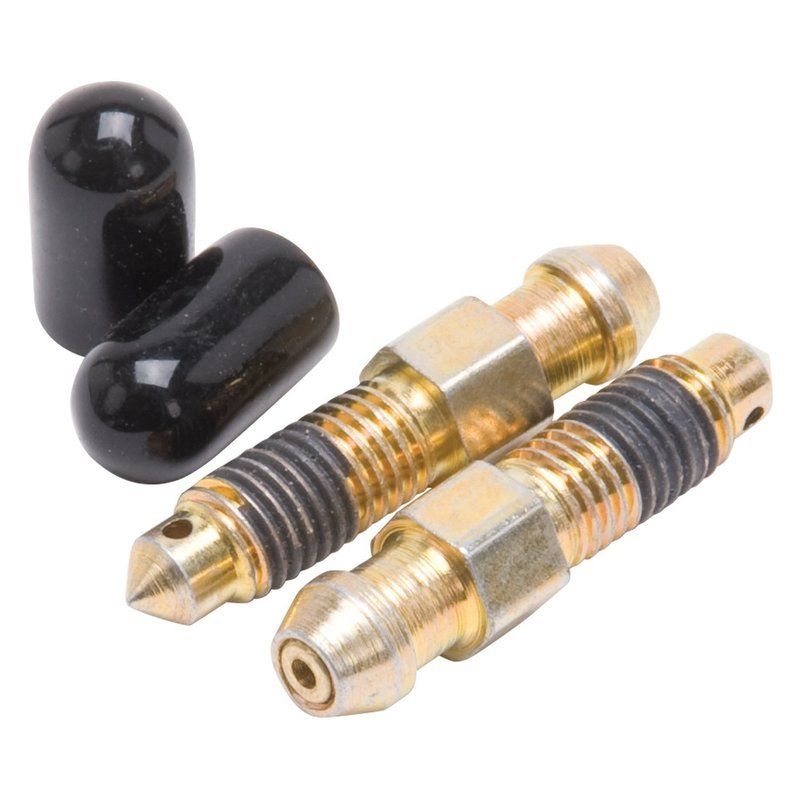
Here is the part number and packaging:
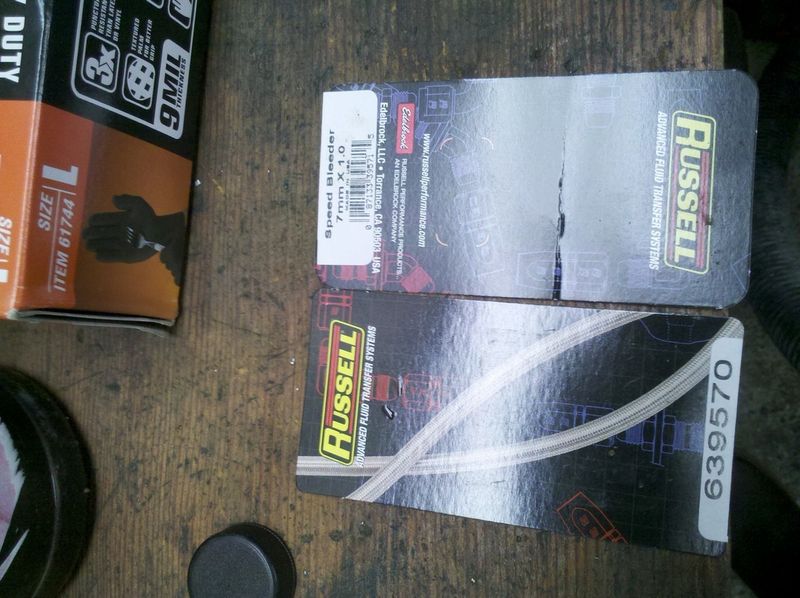
Starting at the back, I replaced the stock bleeders with them one by one. I must say, these things are the bomb shiznit. I am in love! I can loner bleed my brakes in a few minutes per wheel with a jack, a tube, and a bottle. No more having a friend "help" only to get in an argument over what "Press and Hold" and "Release" means. No more spongy, crappy brakes. Buy them, they are worth it! Two sets (two pair) at $13 a pair will do your whole truck including the clutch if you aren't running a rebuilt with an oversize bleeder screw like mine.
Most recent changes involved a replacement Brake master from the internets. And according to the package, Taiwan:

Nothing but the best! My stock one was pissing fluid all over the booster and steering shaft from the base gaskets for the reservoir. When the new one came, I was surprised to find it is aluminum, and weighs almost nothing compared to my cast Iron one.

Quality seems good from what I can tell, so to the workbench vice it went to get filled and manually bled out. The new master came with spare plugs to put in the old master as the lines are dis-connected. This is the only tricky part, as it's impossible not to do without some spilling.
After getting it installed and everything wiped down with denatured alcohol, I decided to give these puppies a try:

Here is the part number and packaging:

Starting at the back, I replaced the stock bleeders with them one by one. I must say, these things are the bomb shiznit. I am in love! I can loner bleed my brakes in a few minutes per wheel with a jack, a tube, and a bottle. No more having a friend "help" only to get in an argument over what "Press and Hold" and "Release" means. No more spongy, crappy brakes. Buy them, they are worth it! Two sets (two pair) at $13 a pair will do your whole truck including the clutch if you aren't running a rebuilt with an oversize bleeder screw like mine.

la cucararacha
+1y
I also installed Belltech sway bars front and rear. The front cam in the mail first, so I went ahead and installed it without the rear to see what it felt like. Steady state cornering was definitely improved, but the difference was not huge. Here is the stock 3/4" VS Belltech 1" kit with hardware.
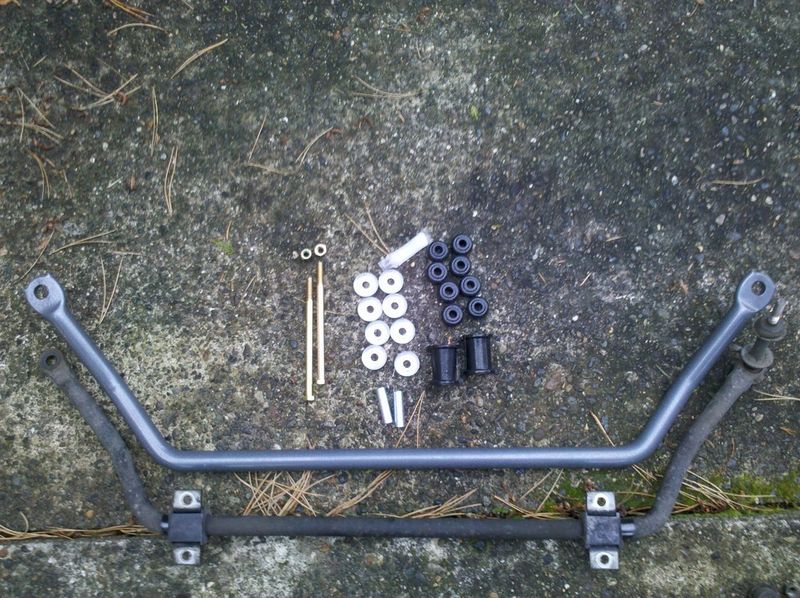
Here is what my stock bushings look like after 170,000 miles:
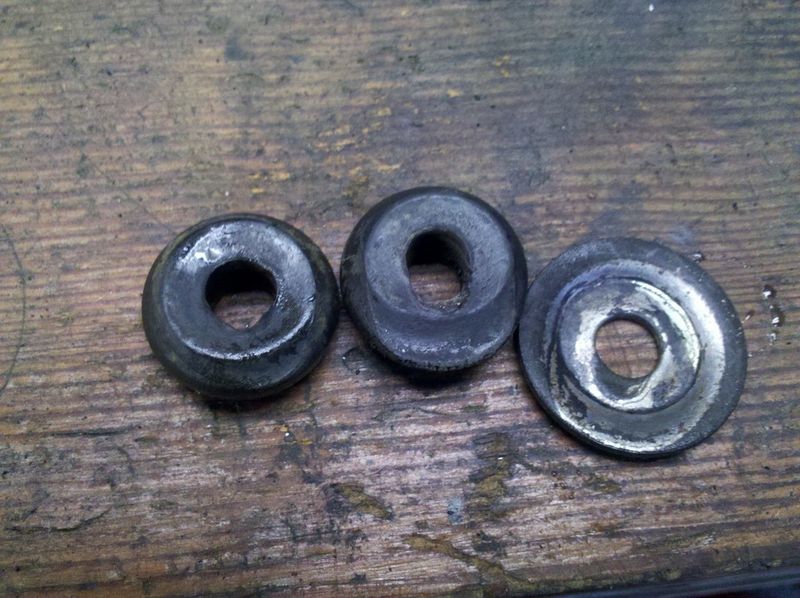
One thing I didn't like so much is that the bushings are wider than the stock ones. This makes for kind of a sloppy install. Not a big deal on this kind of joint, but it should have come with replacement brackets that matched the bushings. I would have paid the extra 5 bucks.
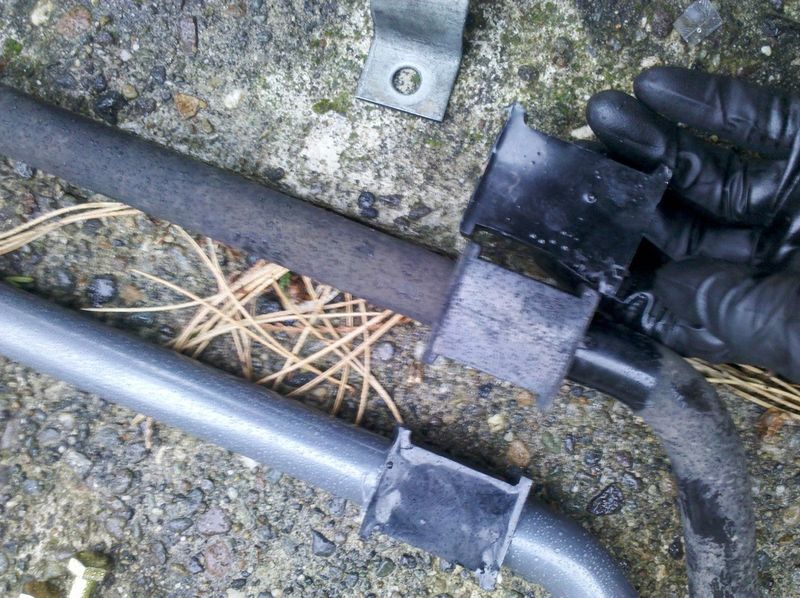
One thing that does impress me about Belltech's bushings is they come with a Teflon lining bonded to the inside. Polyurethane bushings are praised for their stiffness, and notorious for being sticky and binding when loaded. This is a clever way to get the best of both worlds.
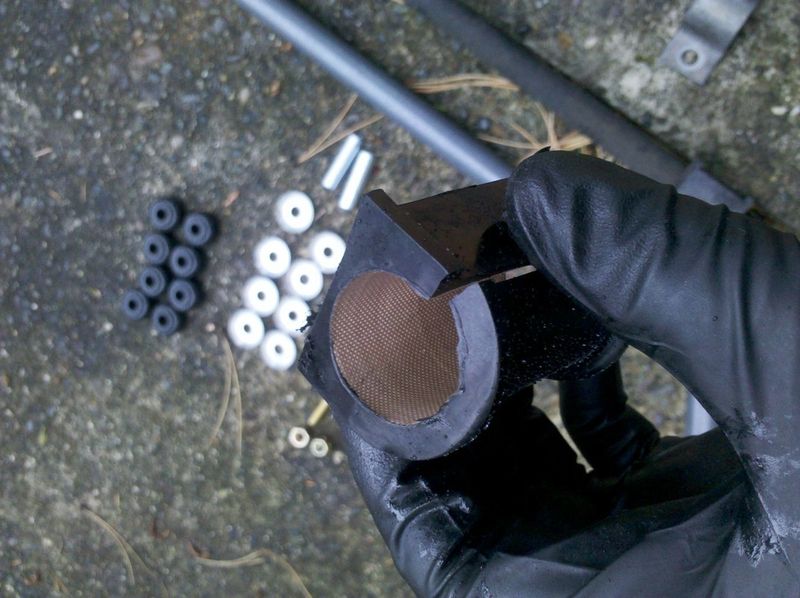
Use all the grease, and put it back in like the stock one.

Here is what my stock bushings look like after 170,000 miles:

One thing I didn't like so much is that the bushings are wider than the stock ones. This makes for kind of a sloppy install. Not a big deal on this kind of joint, but it should have come with replacement brackets that matched the bushings. I would have paid the extra 5 bucks.

One thing that does impress me about Belltech's bushings is they come with a Teflon lining bonded to the inside. Polyurethane bushings are praised for their stiffness, and notorious for being sticky and binding when loaded. This is a clever way to get the best of both worlds.

Use all the grease, and put it back in like the stock one.

la cucararacha
+1y
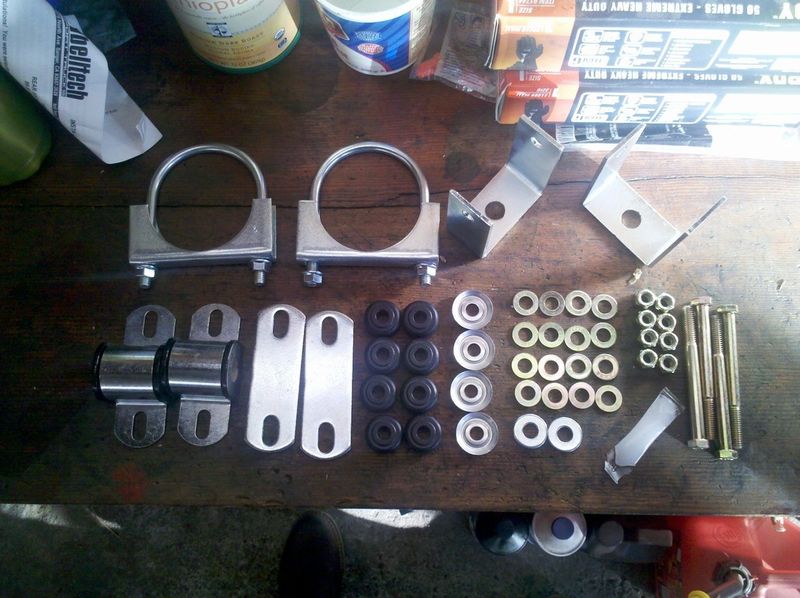
The rear Belltech anti-sway bar arrived a week later (factory direct). It made a huge difference in body roll, stability of the truck, and overall traction. I am very happy with it's performance, and I think the mod was worth the money if you like corners. This install is a bit more involved. Here is the hardware provided:
You need to put the rear axle up on jack stands to keep the rear suspension loaded, and take the wheels off. The instructions are not very good. There a few ways this bar could theoretically be installed, and all they needed to do was snap a few photos to save people allot of fiddling and cursing while lying under their truck. Anyway, once you get the wheels off, you have to unbolt the two tabs the hold the brake lines onto the axle. If you flip those mounting tabs over, it will give you some leeway to bend the lines out and slide in the sway bar brackets.
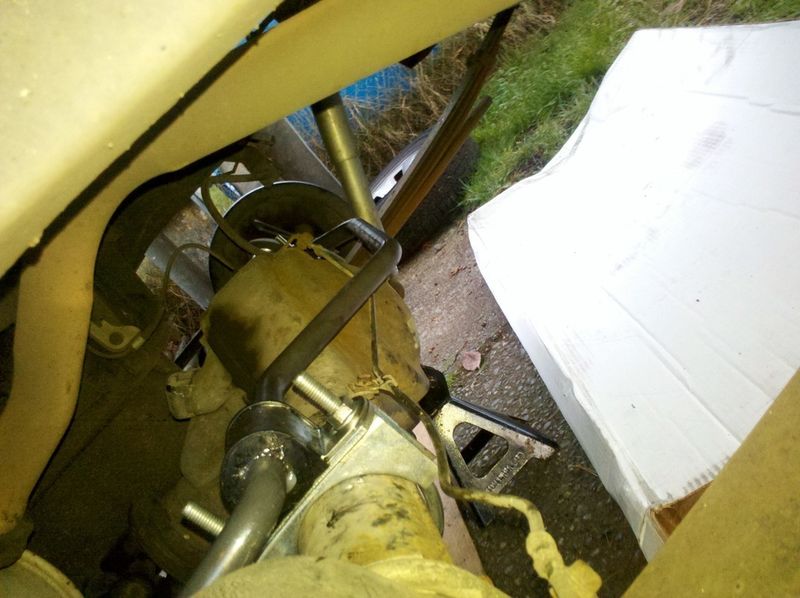
When bending brake lines, be careful to use easy sweeping curves. Bend too hard in one spot, and you could accidentally buckle one of the lines, essentially locking up that brake.
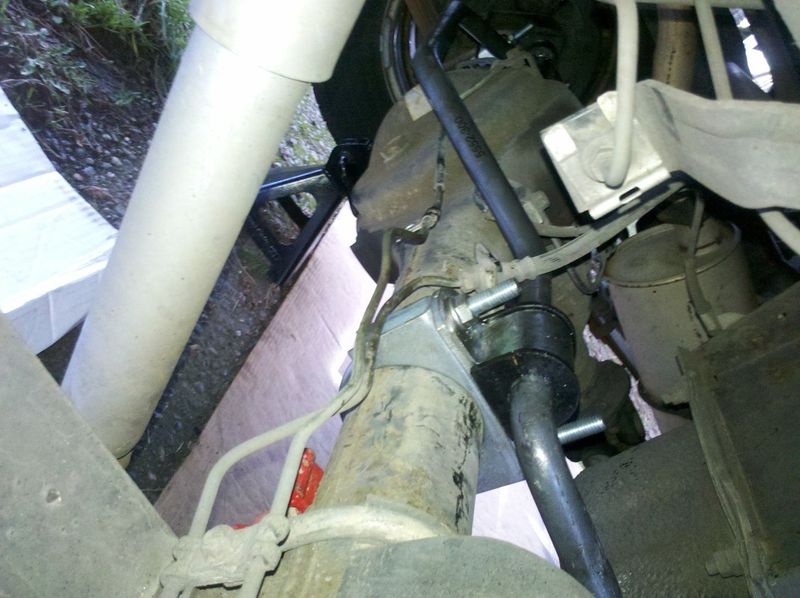
Make sure the lines aren't rubbing on the brackets, because they WILL eventually wear through the lines, and that can make for a very dangerous situation.
Once the bar is threaded around the brake lines and clamps installed, you pre-install the bushings and shackles on the end of the sway bar, and line them up with the frame. To get the clamps lined up, use a tape measure on each side and measure to the drum brake mounting flange. I think mine was 4" away or thereabouts. Then you can use the weld seam on the rear end as reference to make sure the brackets are clocked the same as one-another. The lower tips of the top clamps on mine were centered on the rear weld seam.
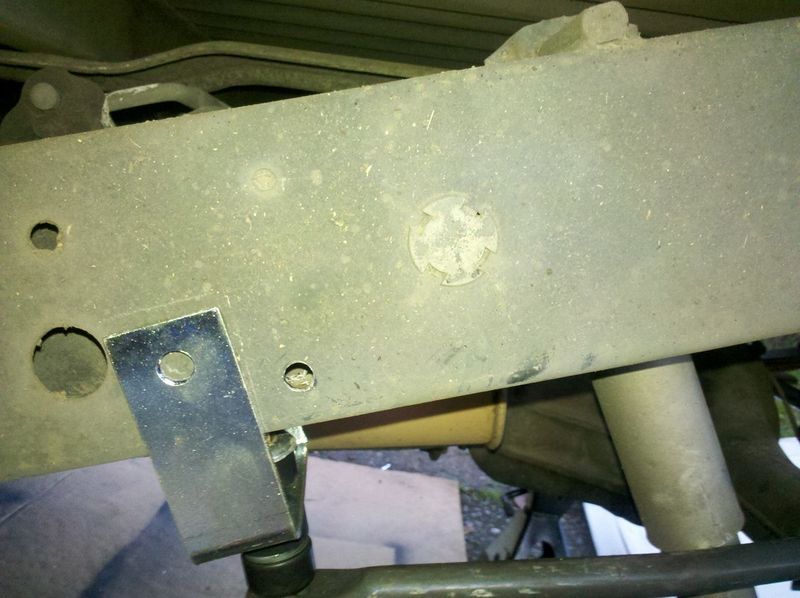
Then you mark, center punch, pre-drill, and carefully and as straight as possible, drill a 3/8" hole through the frame. The hole is supposed to be centered about 3/4" from the bottom of the frame rail. This wasn't bad with a regular hand drill and a little patience. WARNING you need to bend the brake line up on the inside of the passenger side frame rail before drilling, or you will drill right into it! Keep in mind if you have a really long drill you can go right into the gas tank if you are really not paying attention.
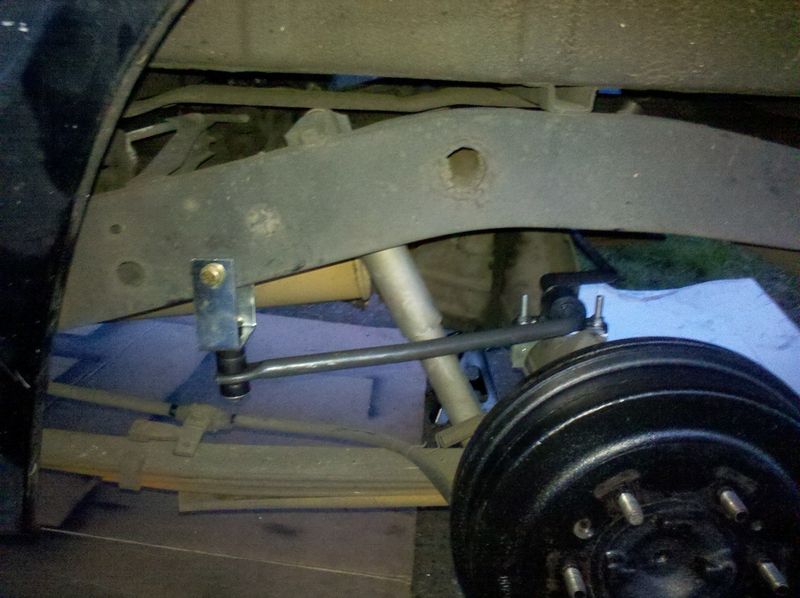
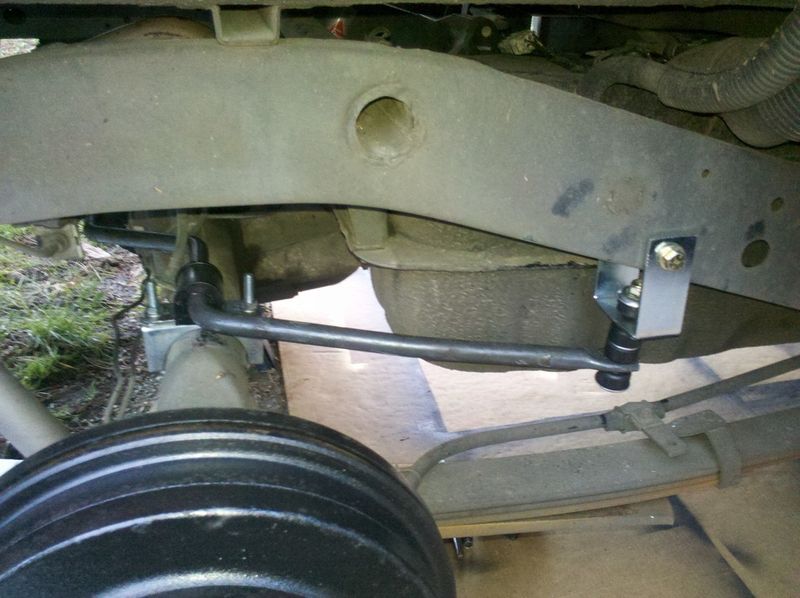
Installing the hardware was more fiddling because the diagram didn't show jack doodie about the stackup. After taking a tally of the washers and nuts, I installed each shackle in the following order on each side from outside in:
bolt head, washer, washer, shackle, washer, washer, frame, washer, washer, shackle, washer, washer, Nylock nut.
Hope this helps somebody. happy cornering!

You need to put the rear axle up on jack stands to keep the rear suspension loaded, and take the wheels off. The instructions are not very good. There a few ways this bar could theoretically be installed, and all they needed to do was snap a few photos to save people allot of fiddling and cursing while lying under their truck. Anyway, once you get the wheels off, you have to unbolt the two tabs the hold the brake lines onto the axle. If you flip those mounting tabs over, it will give you some leeway to bend the lines out and slide in the sway bar brackets.

When bending brake lines, be careful to use easy sweeping curves. Bend too hard in one spot, and you could accidentally buckle one of the lines, essentially locking up that brake.

Make sure the lines aren't rubbing on the brackets, because they WILL eventually wear through the lines, and that can make for a very dangerous situation.
Once the bar is threaded around the brake lines and clamps installed, you pre-install the bushings and shackles on the end of the sway bar, and line them up with the frame. To get the clamps lined up, use a tape measure on each side and measure to the drum brake mounting flange. I think mine was 4" away or thereabouts. Then you can use the weld seam on the rear end as reference to make sure the brackets are clocked the same as one-another. The lower tips of the top clamps on mine were centered on the rear weld seam.

Then you mark, center punch, pre-drill, and carefully and as straight as possible, drill a 3/8" hole through the frame. The hole is supposed to be centered about 3/4" from the bottom of the frame rail. This wasn't bad with a regular hand drill and a little patience. WARNING you need to bend the brake line up on the inside of the passenger side frame rail before drilling, or you will drill right into it! Keep in mind if you have a really long drill you can go right into the gas tank if you are really not paying attention.


Installing the hardware was more fiddling because the diagram didn't show jack doodie about the stackup. After taking a tally of the washers and nuts, I installed each shackle in the following order on each side from outside in:
bolt head, washer, washer, shackle, washer, washer, frame, washer, washer, shackle, washer, washer, Nylock nut.
Hope this helps somebody. happy cornering!
Post was last edited on Jan 29, 2015 04:50. Edited 2
times.
I
irk
+1y
hey nice work with the sway bars.
By any chance do you have part # and did you make the rear mounting brackets for the sway bar?
By any chance do you have part # and did you make the rear mounting brackets for the sway bar?

la cucararacha
+1y
Thanks!
Here is a link to the part numbers on Belltech's website:
" target="_blank
" target="_blank
It came with all of the hardware and brackets you see in the first pic of the writeup.
Here is a link to the part numbers on Belltech's website:
" target="_blank
" target="_blank
It came with all of the hardware and brackets you see in the first pic of the writeup.
Related Discussions in Mazda Projects
Thread
Posts
Last Post
852

last post by
skrapinsask +1y
150

last post by
cherokeed +1y
