K
SFBD square with a Cummins and custom chassis
BD
bagged dually
+1y
Hmm not a bad idea. Thanks man
S
stroker52
+1y
no problem anything to help out.. if you plain to leave the truck outside for a while with the wood mounts in a good tip is to paint them.. or spray them heavy with WD-40.. keeps the water from soaking in..
i spry the wood with WD-40 heavy let set for 15 to 20 mins then come back and do it again.. but this is if your not using treated wood already lol..
i spry the wood with WD-40 heavy let set for 15 to 20 mins then come back and do it again.. but this is if your not using treated wood already lol..
W
watahyahknow
+1y
i heared about people using hockeypucks to do a body lift , maibe you can find someone with an old lathe who's willing to cut some for you out of some plastic rod
i actually seen people using a woodlathe and woodcarving tools for that too
you might even be able to drill a hole in a thick piece of plastic shove a bolt trough it and put that in a powerdrill spin it up and shape it using a grinder
i actually seen people using a woodlathe and woodcarving tools for that too
you might even be able to drill a hole in a thick piece of plastic shove a bolt trough it and put that in a powerdrill spin it up and shape it using a grinder
BD
bagged dually
+1y
I tried to post this earlier and my phone screwed up so I'll try it again.
Last night I cut out most of my lower control arm on the right side. I than replaced it with 1/4" plate sitting 3" lower into the arm. I just tacked it into place with a couple of 1/4" scraps I had laying around to see how it would lay out. Just from the manufacturer's collapsed height of 2.9" I went with 3". My upper coil pocket on the cross member I cut roughly 1.5" off of it and plated it also. Even with the upper spring pocket cut out I only had about .5" till it would hit my lower arms.
I wasn't real happy with the way it turned out. It got late on me so I left it for the night. It looked like the bag wasn't completely collapsed and I was loosing quite a bit of lift. So tonight I went out, and cut it all back apart. I dropped it 2.5" this time and it looks a lot better. I think I could probably get away with only a 2" cup in the lower but I'm going to wait until I get it on some level concrete at the shop before I do anything else. Tomorrow I'm going to try and get the left side done. I still have to finish pie cutting the uppers also. For now though it looks like its laying out pretty hard.
As soon as I get the left side done I'll post up some pix. I've got 1/2" line already ran right now just on a schrader valve till everything is done. I'll try to snap some pix of the process of how I'm doing it.
Not sure it'll be as strong as using a pipe since I've basically cut the entire inner section of my control arm out but my bags collapsed diameter is over 9" so it would have taken up most of the inner section with a 10" pipe anything. Hopefully the bigger bags will ride a lot better though.
BD
bagged dually
+1y
I redid the bag mount last night and got it down to 2.5". I'm gunna try to do the left side tonight and only cup it 2" and see what happens. The bag is supposed to have a collapsed hieght of 3" but it's at about 2.75" right now and looks like I could still collapse it a little more. I just don't want to sacrifice any lift if I can help it. Anyway for now the new plate the bottom of the bag sits on is just tacked in with some scarp step pieces. So it's not staying like it looks in the picture.
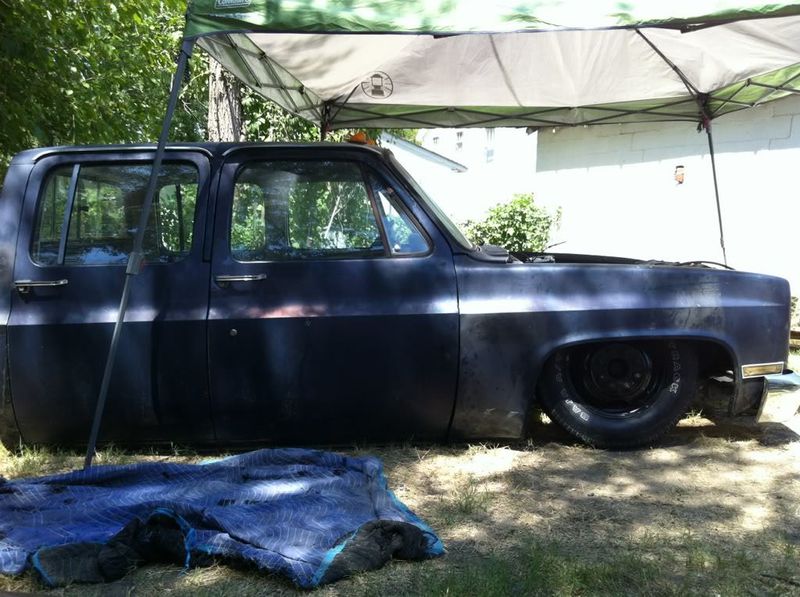
Lift at about 120 psi.
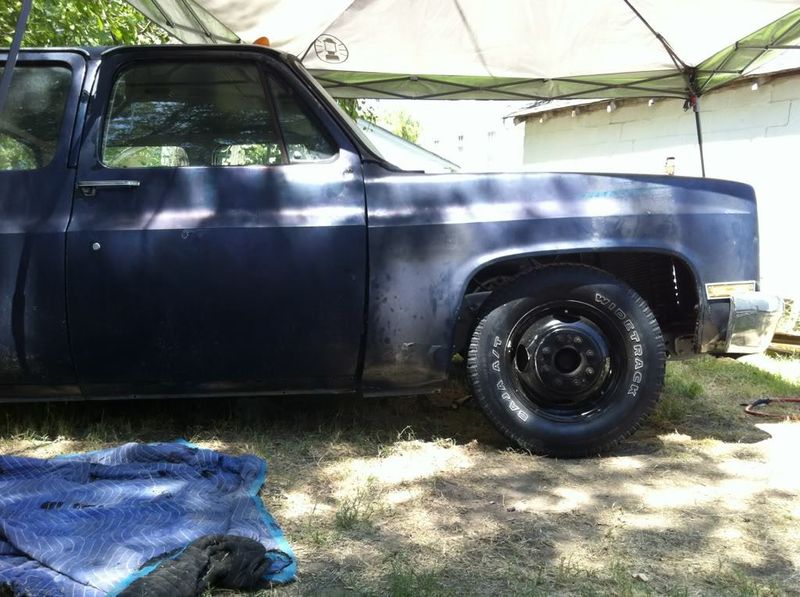
How far the bag is cupped into the lower. I'll try to snap some progress pix on the other side.
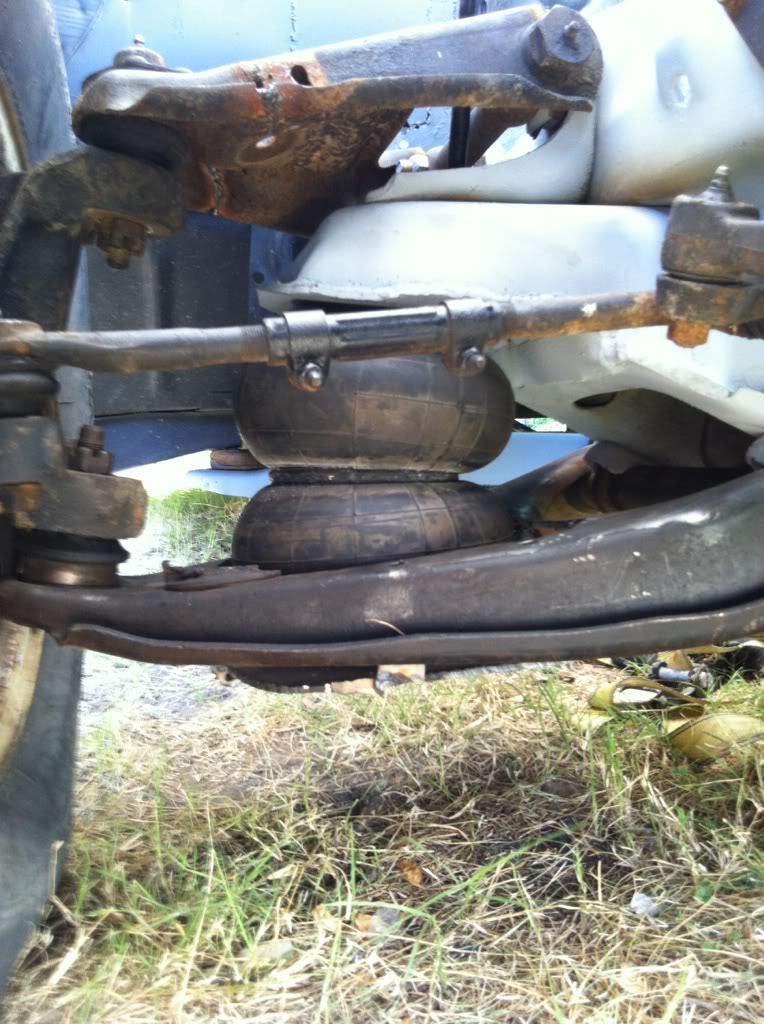

Lift at about 120 psi.

How far the bag is cupped into the lower. I'll try to snap some progress pix on the other side.

BD
bagged dually
+1y
It looks like about a 2.5" drop in the lower control arm is what I'll be using. I experimented with the left side tonight and it wouldn't lay out as hard as I wanted with anything less than 2.5". I'll check it out again once I get it on a good level floor before I actually plate and weld everything. I got the left side tacked in temporarily with some little strips of 1/4". Tomorrow I'm going to get that side finished up and get the axle put back in. I took a few progress pics along the way. Before anyone else tries to do their powers the way I am let me tell you first hand that I don't think this way will be as strong as using pipe but if your bags are to big or you just can't find the right size pipe locally you can go this route. Just expect to have to do a lot of bracing, plating, and you better be able to lay down some killer welds or I'm not sure it would hold with a big block or diesel. We'll see how well mine hold up. Worst case scenario they'll crack or start breaking and I'll have an excuse to buy an after market set later on. For now these will work though.
BD
bagged dually
+1y
This how my lowers started. Not sure if gm changed them at all over the years.
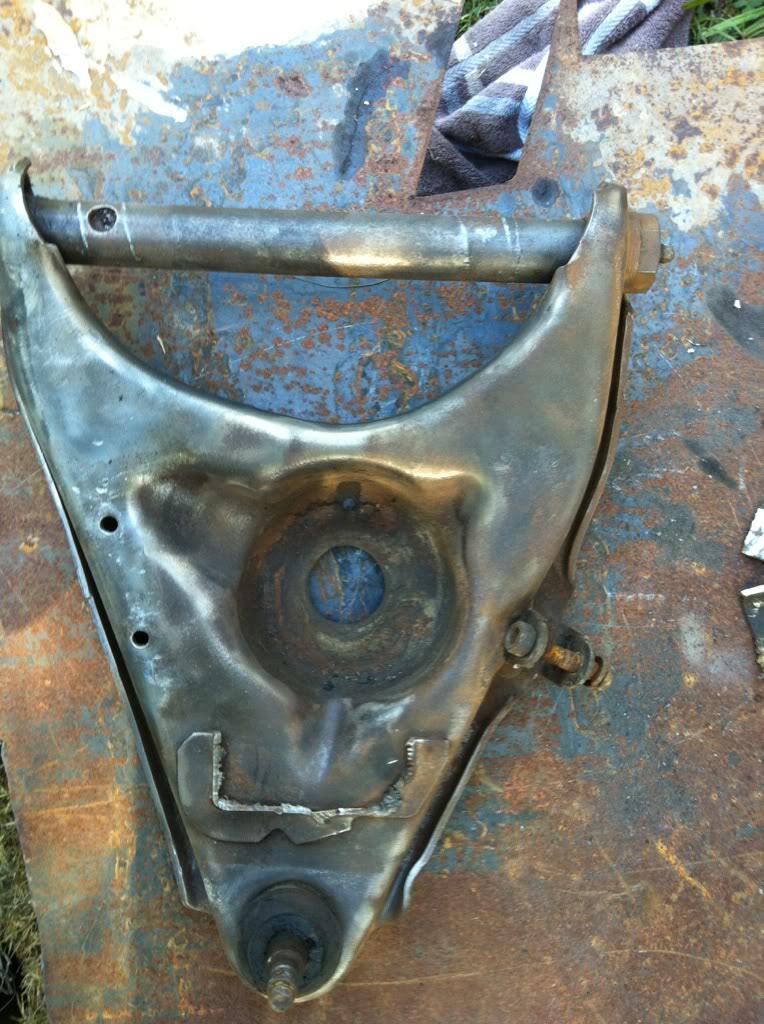
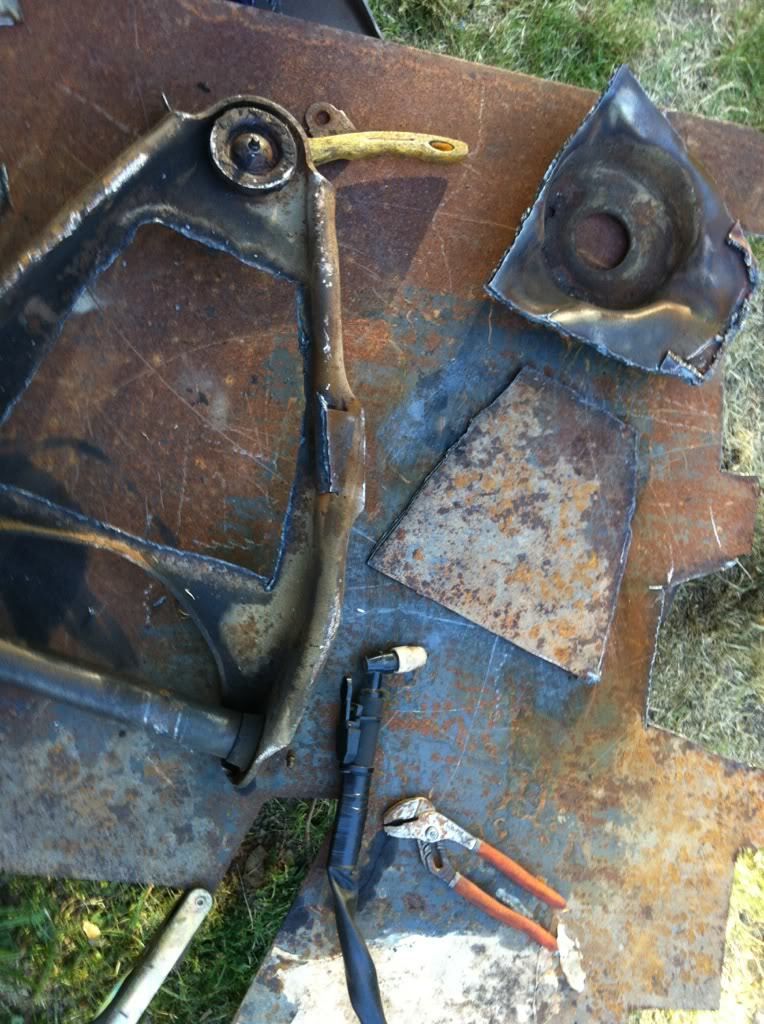
This is the section I cut out of the arms and the new piece that will replace it cut out of 1/4" plate. I used a plasma cutter to cut mine out but a grinder works just as well and I don't reccomend using a plasma unless you need new ball joints. Mine are pretty much trashed so I went the plasma route.
The plate tacked in with a 2.5" recess.
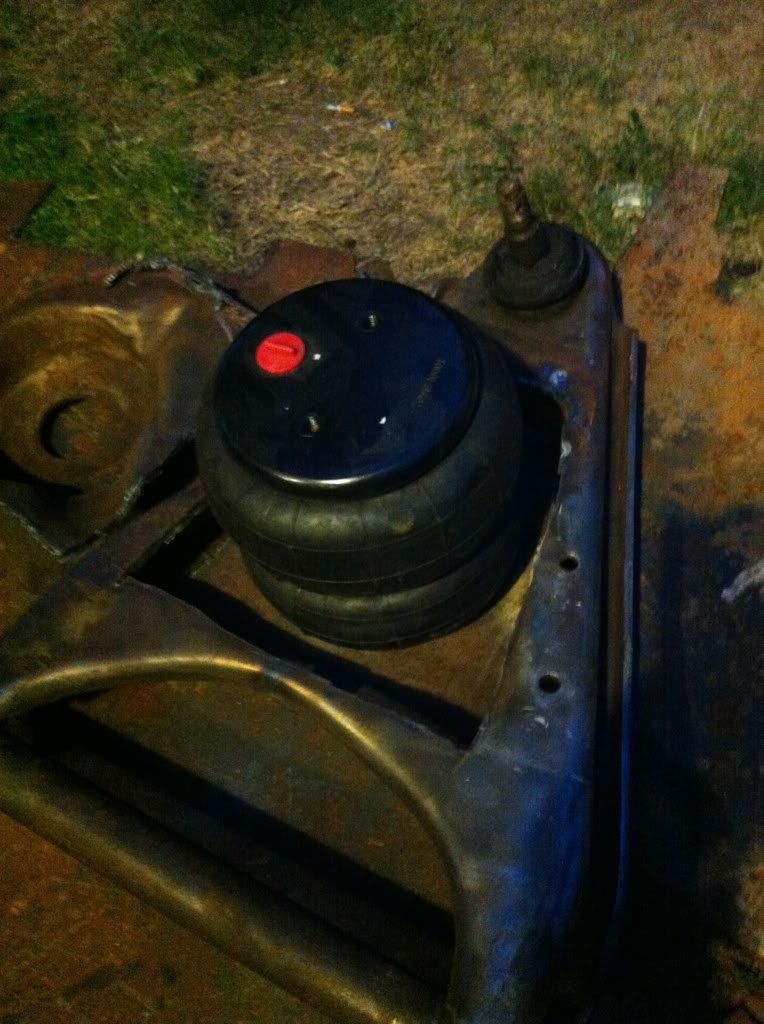
I know I kinda did that backwards showing the right side aired up before the process but I guess better late than never.
Sorry if this is broke down a little to far for some of you more experienced guys. I know 50% of you guys know exactly how to do this stuff with your eyes closed. A lot of this stuff I post is for the guys that don't know how to do this stuff and are trying to learn.

This is the section I cut out of the arms and the new piece that will replace it cut out of 1/4" plate. I used a plasma cutter to cut mine out but a grinder works just as well and I don't reccomend using a plasma unless you need new ball joints. Mine are pretty much trashed so I went the plasma route.

The plate tacked in with a 2.5" recess.

I know I kinda did that backwards showing the right side aired up before the process but I guess better late than never.
Sorry if this is broke down a little to far for some of you more experienced guys. I know 50% of you guys know exactly how to do this stuff with your eyes closed. A lot of this stuff I post is for the guys that don't know how to do this stuff and are trying to learn.
Post was last edited on Jul 19, 2012 09:46. Edited 1
time.

comegetsome
+1y
theres a thread on c10forum about doin arms like this.....havent seen anybody have a problem with it
BD
bagged dually
+1y
I sure hope I don't. I've heard the corners can be the weak point of this type. I just didnt think it would be any weaker than basically cutting my arm in half to sink a 10" piece of pipe in it.
W
watahyahknow
+1y
i remember sumtin about the hingepoints on the a arm hitting sumtin preventing it from lowering enough
did you tried the bottom arm to see how mush you could raise it by band without the bag and spindle
did you tried the bottom arm to see how mush you could raise it by band without the bag and spindle
Related Discussions in Dually Projects
Thread
Posts
Last Post
546
A
last post by
Airnewb91 +1y
193

last post by
Airnewb91 +1y